


Animation in flash
Shooting the Missiles Using Action Script on Flash 3.0
Step 1: Open a new document in flash. Set the stage color as black.
Step 2: Choose Window > Properties from the main menu bar to open the PROPERTIES panel.
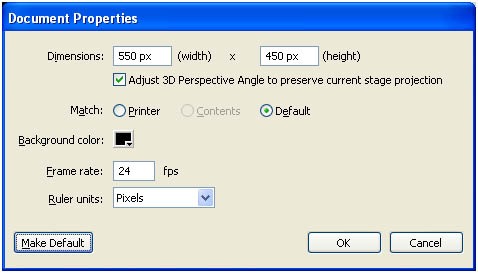
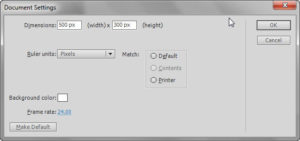
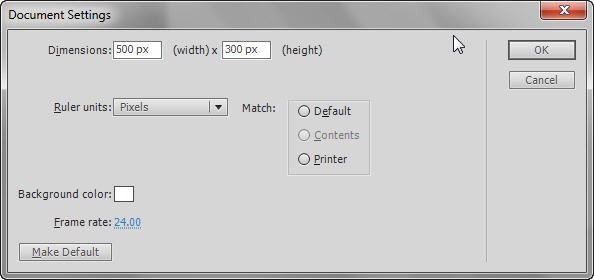
Step 3: Expand the Properties section in the panel and choose the Edit button to enlarge the Document Settings window. Next, set the width to 550 px and height to 450 px in the PROPERTIES panel, as shown in Figure below. Choose the Ok button.
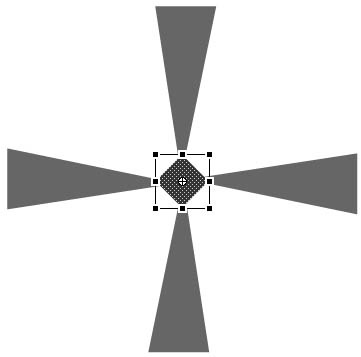
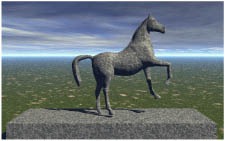
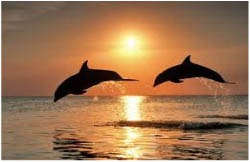
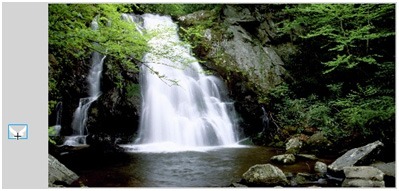
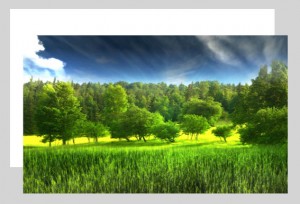
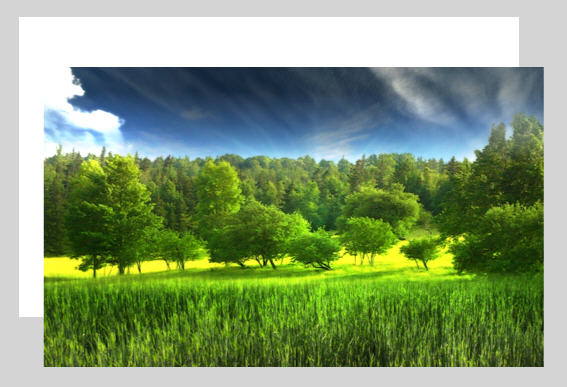
Step 4: import an image to perform the action script. Choose File > Import > Import to stage from the main menu bar and Import the unzipped images file. The three files will be imported to the stage, as shown in Figure below.

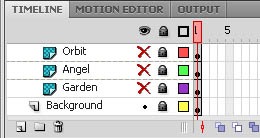
Step 5: Perform some actions to this image. From the timeline create new layer to the name them as figure follows

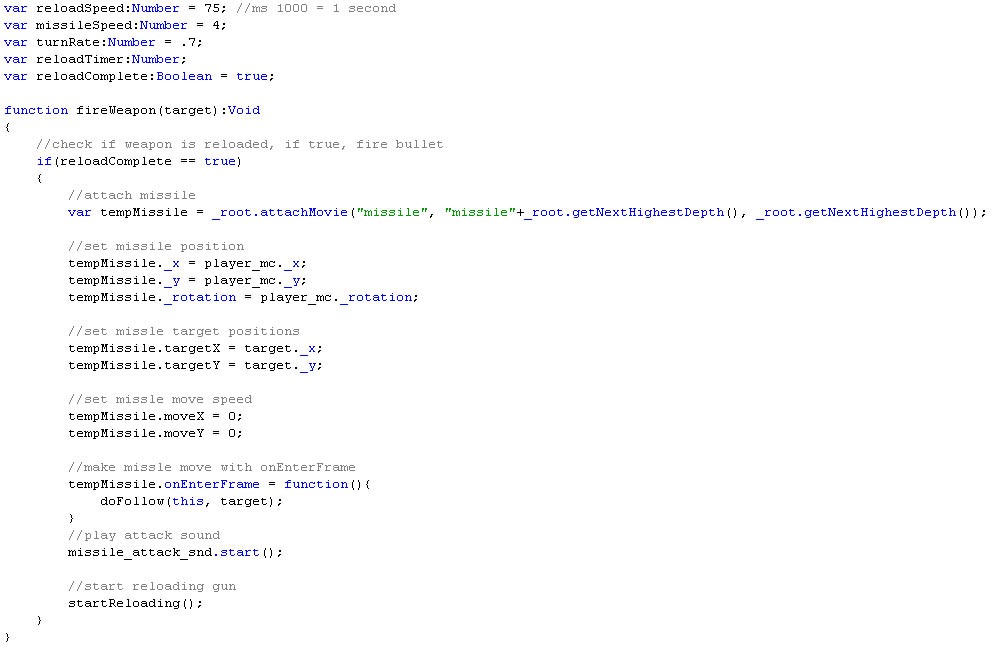
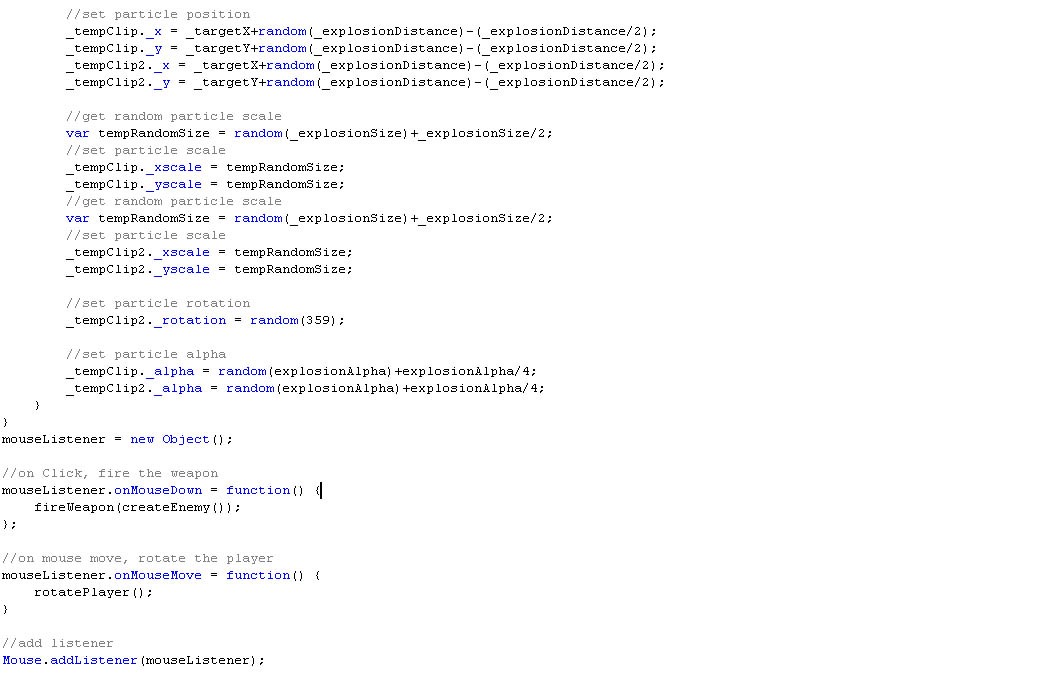
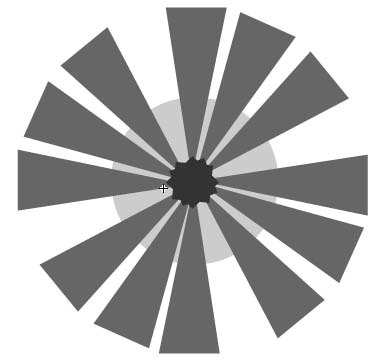
Step 6: Now we will use some action script. To make the thumbnails function and to rotate them around the main image.
Code 1:
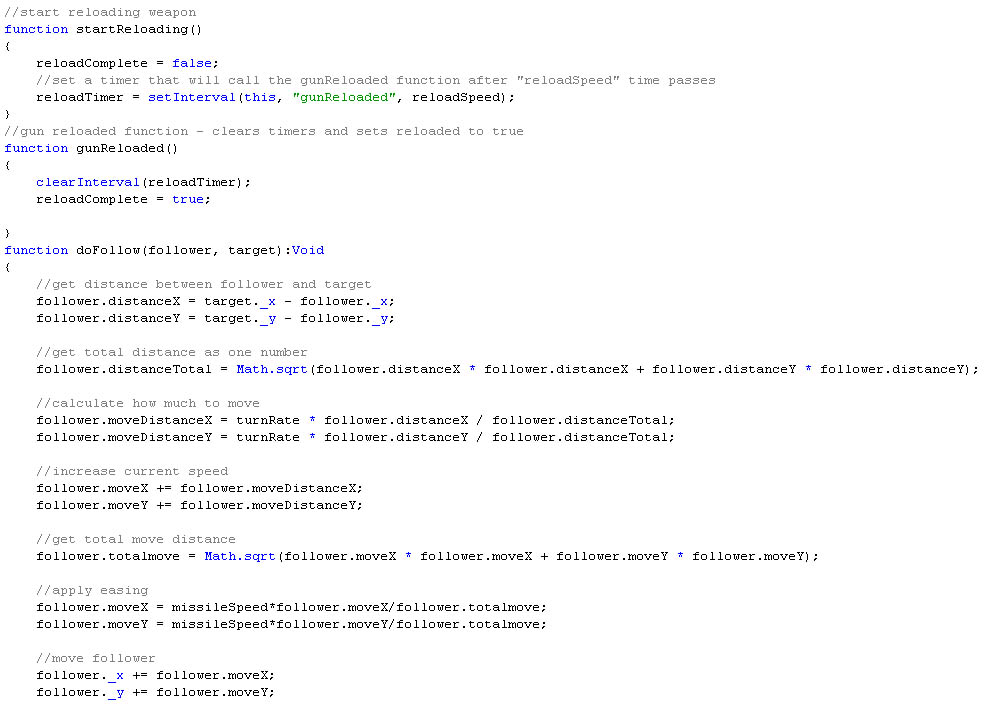
Code 2:
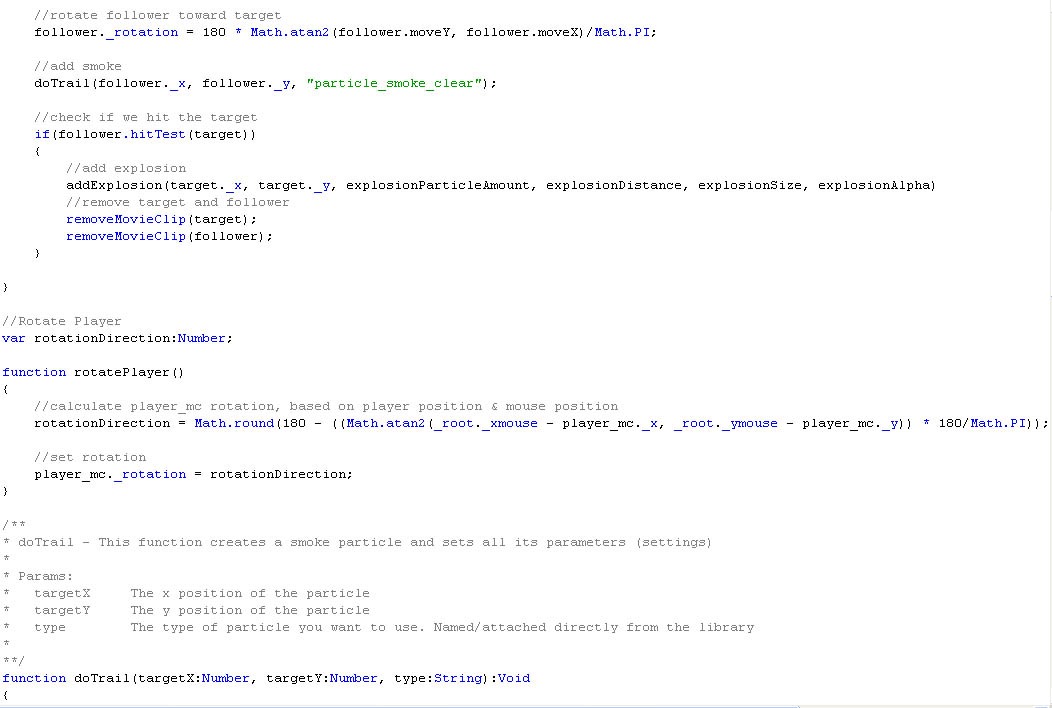
Code 3:
Code 4:
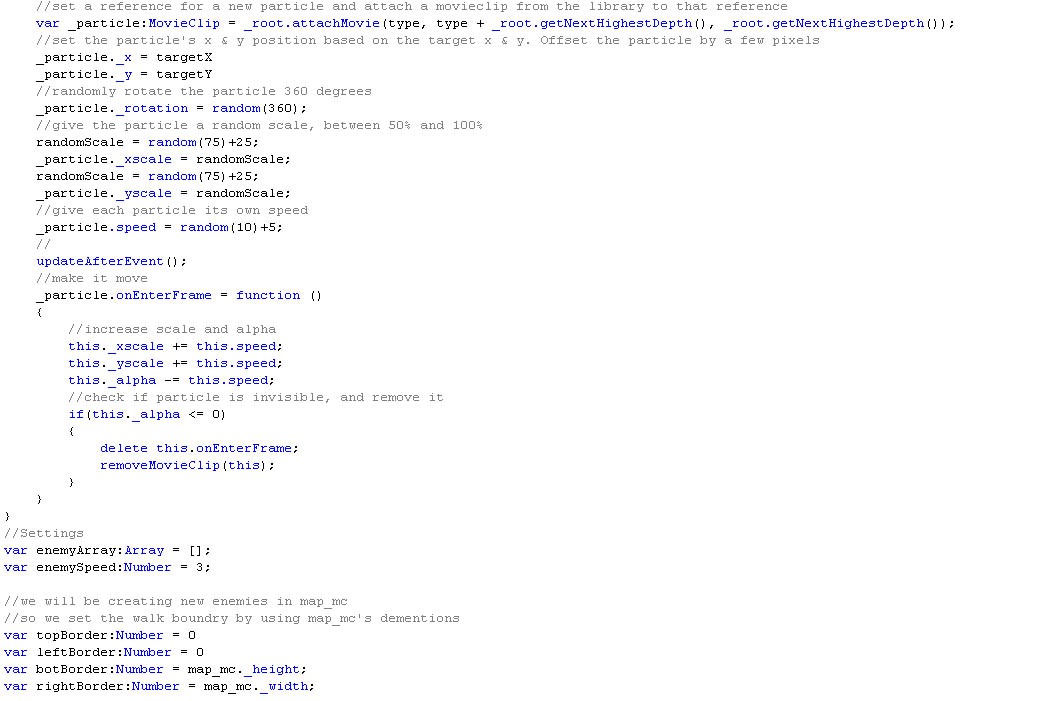
Code 5:
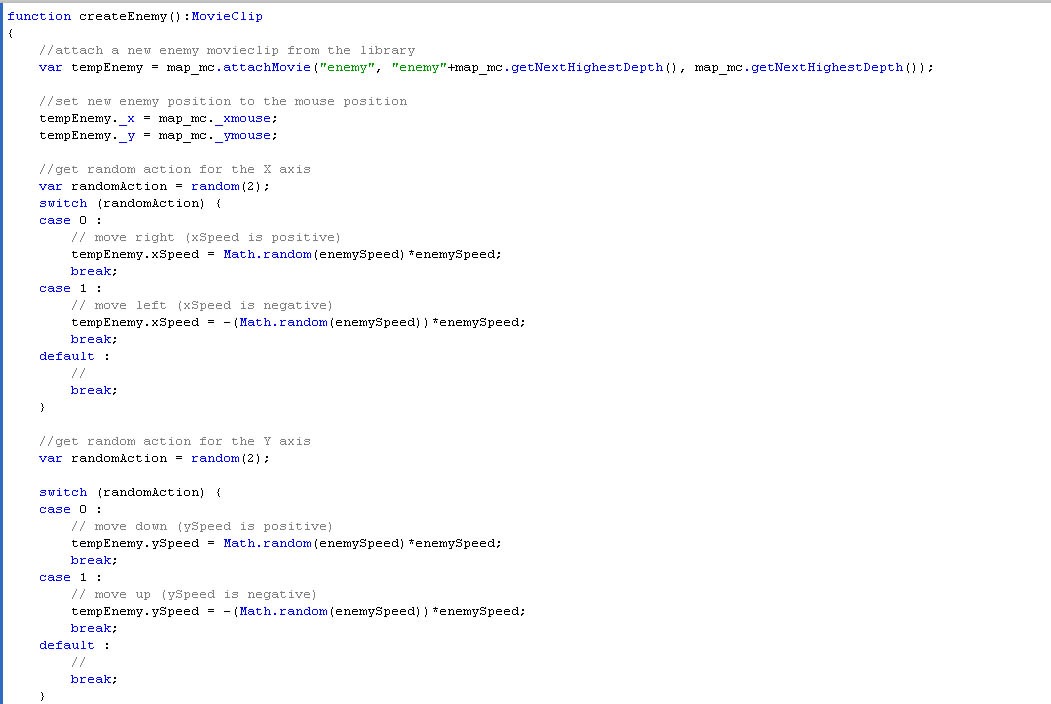
Code 6:
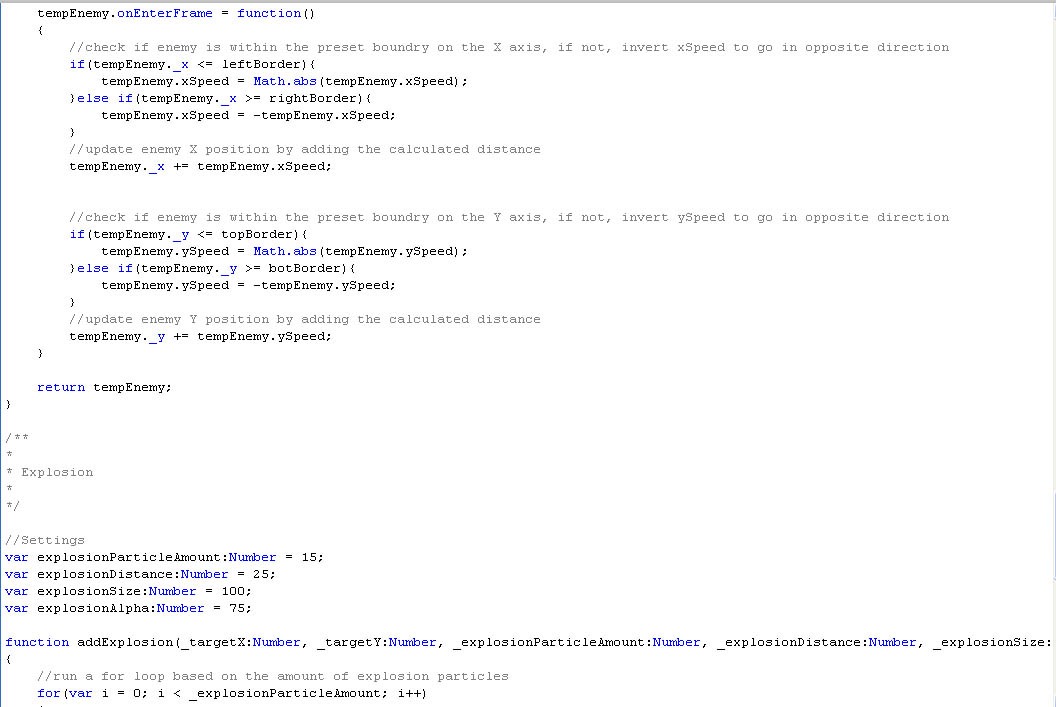
Code 7:
Shake Effect on Action Script Using Flash 3.0
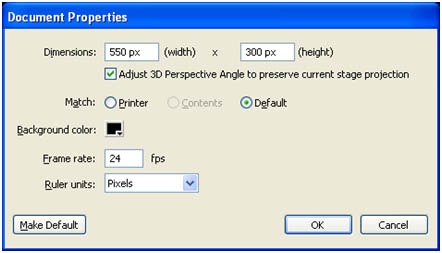
Step 1: Open a new flash file. Choose Window > Properties from the main menu bar to open the PROPERTIES panel.
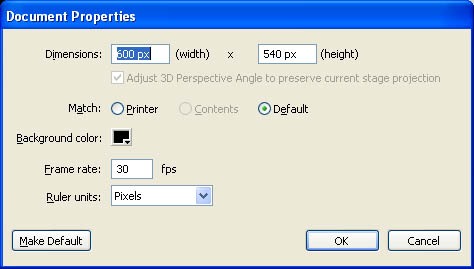
Step 2: Expand the Properties section in the panel and choose the Edit button to enlarge the Document Settings window. Next, set the width to 550 pixels and height to 300 pixels in the
PROPERTIES panel, as shown in Figure below. Choose the Ok button.
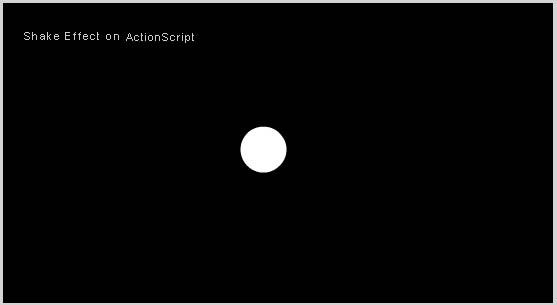
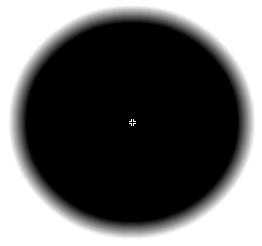
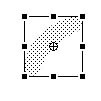
Step 3: Now we need to draw an oval for masking. Select the Oval tool from tools. Draw an circle in the document.
Step 4: Fill the color (#99FFFF) inside the oval. And name the document on left-top as shake effect on Action Script.
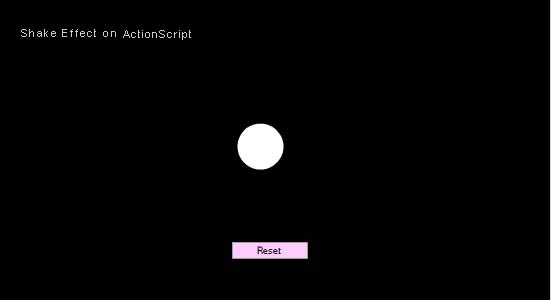
Step 5: Place the button on the document and give instance name it Reset as figure shown below.
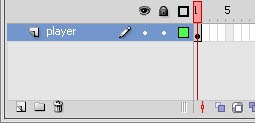
Step 6: Create a timeline for layer 1 and name it as player.
Step 7: Create another layer for controlling effects and named it as controls. And for frame select the rectangle tool from toolbar.

Step 8: Create a fourth layer for Performing Action Script.
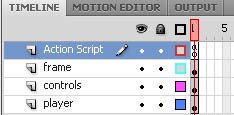
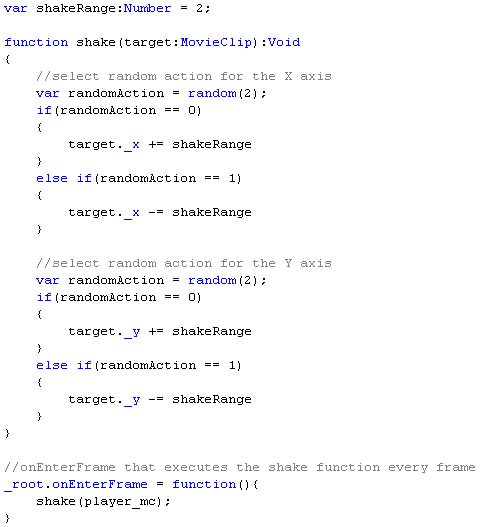
Step 9: Type the following Action Script in Layer-4(Action Script).
Step 10: Import shake effect images to library. Images name should be same as in library and script. Go to library panel and right click on each image. Choose Properties à Linkage. Check the “Export for Action script” option. And run the program.
Floating Gallery Using Flash Cs4
Step 1: open a new flash file. Set the width to 600 pixels and the height to 540 pixels. For this pictorial we need 8 images. We have to resize them with 330*330 for the main image and 75*75 thumbnail images. Name the images image-0 to image-7 and thumb-0 to thumb-7 and then import them into the library (File-> import->import to library).
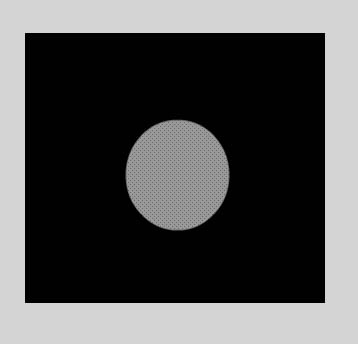
Step 2: By using oval tool (O) to creating a dark grey circle (#323232) circle, without an outline by using dimensions and positions below. I have reduced the magnification in Flash to 50%, so that it’s easier to see.
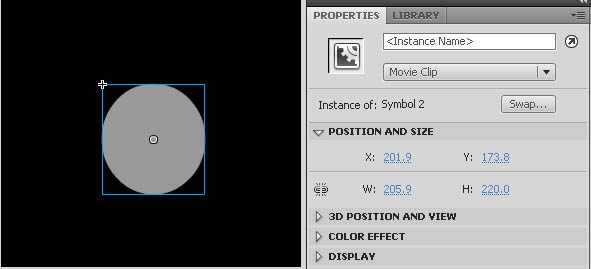
Step 3: To convert the oval into an MOVIE CLIP (Movie Clip Symbol) called “background”, by pressing F8.

Step 4: Convert this Movie Clip into another one called “gallery” and then, from the properties panel, give it the instance name “gallery”. After that action script will be used to give the gallery some functionality and the instance names given to the MOVIE CLIP’s will be used to reference them.
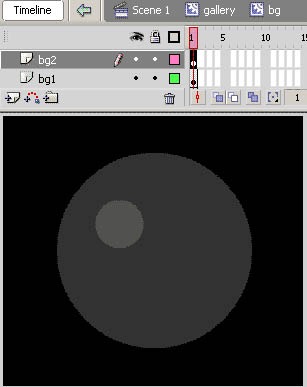
Step 5: Double click on the “gallery” movie clip and then on the “background” movie clip. Name the layer with the dark oval “background 1”. Create the second layer called “background” and with the lighter grey (#505050) oval on this layer.
Step 6: From the properties panel, set the dimensions and positions, as shown below.
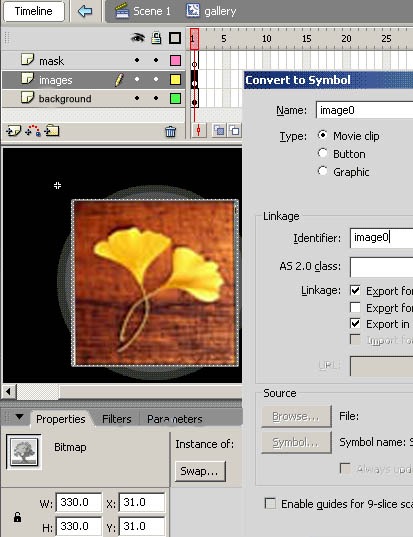
Step 7: Next, drag image 0 onto the “images” layer as shown below. Convert the image to a Movie Clip (F8) called “image0”, selection “export for action script”. This will allow the image to be attached with action script, using the “identifier” as a reference.
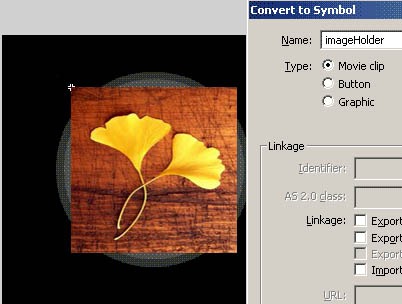
Step 8: Convert the Movie Clip again (F8) into another Movie Clip called “image Holder”.
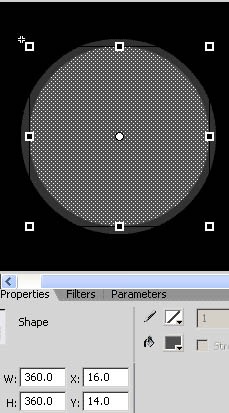
Step 9: Use the Oval Tool to create an oval on the mask layer, setting it to have the dimensions and positions as shown below. Right click on the mask layer and choose “mask”.
Fig (a):
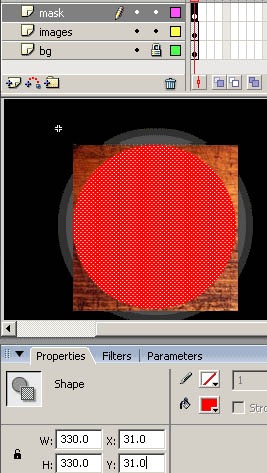
Fig (b):
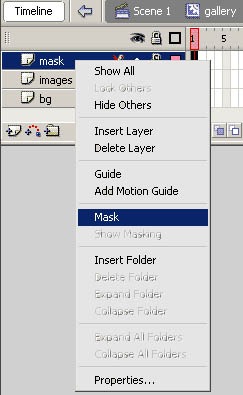
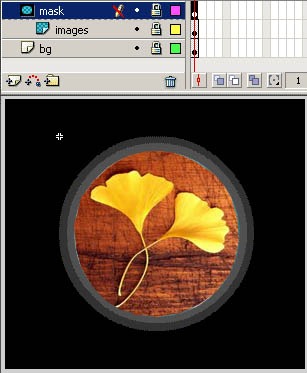
Step 10: The circle should now be masking the image, as shown below.
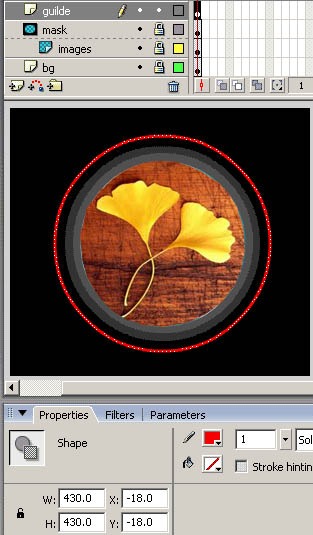
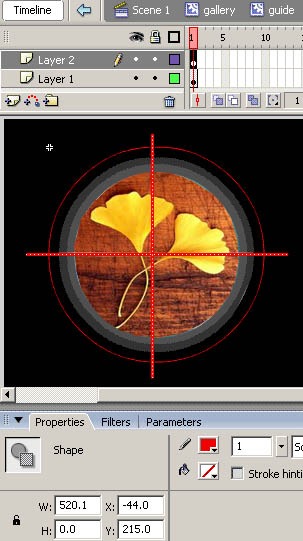
Step 11: Now we are going to create a temporary guide which will be used to place the thumbnails. Create a new layer called “guide” and see the Oval Tool to create a circle with just the stroke color and no fill. Set the dimensions and positions as figure shown below.
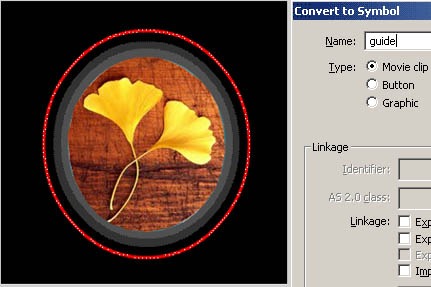
Step 12: Convert the ring into a Movie Clip (F8) called “guide”.
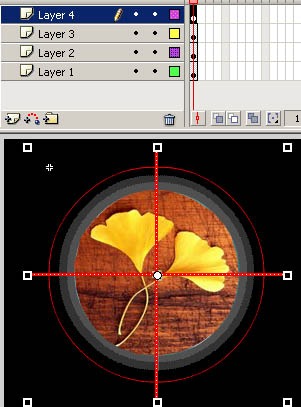
Step 13: Double click on the MOVIE CLIP, create a new layer and draw a line, using the dimensions and positions as figure shown below.
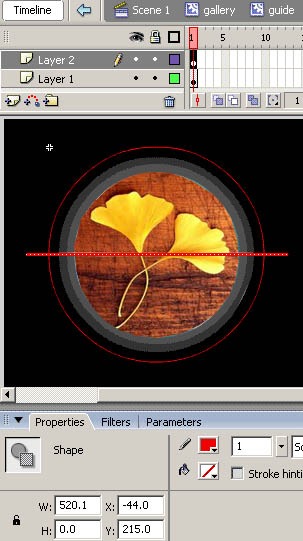
Step 14: Create a vertical line on another new layer as figure shown below.
Step 15: Now copy the 2 lines onto a single new layer.
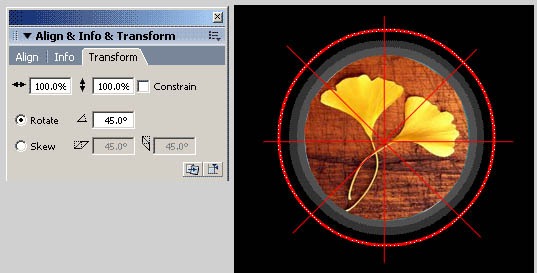
Step 16: Open the transform panel and set “rotate” to 45 degrees.
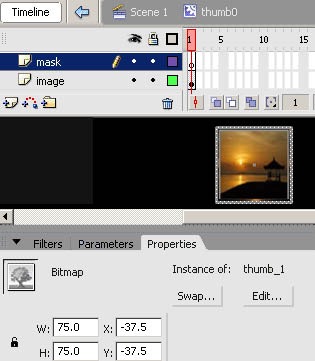
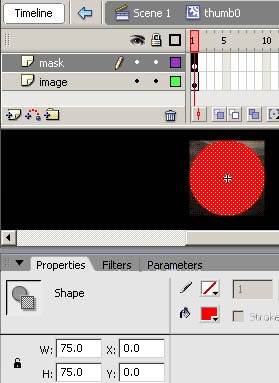
Step 17: Now, create a new MOVIE CLIP (Insert > New Symbol) called “thumb0” and create 2 layers called “image” and “mask”. Drag the thumbnail thumb_0 on to the “image” layer, placing it at the position shown below.
Step 18: Create a circle on the “mask layer”
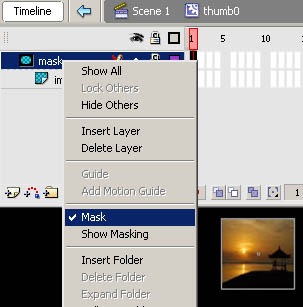
Step 19: Right click on the “mask” layer and chose “mask”.
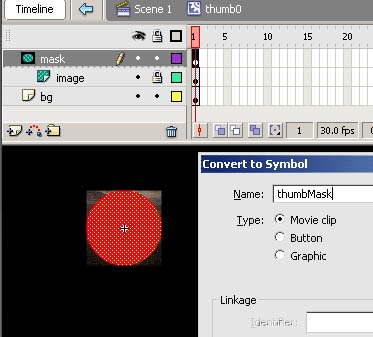
Step 20: Convert the mask into an MC (F8) called thumbMask. You can reuse this MC for the other thumbnails.
Step 21: Create a dark grey (#404040) circle on a layer below the image and mask, using the positions and dimensions shown below.
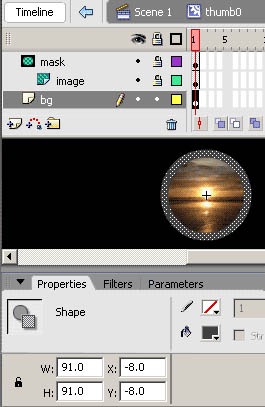
Step 22: This will also be reused for the other thumbnails, so convert it to an MC called “thumbBG”. So, that’s the 1st thumbnails created, now create the other 7, using steps 18 – 23.

Step 23: Next, create a layer called “thumbs” and drag thumb0 MC onto the stage, positioning it at the top over the guide. From the properties panel, give it the instance name “thumb0”.
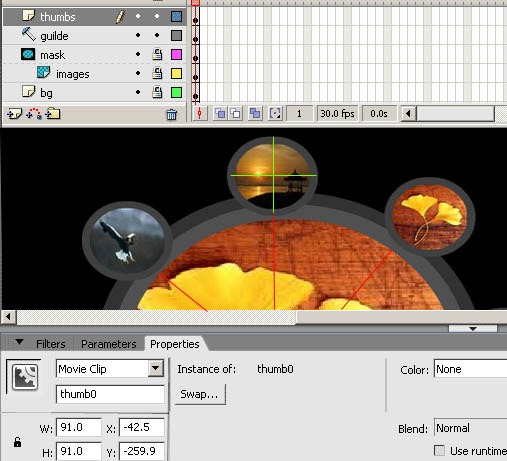
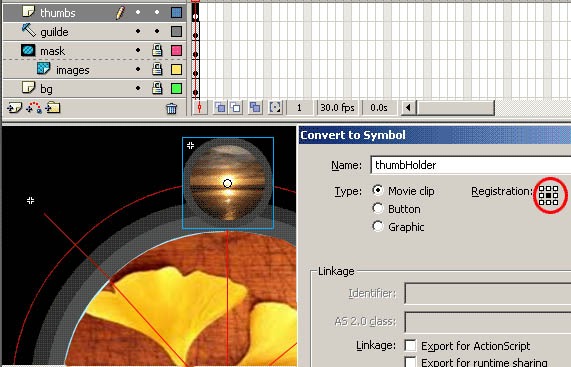
Step 24: Convert thumb0mc into another MC called thumb Holder. Set the registration point (circled in red) to the center. To rotate the thumbnails with action script, the thumb Holder MC will be rotate so that each thumbnail doesn’t have to be rotated individually. Setting the registration point to the center makes sure the MC will rotate from the center.
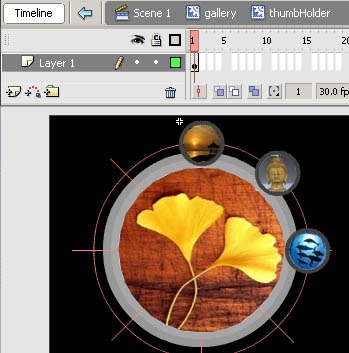
Step 25: Add all 8 of the thumbnails where the lines intersect with the ring. Place thumb1 at the second point, thumb2 at the 3rd, and so on.
Step 26: When all the thumbnails have been added, go back to the Gallery Movie Clip and give the thumb Holder MC the instance name “thumb Holder”.
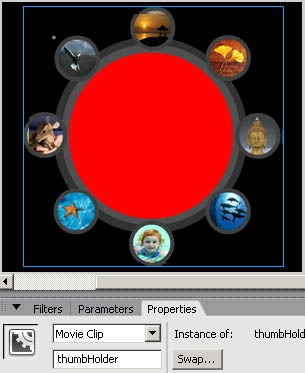
Step 27: Then the image Holder MC and delete the image MC inside of it. This is because we will be adding the image dynamically with action script.
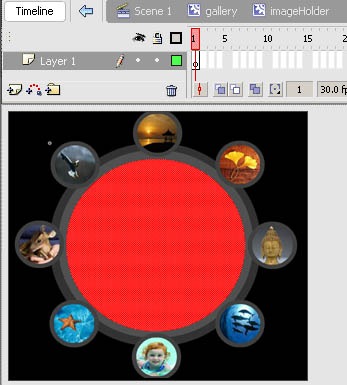
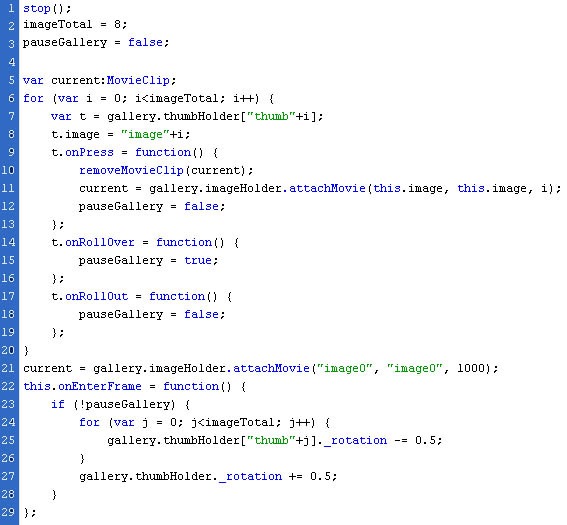
Step 28: Now we are going to create a gallery with rotating thumbnails. We will now use some action script. To make the thumbnails function and to rotate them around the main image.
Step 29: Code Explanation:
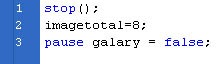
Line 1: A stop() function to stop it from looping
Line 2: A variable to hold the number of images in the gallery
Line 3: A boolean variable which is used to pause / unpause the gallery
Step 30: Code Explanation:
Line 6 – 7: A for loop is created to assign each thumbnail a property containing the name of it’s corresponding image. The “i” in the loop will start off at 0 and increment by 1 (i++), while i is below 8 (i Line 8: Now that we are storing “thumb4” in “t”, we give it the property “image” and assign it to hold image4 (“image”+i)

Step 31: Code Explanation:
Line 9: An onPress function is create for each thumbnail
Line 10: The last displayed image will be held in current, so we use this function to remove it before the new one is attached (line11), upon pressing the thumbnail
Line 11: We use the t.image property to attach the image to “imageHolder” MC. t.image is refered to as this.image because it’s being called from withing an onPress function.
Line 12: When a thumbnail is rolled over with the mouse, the gallery will be pause (see next step), but when the thumbnail is pressed, we want them to start rotating again, so we set “pauseGallery” to equal false.

Step 32: Code Explanation:
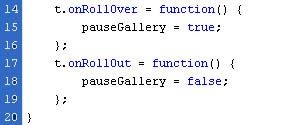
Line 14 – 16: “pauseGallery” is set to equal true when the thumbnail is rolled over.
Line 17 – 20: “pauseGallery” is set to equal false when the thumbnail is rolled out.
Step 33: Code Explanation:
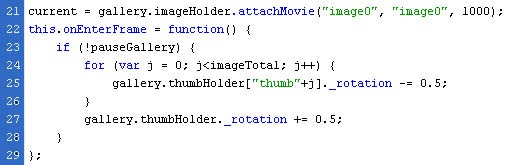
Line 21: When the gallery start image0 is attached to be displayed.
Line 22: An onEnterFrame function is created which will execute any code inbetween the braces {} repeatedly, at the frame rate (30) of the movie.
Line 23: Another loop is used to rotate each thumb counter clockwise with 0.5 degrees. This needs to be done because when the thumbnail holder is spinning round (line 27) the thumbnails will stop being upright.
Line 25: Last we rotate the thumbHolder by 0.5 degreess. You can change the value of this and line 27 to increase or decrease the speed of the rotation.
Step 34: the final code is
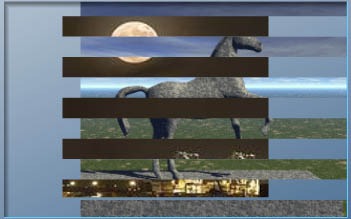
Masking The Images On Action Script Using Flash cs4
Step1: open a new flash file. Set the width to 465 pixels and the height to 232 pixels. And set frame rate to 24fps.

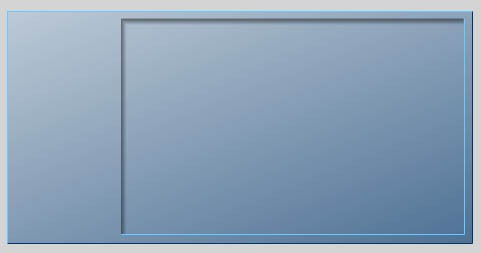
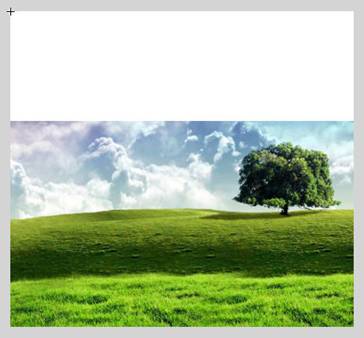
Step 2: By using the rectangle tool draw a rectangle. And import the image for background (file ->import -> import to stage) set as background image.
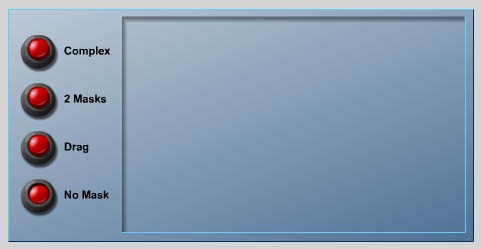
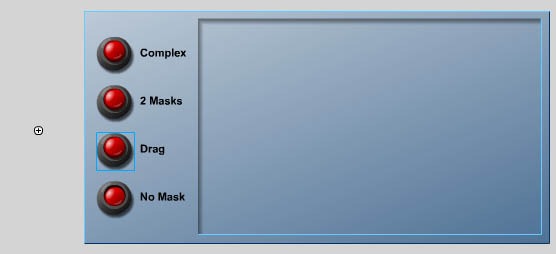
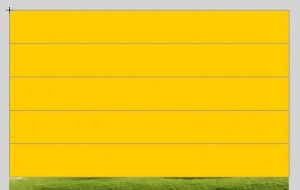
Step 3: Now, we need to place the buttons on left-side of the background image to perform action controls. Import the images from file menu. Place 4 buttons as figure shown below

Step 4: Name the buttons for its relevant actions as shown below
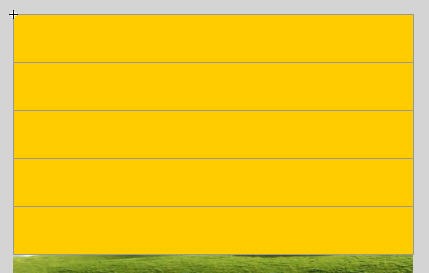
Step 5: To convert the image into a MOVIE CLIP (Movie Clip Symbol) called “background”, by pressing F8.
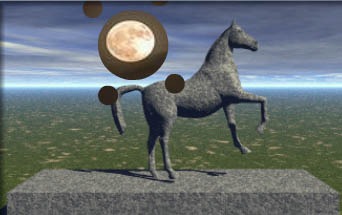
Step 6: Now we need to mask the feature for visually cropping display objects within a shape as image shown below.
Step 7: To convert the image into a MOVIE CLIP (Movie Clip Symbol) called “background”, by pressing F8.
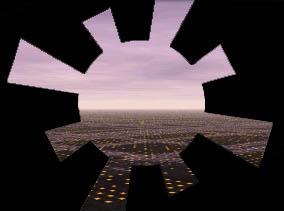
Step 8: From the cropping image to mask the layer and perform some actionscript towards the masking as image shown below
Step 9: The image should now be masking the image, as shown below.
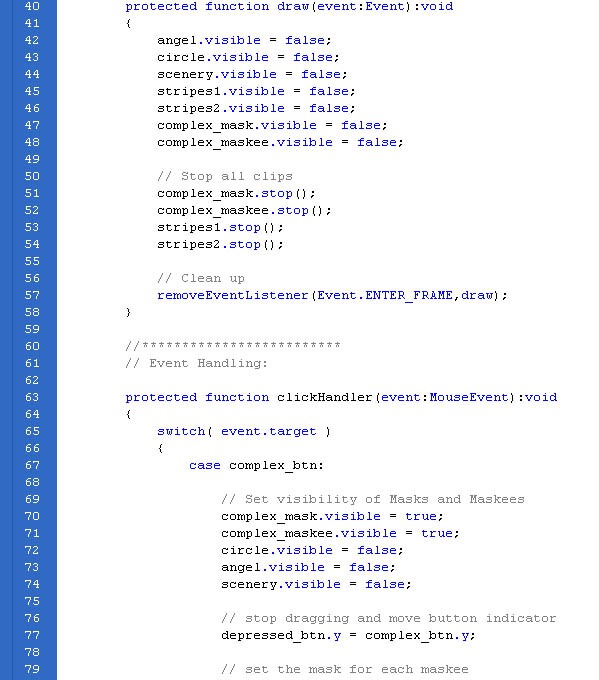
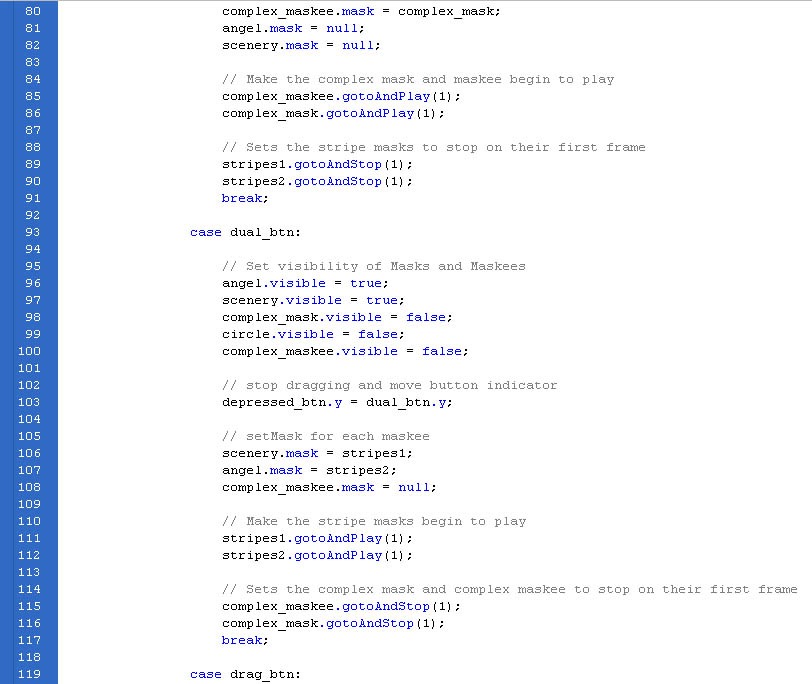
Step 10: create a timeline to demonstrate the following function.
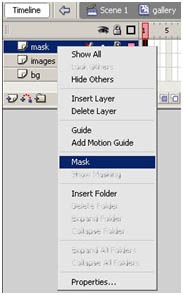
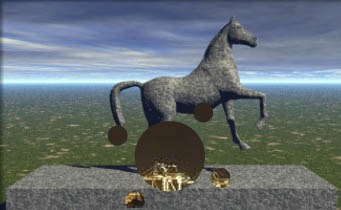
Step 11: now we need to focus on second button i.e. mask. The process involves creating a shape and applying it to the “mask” property of another display object.
Step 12: Masks can stay stationary while the object is being masked move or masks can animate above the object to create transitions and special effects as shown below
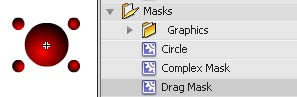
Step 13: Now, create a new MOVIE CLIP (Insert > New Symbol) called “thumb0” and create 2 layers called “image” and “mask”. Drag the thumbnail thumb_0 on to the “image” layer, placing it at the position shown below.
Step 14: then the image will mask the two layers with the movie clip that has been shown in the following image.
Step 15: Right click on the “mask” layer and chose “mask”.
Step 16: On the mask layer two layers have combined to perform the mask function as figure shown below.
Step 17: Then the image Holder MC and delete the image Movie Clip inside of it. This is because we will be adding the image dynamically with action script.
Step 18: Then the image Holder MC and delete the image MC inside of it. This is because we will be adding the image dynamically with action script as shown below.
Step 19: When all the thumbnails have been added, go back to the Movie Clip and give the thumb Holder Movie Clip the instance name “background”.
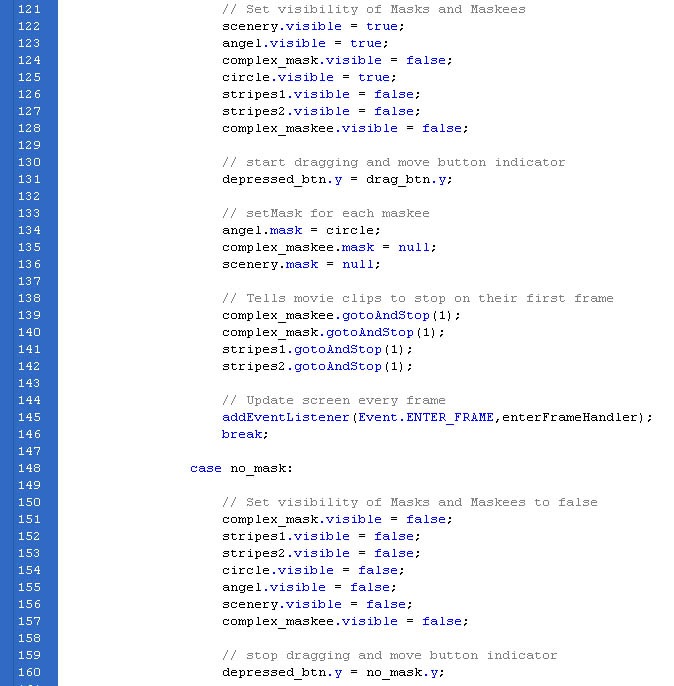
Step 20: Now we need to drag the mask on the right window. By using this drag mask we can able to drag the mouse cursor on the screen as figure shown below.
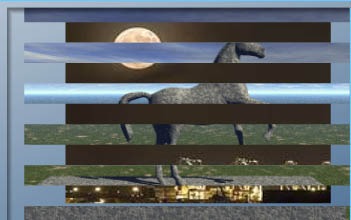
Step 21: Now we need to make spiral movie clip on the right window to mask the two given layer as the figure shown below.
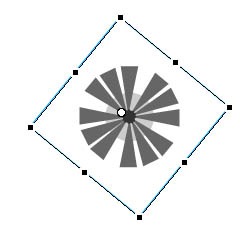
Step 22: To create the mask frame to function the mask frame on the layer style as figure shown below.
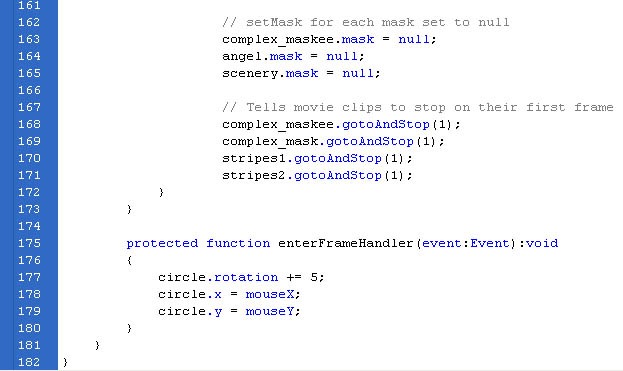
Step 23: To rotate the thumbnails with action script, the thumb Holder MC will be rotate so that each thumbnail doesn’t have to be rotated individually. Setting the registration point to the center makes sure the MC will rotate from the center. Press F8 to perform the action as figure shown below.
Step 24: Setting the registration point to the center makes sure the MC will rotate from the center. Press F8 to perform the action as figure shown below.
Step 25: Last layer to perform no function to be done to make the screen idle.

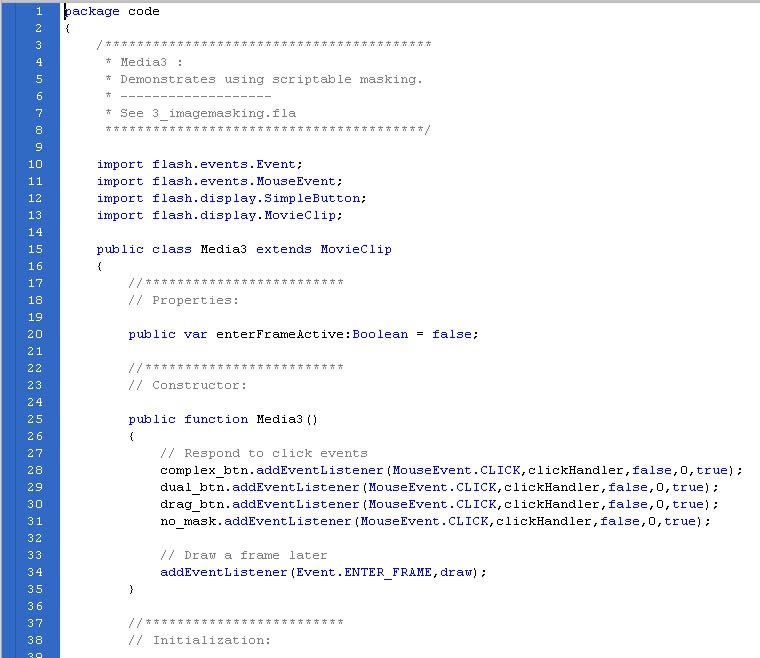
Step 26: Now we will use some action script. To make the thumbnails function and to rotate them around the main image.
Code 1:
code 2:
Code 3:
Code 4:
Code 5:
There are three types of masks which is displayed above flash file. Click the buttons to see the different effects.
Lightening And Masking Techniques Using Flash
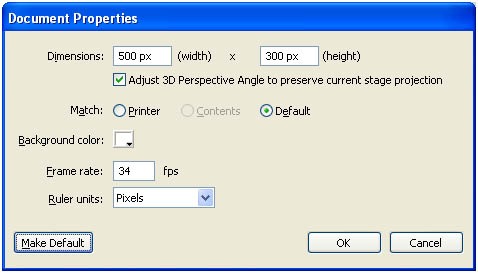
Step 1: open a new flash file. Set the width to 500 pixels and height to 300 pixels. Choose window -> properties from main menu bar, the properties panel is displayed.
Step 2: choose the Edit button under the properties tab to display the document settings window. Set the width to 500px and height to 300px and click ok button to set the stage size.
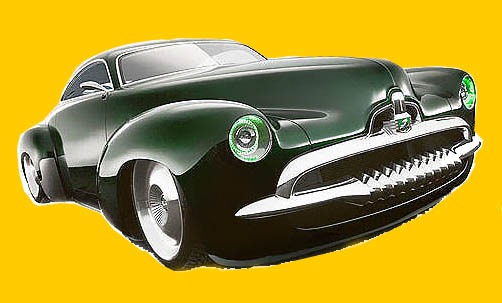
step 3: Choose file -> import -> import to stage from the main menu, the ALIGN panel will be appear as like the figure below.
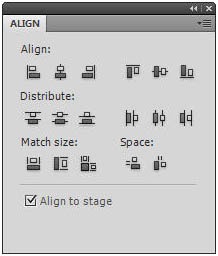
Step 4: select the image and then select the Align to stage checkbox from the ALIGN panel. And select the second button from left under the ALIGN and the distribute area. Image will be displayed to stage.
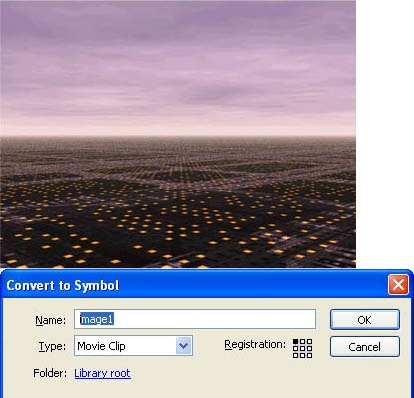
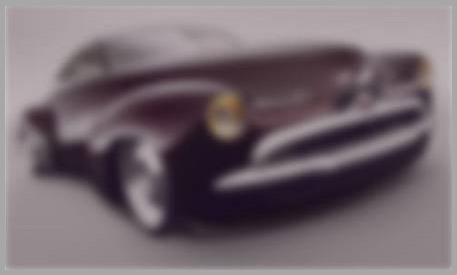
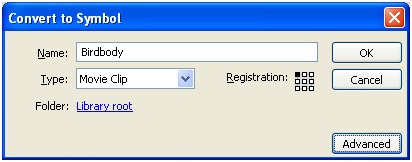
Step 5: Then convert the images into symbol, choose Modify -> Convert to Symbol from the main menu bar, the Convert to Symbol window is displayed; as shown in Figure below. Rename the movie clip as car and choose the OK button.

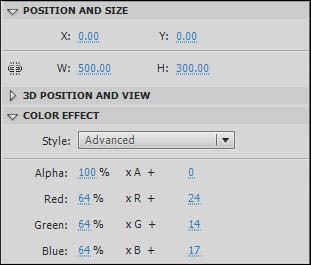
Step 6: select the car movie clip, and then choose Window -> Properties from the main menu bar to display the PROPERTIES window. Maximize the COLOR effect tab and select Advanced from the Style drop-down list. Enter the values as shown in the figure below.
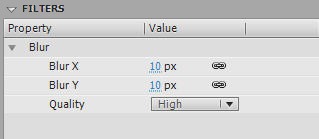
Step 7: Now select the movie clip and expand the FILTERS tab from the PROPERTIES window and add Blur filter to it with the values as shown below.
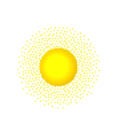
Step 8: After adding the properties, the car movie clip will appear as shown in Figure below. Now set the background effect for the car, and then rename the layer as background effect.
Step 9: Create a new layer and name it as blending, and then drag the car image from the library, place it exactly over the stage area. Make it as a movie clip symbol with the name car-blending.
Step 10: Maximize the DISPLAY tab to select Hard Light blending option from the Blending drop down list. Before that make sure, whether PROPERTIES panel is displayed and the car-blending movie clip is selected.
Step 11: maximize the FILTERS tab and add the Glow filter to the car-blending movie clip. To get the desired effect set the parameters in the FILTER tab.
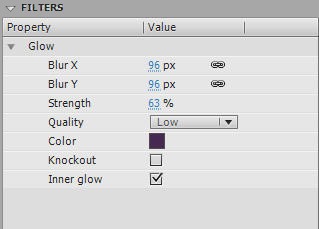
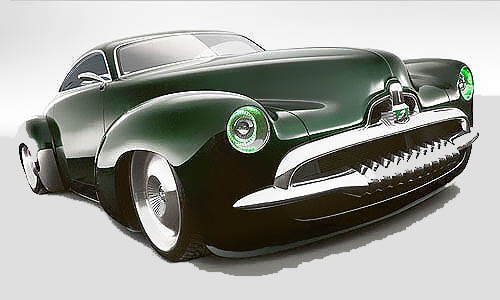
Step 12: For the Color parameter in the Glow filter type use the hex value as #462953.
Step 13: On adding the glow filter to the car-blending movie clip the car on the stage area will be displayed as

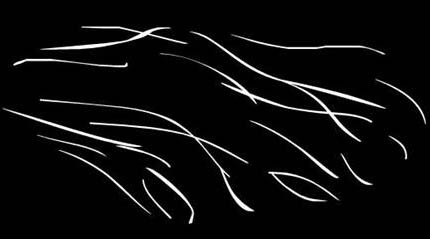
Step 14: Create a new layer with the name lightening, and then choose Insert -> New Symbol from the main menu bar to create a new symbol. And then rename the new symbol to lightning and set the symbol type to Movie clip and choose the OK button. Now a blank new movie clip is created.
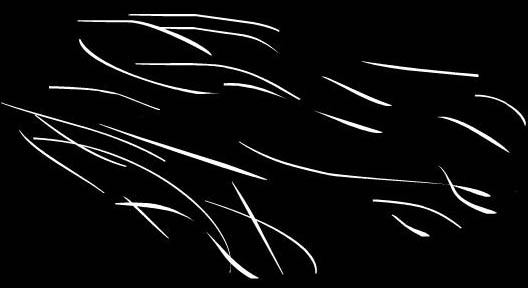
Step 15: Choose the Brush Tool from the toolbar and create some brush strokes in the stage area as shown below

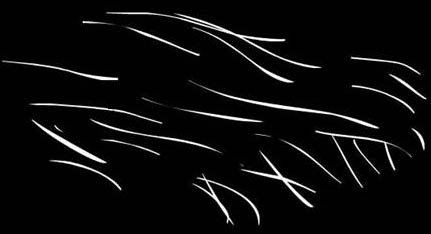
Step 16: Now, set a new keyframe on frame 7 and create some brush strokes as like the figure shown below.
Step 17: Now, set a new keyframe on frame 15 and create some brush strokes as like the figure shown below.
Step 18: Now, set a new keyframe on frame 22 and create some brush strokes as like the figure shown below.
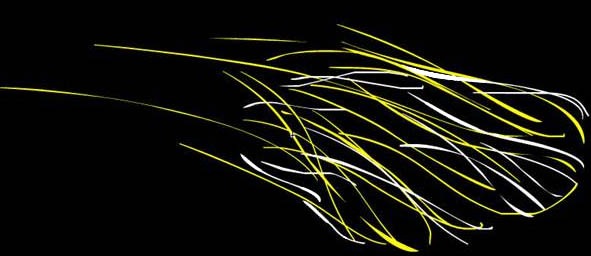
Step 19: Now, set a new keyframe on frame 29 and create some brush strokes as like the figure shown below.

Step 20: Now, set a new keyframe on frame 29 and create some brush strokes as like the figure shown below. We can also add yellow color as the stroke color.
S
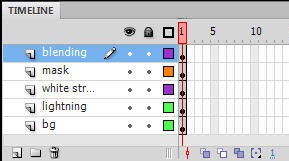
tep 21: Now, set the shape tweening between the all the keyframes. Then create a new layer, and then create random strokes which created on above with two colors with the position of the keyframes exactly at the same position and add shape tweening between the keyframes. The timeline is shown below.

Step 22: Now, add Blur Filter to the movie clip in the PROPERTIES panel and set the Blur X and Y values to 10 and Strength to High. Go back to the main stage and create a new layer. Create a blank movie clip with the name white strokes.
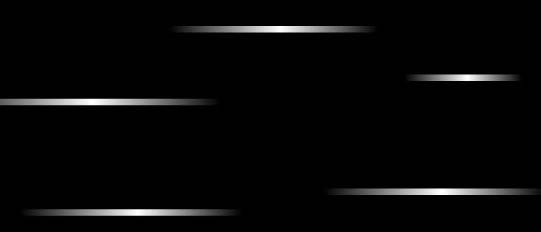
Step 23: Select the Rectangle Tool from the main menubar and create 5 rectangles randomly. Add linear gradient to it in the sequence transparent, white, and transparent, and then arrange them like a figure as shown below
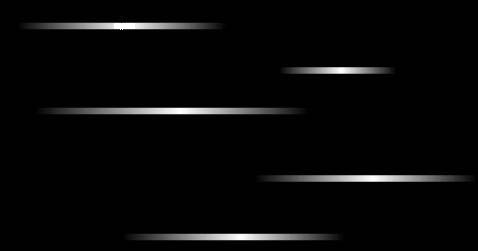
Step 24: Press F6 to create keyframe. Rearrange the rectangle streaks as shown below
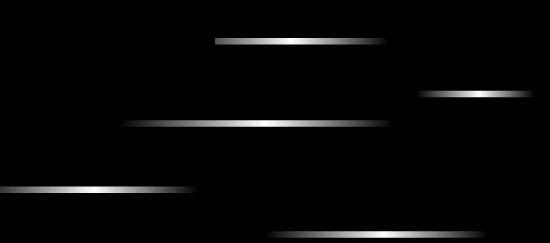
Step 25: Press F6 again to create keyframe. Rearrange the rectangle as shown below.
Step 26: Now, Go back to the main stage area and press CTRL + T to activate the TRANSFORM tab. set the rotate value to 20 degrees.
Step 27: Then, create a new layer and rename it as mask. Now create a sketch the image that is shown in the Figure below such that the car image can come exactly in between it.
Step 28: Next, make sure that the layers are placed exactly in its position as shown below
Step 29: Next, select the layer named mask and right click over it and choose the Mask option from the flyout to mask the underneath layer. Publish the file by pressing CTRL + ENTER to get the animation effect as like below
Step 30: Finally we animate the car to get more life into the animation.
Flying Birds On Scenery Using Flash Motion Tweening
Step 1: Open a new flash file. Set the width to 450 pixels and the height to 239 pixels, set movie’s frame rate as 34 from the properties panel and click ok.
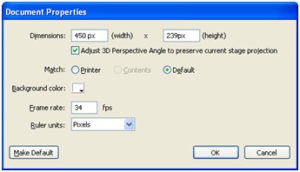

Step 2: Set any background color for the document.
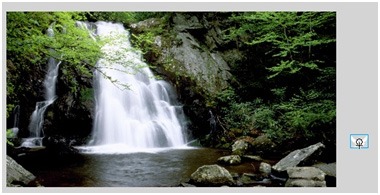
Step 3: To set the background image, choose File -> Import -> Import to stage (ctrl+R) and select the image. Call the current layer background, double click on it to change the layer name as Background.
Step 4: While the image is still selected, goto Align panel (ctrl+K) and follow the steps below:
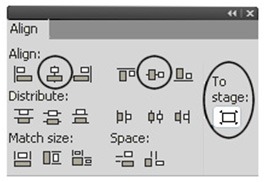
1.Make sure that Align/Distribute to stage button is turned on,
2.Click on the Align horizontal (Center)button and
3.Click the Align vertical button.
Step 5: Now click on Frame 100 and press F5 key.
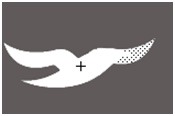
Step 6: Create a new layer above the background layer and named it as Bird. Now we need to draw an bird body without wings using Line Tool and Paint Bucket Tool as shown below,
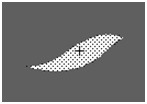
After creating the bird body, Select the layer and press F8 key to convert it into Movie clip symbol.
Step 7: Select the bird body layer and double click on it, specify the name as birdbody from the default name (layer 1).
Step 8: Click on the frame 30 and press F5 Key.
Step 9: Now, we need to create feather animation, so create a new layer above the layer birdbody and named it as feather1.
Step 10: Draw a feather of a bird using the Line tool and paint bucket tool.

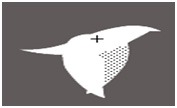
Step 11: Select the frame 2 and press F6 key. After pressing the F6 key set the feather shape as shown below.

Step 12: Now select the frame 4 and press F6 key. Then set the feather shape on the position like this image as shown below.

Step 13: Now click on frame 6 and press F6 key. And make the feather shape like this
Step 14: Now click on frame 8 and press F6 key. And make the feather shape like this

Step 15: Now click on frame 10 and press F6 key. And make the feather shape like this
Step 16: Now click on frame 12 and press F6 key. And make the feather shape like this

Step 17: Now click on frame 14 and press F6 key. And make the feather shape like this

Step 18: Now click on frame 16 and press F6 key. And make the feather shape like this

Step 19: Now click on frame 18 and press F6 key. And make the feather shape like this

Step 20: Now click on frame 20 and press F6 key. And make the feather shape like this
Step 21: Now click on frame 22 and press F6 key. And make the feather shape like this
Step 22: Now click on frame 24 and press F6 key. And make the feather shape like this

Step 23: Now click on frame 26 and press F6 key. And make the feather shape like this

Step 24: Now click on frame 28 and press F6 key. And make the feather shape like this

Step 25: Now click on frame 30 and press F6 key. And make the feather shape like this

Step 26: We finished the first feather. Now we need to create another feather
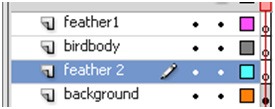
Step 27: Now select the feather 2 layer and draw another feather shape as below

Step 28: Now click on frame 2 and press F6 key. And make the feather shape like this

Step 29: Now click on frame 4 and press F6 key. And make the feather shape like this

Step 30: Now click on frame 6 and press F6 key. And make the feather shape like this
Step 31: Now click on frame 8 and press F6 key. And make the feather shape like this

Step 32: Now click on frame 10 and press F6 key. And make the feather shape like this

Step 33: Now click on frame 12 and press F6 key. And make the feather shape like this

Step 34: Now click on frame 14 and press F6 key. And make the feather shape like this

Step 35: Now click on frame 16 and press F6 key. And make the feather shape like this
Step 36: Now click on frame 18 and press F6 key. And make the feather shape like this

Step 37: Now click on frame 20 and press F6 key. And make the feather shape like this

Step 38: Now click on frame 22 and press F6 key. And make the feather shape like this

Step 39: Now click on frame 24 and press F6 key. And make the feather shape like this

Step 40: Now click on frame 26 and press F6 key. And make the feather shape like this

Step 41: Now click on frame 28 and press F6 key. And make the feather shape like this

Step 42: Now click on frame 30 and press F6 key. And make the feather shape like this

Step 43: Now we finished the feather animation and we’ll move on to bird animation.
Step 44: Now come back to frame 70 and place on the position of the bird like below

Step 45: Go back to first frame and place the position of the bird like this
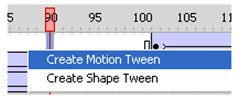
Step 46: Right-click anywhere on the gray area between frame 1 and 70 and frame 70 and 100 on the timeline and choose Right click on the layer and select Create Motion Tween from the menu that appears.
Step 47: Save and publish the file using ctrl+Enter key.
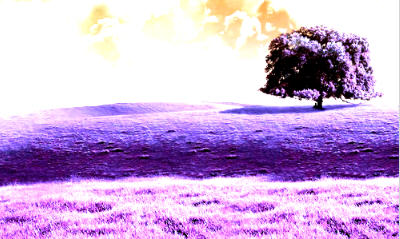
Blend Image flash Transition Effect
Follow the steps to complete the tutorial.
1. Open a new flash file. Choose Window > Properties from the main menu bar to open the PROPERTIES panel.
2. Expand the Properties section in the panel and choose the Edit… button to enlarge the Document Settings window. Next, set the width to 500 px and height to 300 px in the
PROPERTIES panel, as shown in Figure below. Choose the Ok button.
3. Now we will import the images to be used in this tutorial. Unzip the VMask_tutorial.rar file that you downloaded.
4. Choose File > Import > Import to stage from the main menu bar and Import the unzipped images file. The three files will be imported to the stage, as shown in Figure below.
5. The images are not aligned on the stage area. To align them, choose Window > Align from the main menu bar; the ALIGN panel is displayed, as shown in Figure below.
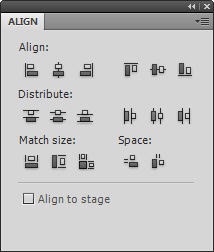
6. Next, select all the three images on the stage and select the Align to stage checkbox from the ALIGN panel and choose the second button from left under the Align and the Distribute area. The images will be aligned to the stage.
7. Now, let us distribute these images on different layers. To do so, right click on the images when they are selected and choose Distribute to Layers… from the fly out, the images are distributed in different layers.
8. Next, convert the images into symbols. Select img1.jpg and choose Modify > Convert to Symbol from the main menu bar; the Convert to Symbol window is displayed; as shown in Figure below.

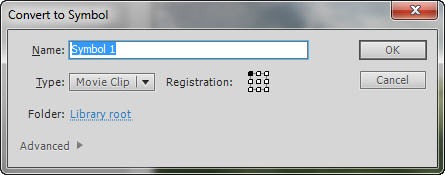
9. Name the movie clip symbol as img1 and choose the OK button. The image is converted to movie clip symbol. Similarly, convert img2.jpg and img3.jpg into movie clip symbols.
The movie clip helps to manage a image in a better way. Also, it will help us to apply filters and other effects to the mages in a better way.
10. Set the visibility of img2 and img3 layers to off. Next, select the img1 movie clip and choose Modify > Convert to Symbol from the main menu bar and name the movie clip as masking1.
11. Double-click on the masking 1 movie clip and next create a key frame on frame 30 in the timeline, as shown in Figure below.

12. Next, set motion twining between the two key frames. Select the key frame on frame1 and place the img1 movie clip around 30 pixels down from its original place, as shown in Figure below.

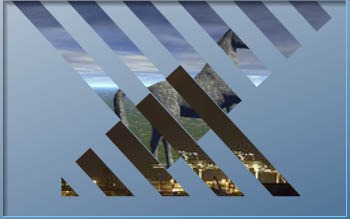
13. Next, create a new layer and name it as mask 1. Create a rectangle with width 500px and height 60px, as shown in Figure below.


14. Select the rectangle and choose CTRL + g to make it as a grouped object. Next, create 4 copies of the rectangle just created and align them to as shown in the Figure below.
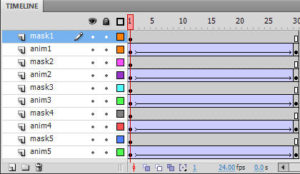
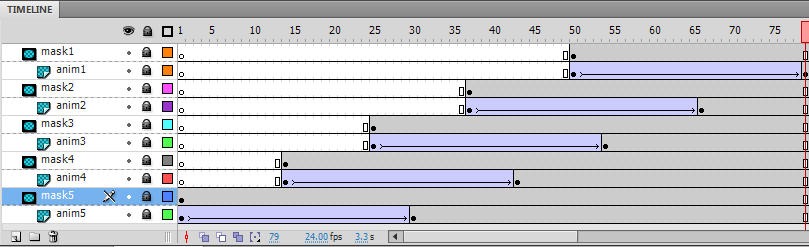
15. Select all the five rectangle shapes and right click on them and choose Distribute to Layers to distribute them to different layers. Rename the layers as mask1, mask2, mask3, mask4, and mask5.
16. Next, activate the layer named layer1 and rename it to anim1 and select the image movie clip at the first key frame and choose Window > Properties from the main menu bar; the PROPERTIES panel is displayed.
17. Add Adjust Color filter to the selected movie clip and set the following values in its parameters to get and effect as shown in Figure below.
Brightness: 0
Contrast: 50
Saturation: 0
Hue: 180

18. Set the alpha to zero for the movie clip on the first frame.
19. Next, create 4 copies of the anim1 layer and rename them as anim2, anim3, anim4, and anim5. Now, make sure that each anim layer is placed below one mask layer, such that the timeline panel looks as shown in Figure below.
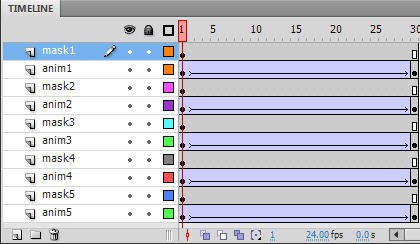
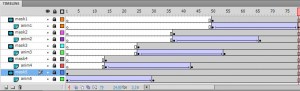
20. Now, right click on the mask1 layer and choose mask from the fly out. Similarly, set mask for mask2, mask3, mask4, and mask5 layers and align the frames in the timeline to as shown in Figure below.
21. Press ENTER and have a look on the masking transition effect. You can tweak the animation as per your needs and requirements.
22. Next, go to the main stage and similar transition effect to the other two images and make a timeline animation to create a photo show transition effect.
Sticker peel off Animation using Flash
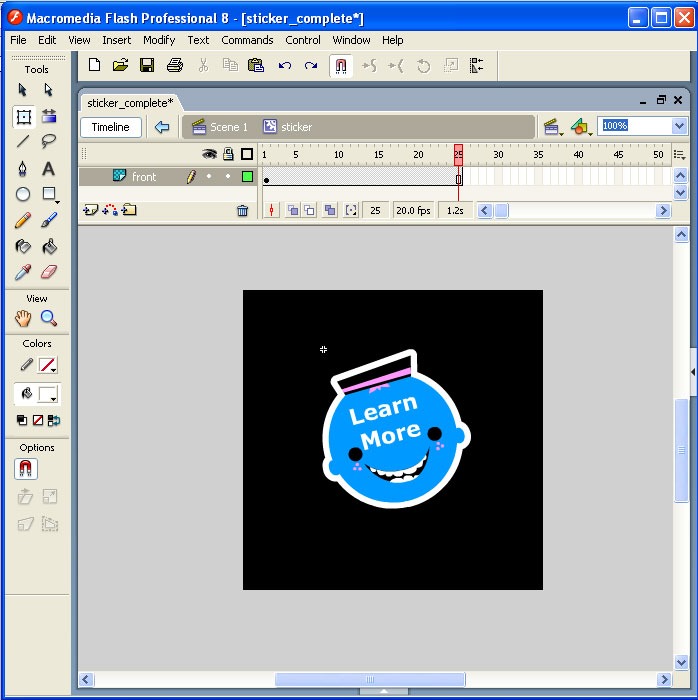
Step-1: Open a new document with the size of 300 X 300 pixels.
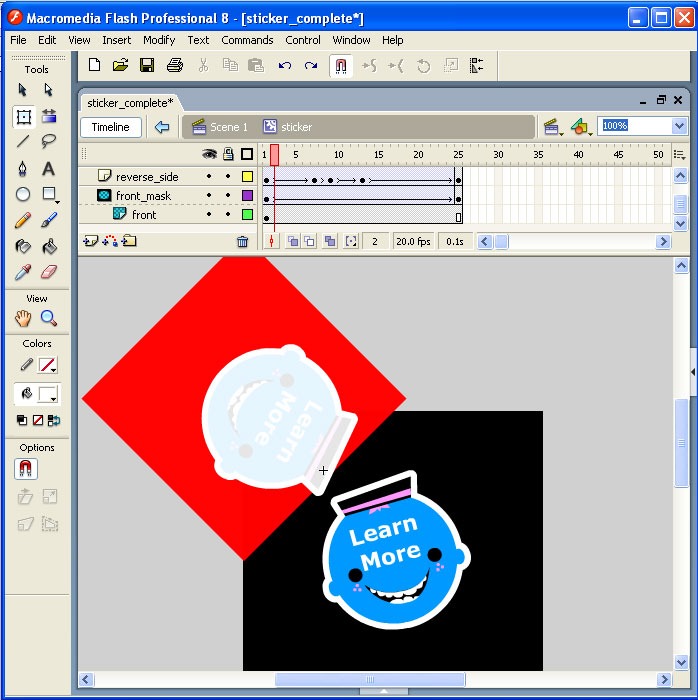
Stpe-2: Draw a picture like below or import (ctrl+r) the picture which you like to do animation in layer-1. I named the layer-1 as “Front”. Select the 25th frame of “front layer” and give F5 (to copy frame till 25th frame).
Step-3: Create new layer, name it as “front-mask”. Pick a rectangle tool and draw a shape. Place it on the top of the left hand side as below. Convert it into graphic by press “F8”. Again copy the frame till Frame-25 but here we are copying and inserting frame. So give F6 in 25th frame.
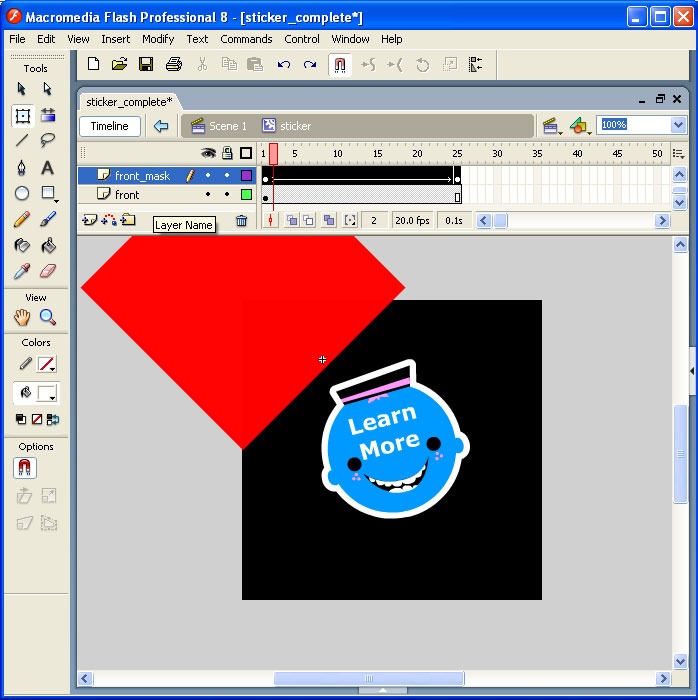
Step-4: just select 25th frame and drag the rectangle which we converted to graphic to right hand side bottom and reduce the alpha till 70% to 75%.
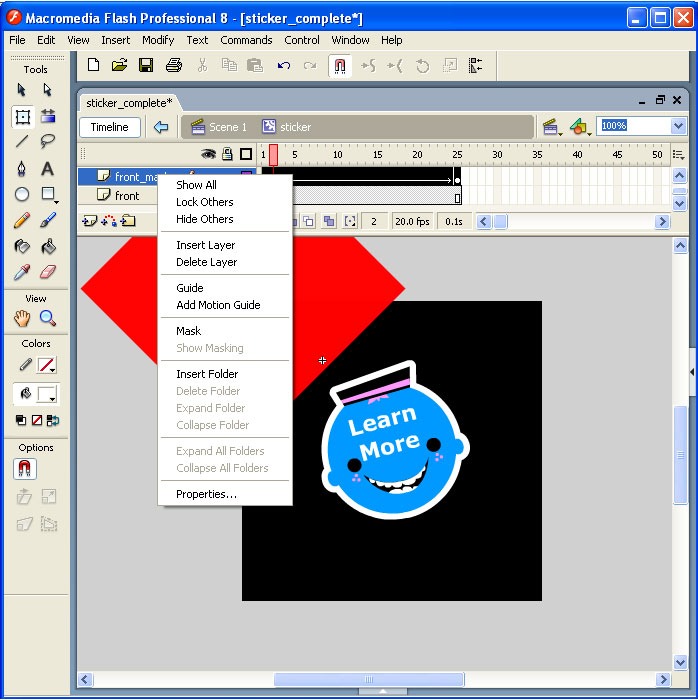
Step-5: Select “front-mask” layer and right click on it. Apply “Mask” option. So this layer would hide.
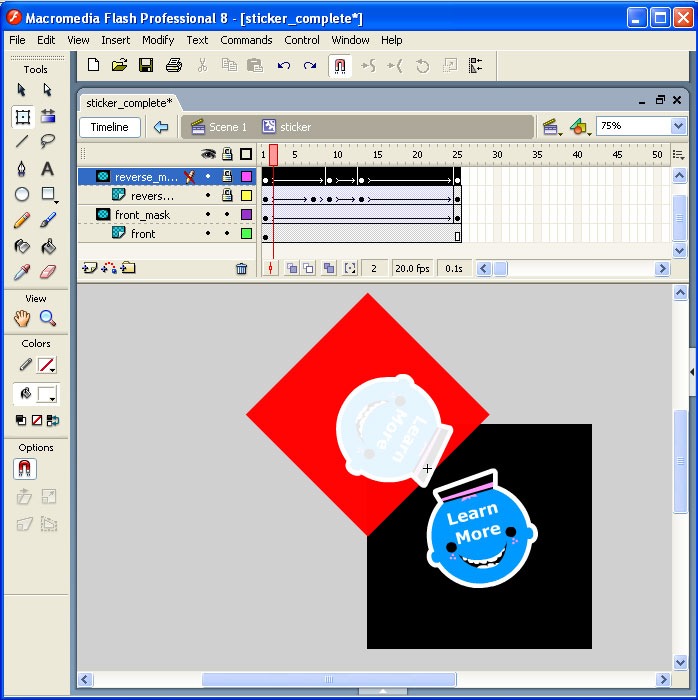
Step-6: Create new layer, name it as “reverse” and import the same picture then convert it into graphic(F8) and reduce tint up to 90% and give F6 in 25th frame.
Step-7: Make new layer, name it as “reverse-mask”. Pick a rectangle tool and draw a shape. Place it on the top of the left hand side as below. Convert it into graphic by press “F8”. Again copy the frame till Frame-25 but here we are copying and inserting frame. So give F6 in 25th frame.
Step-8: Now select 25th frame and drag the rectangle which we converted to graphic to right hand side bottom.
Step-9: If you want make one layer to write script to do action for one time by select 25th frame and give F7 (Empty key frame). Press F9, type stop();
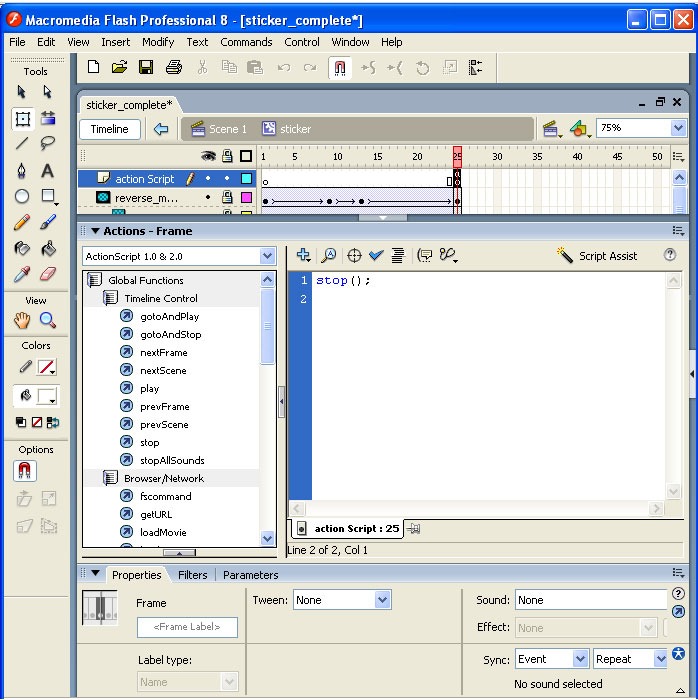
Now Ctrl+enter to run the program.
Click here to download the source Sticker peel off Animation using Flash