


USE OF PATHFINDER TOOL IN ADOBE ILLUSTRATOR
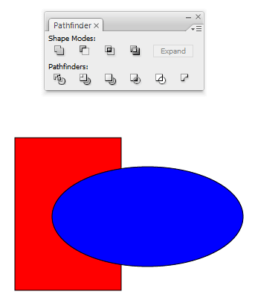
The pathfinder tool in Illustrator is one of most useful tools for manipulating paths. You can find the pathfinder tool by going to Window > Pathfinder.
Initially:

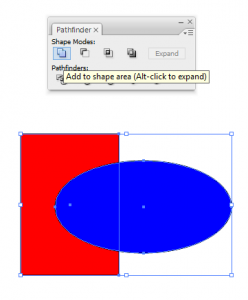
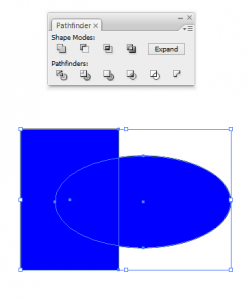
Unite combines all selected shapes into one shape.
Before:


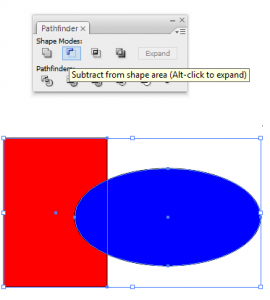
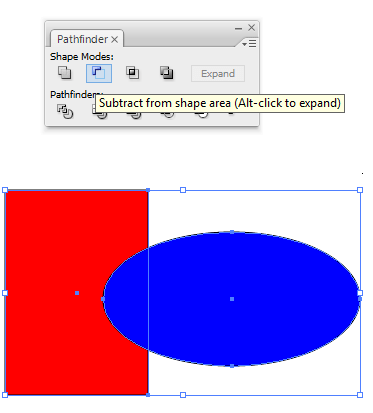
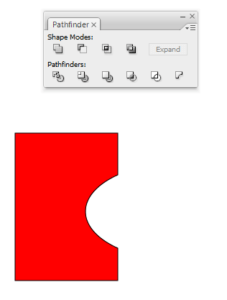
Minus Front of the selected shapes, takes the bottom-most shape (in your Layers) and subtracts all other selected shapes from itr.
Before:
After:

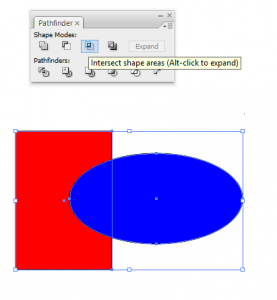
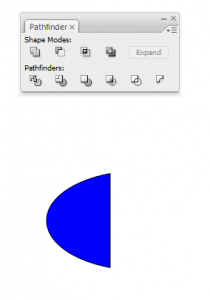
Intersect results in the intersection of the selected shapes.
Before:

After:

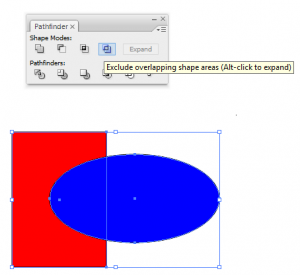
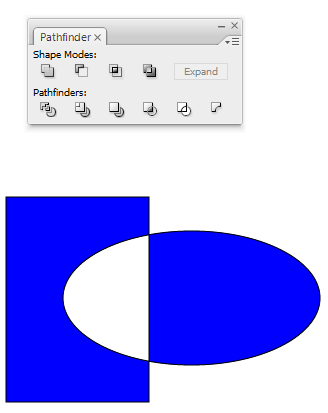
Exclude excludes the overlapping areas of the selected shapes
Before:

After:

Coming…, The six pathfinders are a little hard than the shape modes, but very useful.
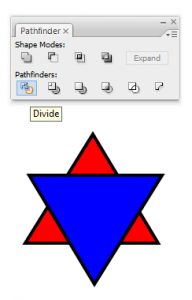
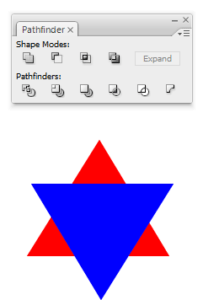
Divide separates the selected shapes into parts, which take on the overlapping color.
In the image above, on the left are two separate triangles, one overlapping the other. On the right is the result after Divide is used. (All subsequent images follow a before on the left, after on the right format.)
Before:


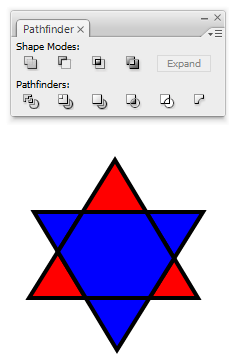
Merge is very similar to Trim; it separates the selected shapes into parts while preserving top layers, but also merges overlapping shapes of the same color.
Before:
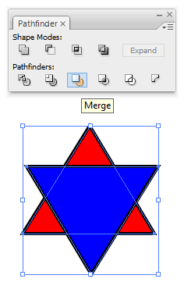

After:


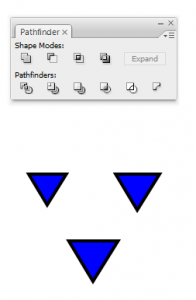
Minus Back works with two shapes, and takes subtracts the bottom shape from the top shape.
Before:
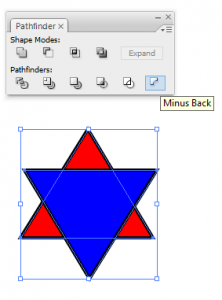

After:
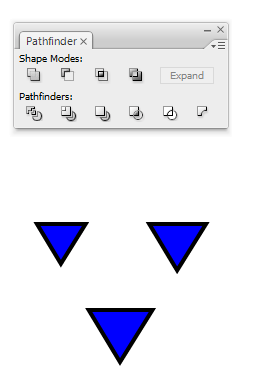
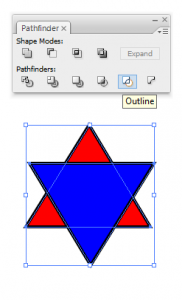
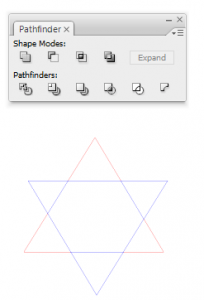
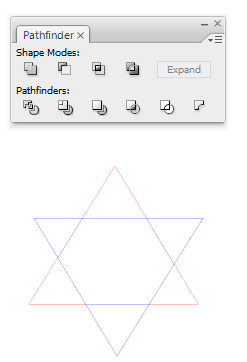
Outline results in the outline of each shape, split into parts; each part takes on the color of the top-most layer.
In the above image, the sections have been moved out of their original outlined positions for clarity.
Before:

After:
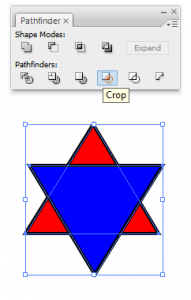
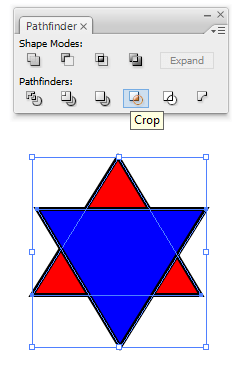
Crop takes the shape of the top layer that is selected and crops out everything from all the other selected layers that is not within that shape, in the color(s) of the other layer(s). The above image shows three overlapping shapes and the results of using the crop tool if different shapes were the top layer. For example, on the left, the circle layer is the top layer, so the circle shape is preserved but what results is the parts of the layers underneath that are within the circle. It may be easier to think of the crop tool as a cookie cutter; you only want whatever is within the shape of the cookie cutter.
Before:


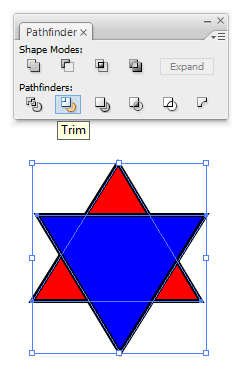
In the image above, on the left are the same two separate triangles as before. When Trim is used instead of Divide, the blue triangle, which overlaps the yellow one, is preserved.
Before:

After:

No comments yet.
Leave a comment
Quick Search
Blogroll
Categories
| M | T | W | T | F | S | S |
|---|---|---|---|---|---|---|
| 1 | 2 | |||||
| 3 | 4 | 5 | 6 | 7 | 8 | 9 |
| 10 | 11 | 12 | 13 | 14 | 15 | 16 |
| 17 | 18 | 19 | 20 | 21 | 22 | 23 |
| 24 | 25 | 26 | 27 | 28 | 29 | 30 |
| 31 | ||||||