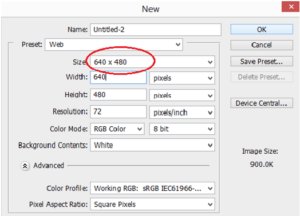
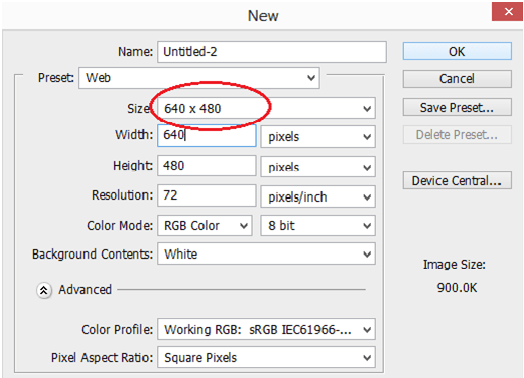
Step 1 : Open a new Photoshop document
In the first step, open a new document with preferred size.
We can use the keyboard shortcut ctrl+N to open a new document.
Step 2 : Fill the document with Balck
Set the foreground color as Black. Use the keyboard shortcut Alt+Backspace to fill the document with foreground color.


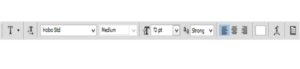
Step 3 : Add your text to the Document
Grab the type tool from the tools palette otherwise press T to work with keyboard shortcut.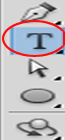
Go to the option bar set font color, font size and font style.
Press letter X to swap foreground and background color so that we get white as a foreground color.
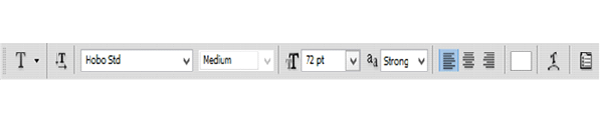
Type the text plastic and resizing the text size by pressing ctrl+T.


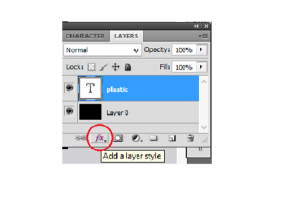
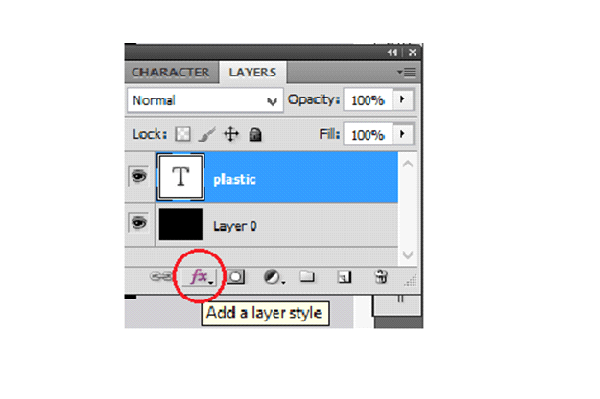
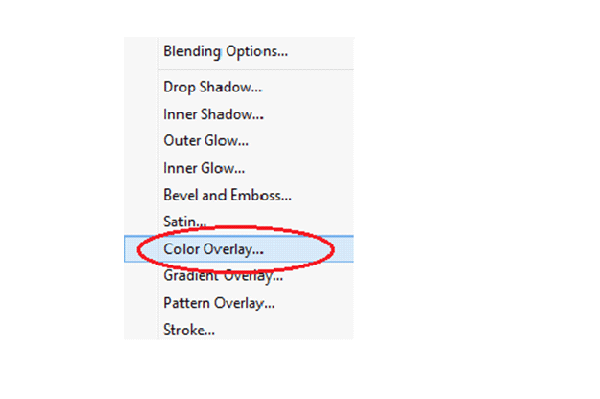
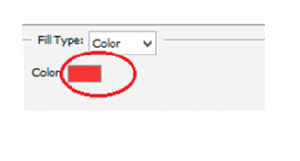
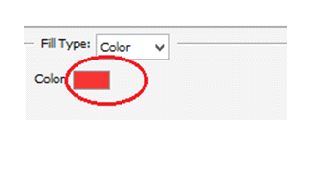
Step 4 : Choose a color for your text using the color overlay layer style
To create plastic effect first we have to choose color overlay from layer styles which is in bottom of layer palette.
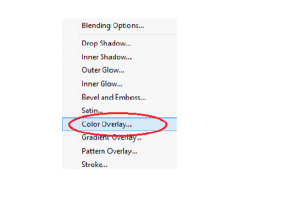
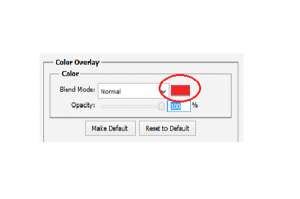
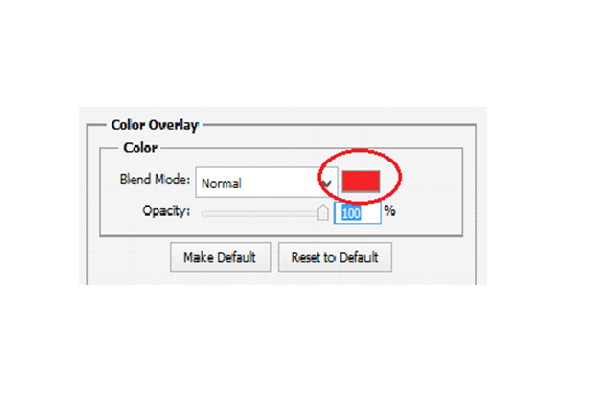
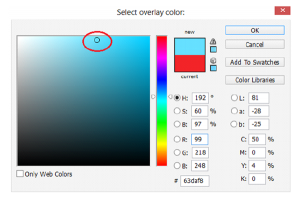
It brings up a color overlay dialog box. Click on color swatch and pick a lighter shade of the color.
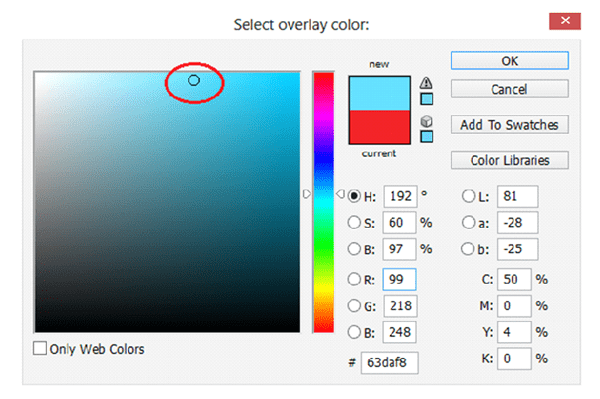
Now the text color will appear like this


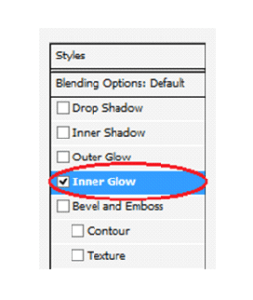
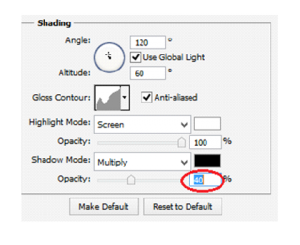
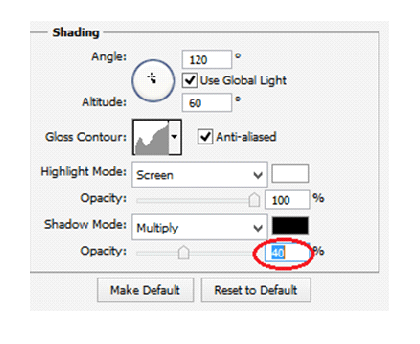
Step 5: Add An Inner Shadow To The Text Using The “Inner Glow” Layer Style
Now we are going to give a three dimensional look for our text by choosing Inner glow style.
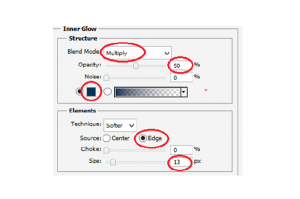
Change the blend mode to multiply and change an opacity also to 50%.
Click on color swatch and pick a matching color, source will be an edge and the shadow size will be 13 pixels.

Now the text will look something like this


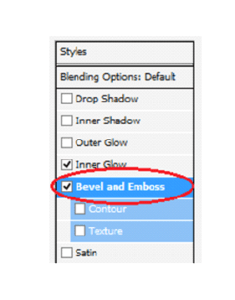
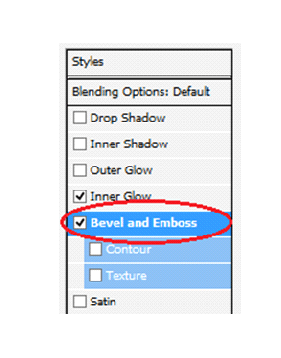
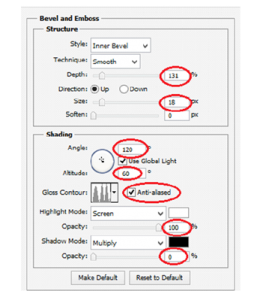
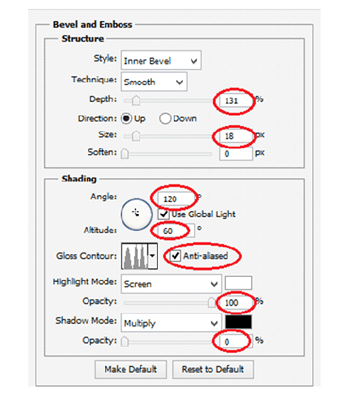
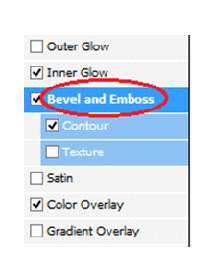
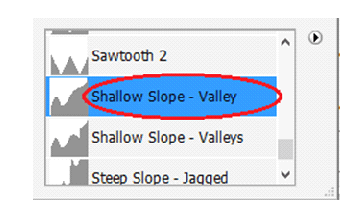
Step 6: Apply The “Bevel and Emboss” Layer Style
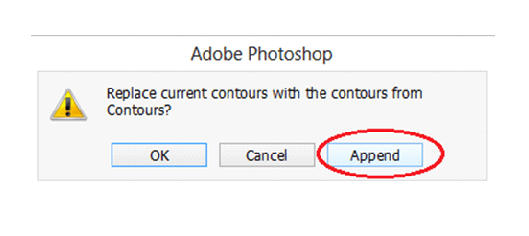
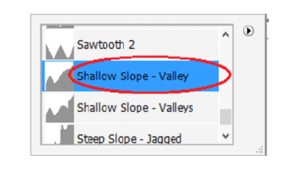
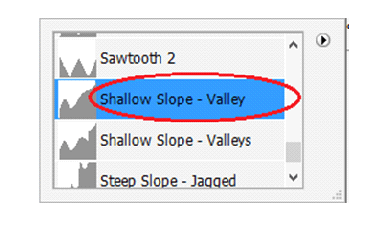
We have to add Bevel and Emboss effect to our text. For doing this we want to load new contours and append that.
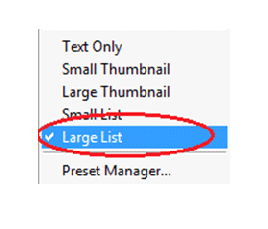
To load new contours click on the down pointing arrow to the right side of the contour preview thumbnail.

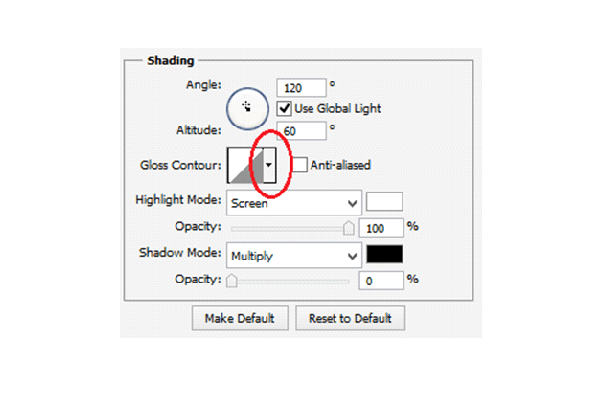


Select Large list from the options so that we can see both thumbnail preview and name of the contour .
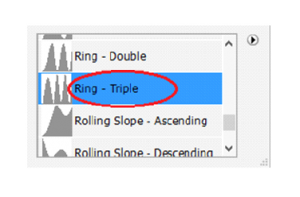
Select the Ring-Triple and change the rest of Bevel and Emboss options.
Now the text looks like this


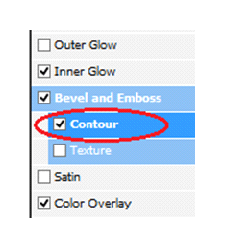
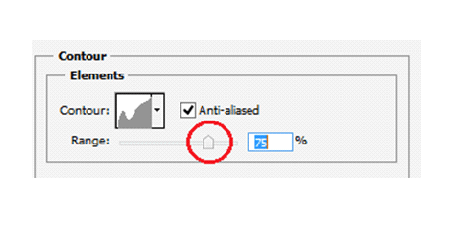
Step 7: Apply The “Contour” Layer Style
Add the contour layer style from the layer style palette.
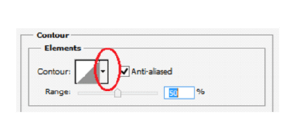
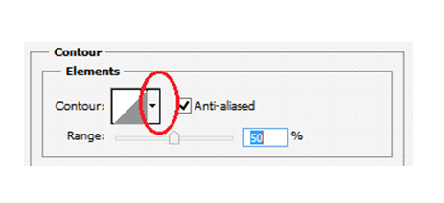
Change the contour style and range to create plastic effect on our text
After adding contour style the text will appear like this


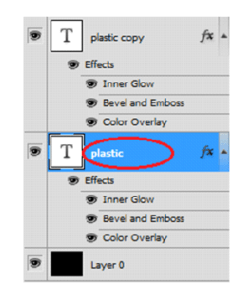
Step 8: Duplicate The Text Layer
Duplicate the text layer so now there are two text layers in the layers palette.
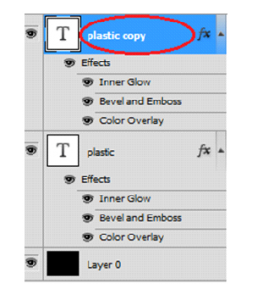
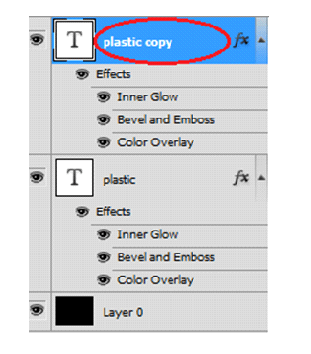
Click on the original text layer, once again doing some changes in the original text.

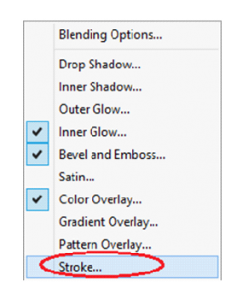
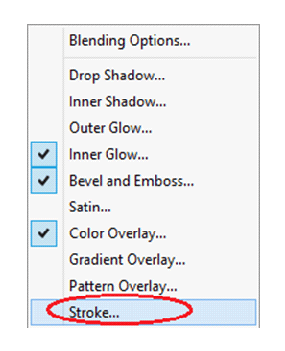
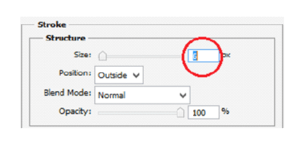
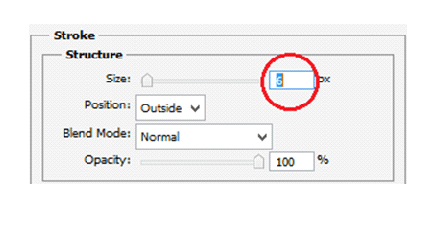
Step 9: Add a Stroke To The Text
Click on layer style to create stroke effect on the text.
Change the Range and color
Move the mouse over the text we will see our mouse cursor will change into eyedropper icon.
Then click near the edge of one letter to sample shade of the color.
Then choose color midway between lighter and darkest colors in the text.


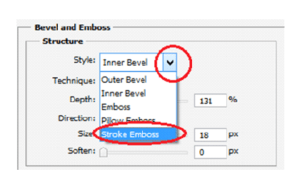
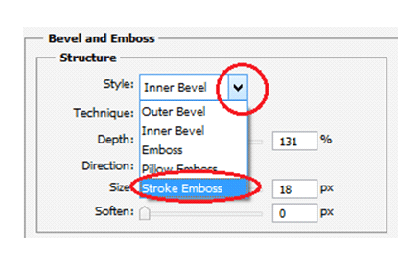
Step 10: Apply The “Bevel and Emboss” Style To The Stroke
Once again wsitch to Bevel and Emboss style to stroke itself.
Click on the down pointing arrow to change to stroke emboss.
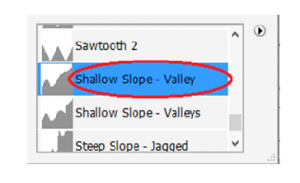
Then change contour style and range
Finally we get the text with plastic effect


Leave a Reply