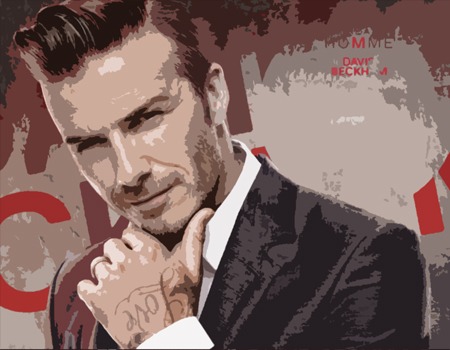
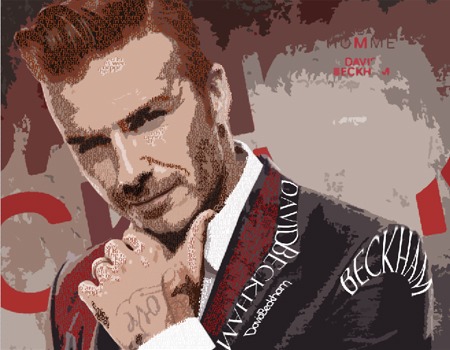
STEP-1: choose a portrait image for your typography design.

STEP-2: Creating Image Effect
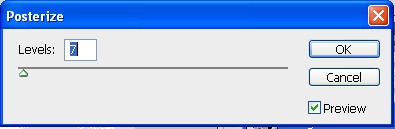
Convert the image into posterize effect by selecting Image > Adjustments > posterize. Set the Levels to 7.
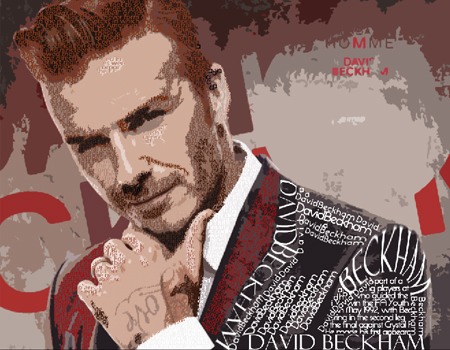
STEP-3: Add Background Text – Important Step
Lower your text opacity to around 20%. Create a new group (Layer – New – Group) and name it Text. Use only the different fonts and sizes. Avoid large spaces between words. Fonts I used:
- Arial
- Cambria
- Die hund
- Impact
- Tahoma
- Times New Roman
- Verdana
- And little bit more default fonts
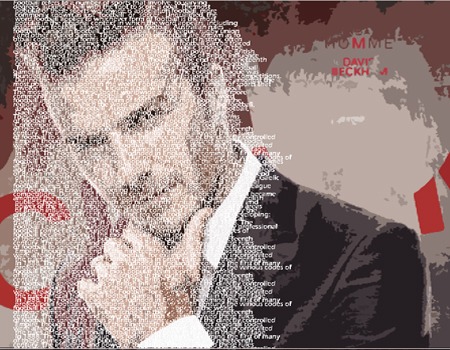
Merge the text into layer and then, crop the layer by selecting the face region.
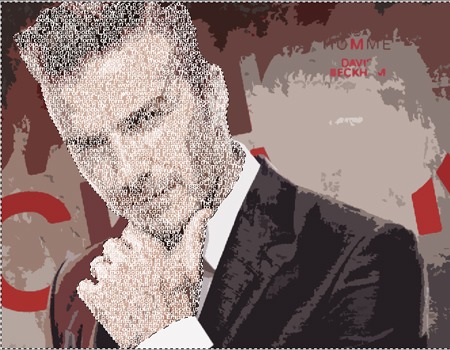
Change the merged layer color by choosing Blending options > Color overlay.
Step-5: Creating effect
When you’re done duplicate your TEXT group (Layer – Duplicate Group) and merge it (Ctrl+E). Make your unmerged TEXT group invisible and select the face region by using Magic Wand Tool.
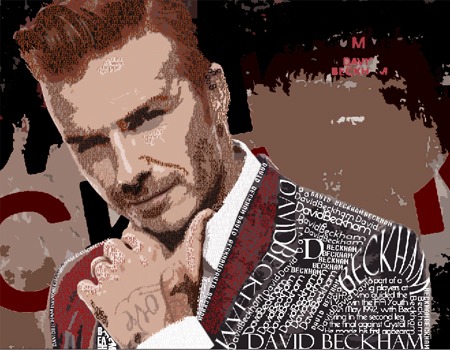
Step 6 – Create Background Text Effect
Make merged text layer visible again and apply following layer style.
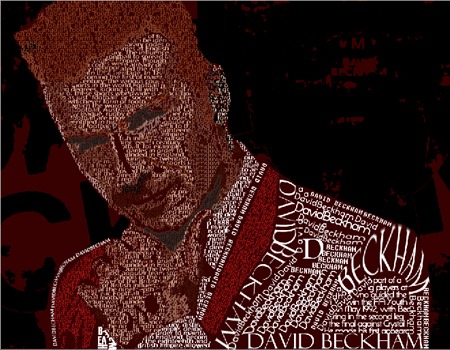
Step 7 – Final touches
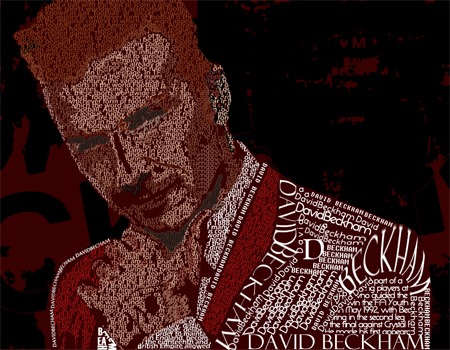
Create new layer, go to Image then Apply Image, then go to Filter choose Render, select Lightning Effects and apply following settings. Here is the final result of portrait typography design.
Leave a Reply