PHP
To upload a file using php
Steps:
1. Create new html file and copy upload.html code and save it as upload.html.
2. Create new php file and copy uploader.php code and save it as uploader.php.
3. Run upload.html, then it will display the html data.
4. Click browse button and select any file or image and press upload button.
5. Then it will transfer that specific file or image to the created folder and display the output as file is uploaded.
upload.html:
[php]
<!DOCTYPE html PUBLIC "-//W3C//DTD XHTML 1.0 Transitional//EN" "http://www.w3.org/TR/xhtml1/DTD/xhtml1-transitional.dtd">
<html xmlns="http://www.w3.org/1999/xhtml">
<head>
<meta http-equiv="Content-Type" content="text/html; charset=iso-8859-1" />
<title>upload</title>
</head>
<body>
<form enctype="multipart/form-data" method="post" action="uploader.php">
<input type="file" name="file" />
<input type="submit" name="submit" value="upload" />
</form>
</body>
</html>
[/php]
It displays the output as:
Calculate add,sub,mul using php
Steps:
1. Create new html file and copy calculate.html code and save it as calculate.html.
2. Create new php file and copy calculation.php code and save it as calculation.php.
3. Run calculate.html, then it will display the html data.
4. Enter value1, value2 and press add or sub or mul button and press calculate button.
5. Then it will transfer to calculation.php which displays the output.
calculate.htm:
[php]
<!DOCTYPE html PUBLIC “-//W3C//DTD XHTML 1.0 Transitional//EN” “http://www.w3.org/TR/xhtml1/DTD/xhtml1-transitional.dtd”>
<html xmlns=”http://www.w3.org/1999/xhtml”>
<head>
<meta http-equiv=”Content-Type” content=”text/html; charset=iso-8859-1″ />
<title>calculation</title>
</head>
<body>
<form method=”post” action=”calculation.php”>
Value 1: <input type=”text” name=”val1″ size=”7″><br /><br />
Value 2: <input type=”text” name=”val2″ size=”7″>
<p>
<input type=”radio” name=”calculate” value=”add” />
add
<input type=”radio” name=”calculate” value=”sub” />
sub
<input type=”radio” name=”calculate” value=”mul”/>
mul
</p>
<input type=”submit” name=”submit” value=”calculate”/>
</form>
</body>
</html>
[/php]
It displays the output as:
Value 1: Value 2:
add
sub
mul
Transfer data from one page to another using php
Steps:
1:Create new php file and copy file1 code and save it as file1.php.
2.Create another new php file and copy file2 code and save it as file2.php.
3.Run file1.php, then it will display the file1 data.
4.Enter your name, age and location and press the submit button.
5.It will transfer to file2.php and displays the output.
file1:
[php]
<!DOCTYPE html PUBLIC "-//W3C//DTD XHTML 1.0 Transitional//EN" "http://www.w3.org/TR/xhtml1/DTD/xhtml1-transitional.dtd">
<html xmlns="http://www.w3.org/1999/xhtml">
<head>
<meta http-equiv="Content-Type" content="text/html; charset=iso-8859-1" />
<title>table1</title>
<script language="javascript" type="text/javascript">
function check()
{
if(document.getElementById(‘name1’).value==”)
{
alert("Please enter your name");
document.getElementById(‘name1’).focus();
}
else if(document.getElementById(‘age1’).value==”)
{
alert("please enter your age");
document.getElementById(‘age1’).focus();
}
else if(document.getElementById(‘location1’).value==”)
{
alert("please enter the location");
document.getElementById(‘location1’).focus();
}
else
{
document.form.submit();
}
}
</script>
</head>
<body>
<form method="post" action="file2.php" name="form" >
<table width="100%" border="0">
<tr>
<td><label>Enter your name: </label>
</td>
<td><input type="text" name="name" id="name1"; />
</td>
</tr>
<tr>
<td><label>Enter your age:</label>
</td>
<td><input type="text" name="age" id="age1"; />
</td>
</tr>
<tr>
<td><label>Enter the location:</label>
</td>
<td><input type="text" name="location" id="location1"; />
</td>
</tr>
<tr>
<td colspan="2"> <div align="center">
<input type="button" value="Submit" onclick="check();" name="Submit" />
</div></td>
</tr>
</table>
</form>
</body>
</html>
[/php]
//save this as file1.php
It will display the output as:
file2:
[php]
<!DOCTYPE html PUBLIC "-//W3C//DTD XHTML 1.0 Transitional//EN" "http://www.w3.org/TR/xhtml1/DTD/xhtml1-transitional.dtd">
<html xmlns="http://www.w3.org/1999/xhtml">
<head>
<meta http-equiv="Content-Type" content="text/html; charset=iso-8859-1" />
<title>table2</title>
</head>
<body>
<?php
$var1=$_POST[‘name’];
$var2=$_POST[‘age’];
$var3=$_POST[‘location’];
echo "your name is: $var1"."<br/>";
echo "your age is: $var2"."<br/>";
echo "loaction is: $var3";
?>
</body>
</html>
[/php]
//save this as file2.php
after entering your name, age and location and pressing the submit button, it displays the output.
For example:
your name is: John
your age is: 25
loaction is: CA
To display current date,no.of days and weeks in a month and year using php
1:Create new php file and copy the code and save it as file1.php.
2.Run file1.php, then it will display the current date and no.of days,weeks in a month and year.
[php]
<?php
echo "My name is: John"."<br/>";
echo "current date is:"."\n" .date("Y m d h: s: m") ."<br/>";
echo "No of days in a month:"."\n" .cal_days_in_month( CAL_GREGORIAN, 07, 2010) ."<br/>";
echo "No of weeks in a month:"."\n".date("w", mktime(0,0,0,12,31,2010)) ."<br/>";
echo "No of weeks in a year:"."\n" .date("W", mktime(0,0,0,12,31,2010)) ."<br/>";
?>
[/php]
It display the output as:
My name is: John
current date is: 2010 07 23 04: 46: 07
No of days in a month: 31
No of weeks in a month: 5
No of weeks in a year: 52
Php code to find leap year or not
We can find a year is leap year or not in various ways.we can use the following fuctions in php.
- By using date() function
- By Modulus operator
Here is a sample php code that uses modulus(%)operator for finding the leap year.
Write the below code within php tags
[php]
<code>
<!–?PHP </p–> </code>
<code>$start = 1000;
$end = 1011;
for($i = $start; $i < $end; $i++)
{
if(($i%4) == 0){$val = "Leap Year";}else{$val = "Not Leap Year";}
echo $i, ‘ —> ‘.$val.”;
}</code>
?>
[/php]
It will produce the output as given below.
1000 —> Leap Year
1001 —> Not Leap Year
1002 —> Not Leap Year
1003 —> Not Leap Year
1004 —> Leap Year
1005 —> Not Leap Year
1006 —> Not Leap Year
1007 —> Not Leap Year
1008 —> Leap Year
1009 —> Not Leap Year
1010 —> Not Leap Year
You find leap years for any year ranges by changing the $start and $end.
Php Tools
PHP is the commonly used open-source server-side scripting languages among all exist languages today. PHP has in depth credentials, a vast community, plenty of ready-to-use scripts and well-supported frameworks. It’s very easy to begin with PHP than with other scripting languages like Python, etc… That’s why PHP has huge community. PHP makes the development process easier and more effective with its tools and resources.
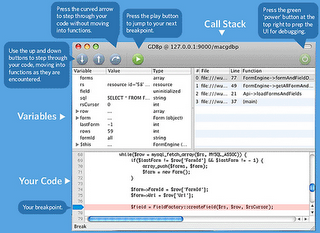
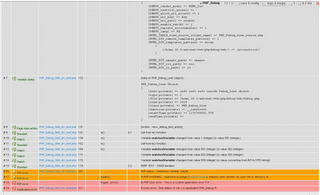
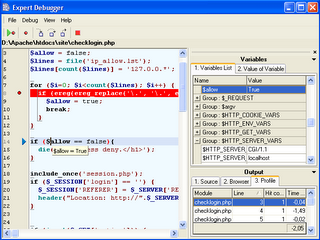
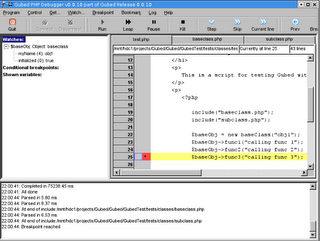
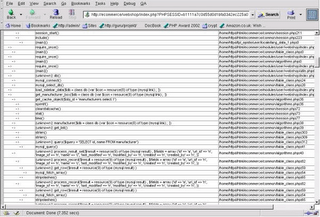
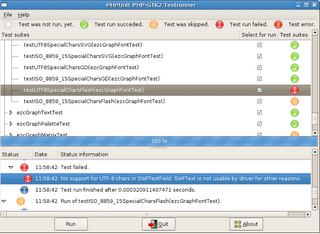
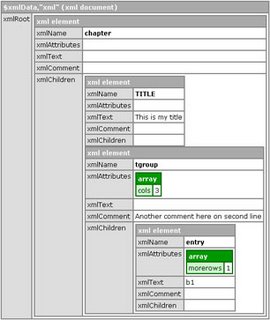
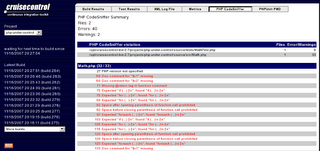
A lot of debugging and testing tools were available. Some of them were listed below.
| Debugging Tools | |||||
| MacGDBp | PHP_Debug | DBG | Gubed PHP Debugger | Xdebug | Webgrind |
 |
 |
 |
 |
 |
 |
| Testing Tools | |||||
| PHPUnit | dBug | PHP_CodeSniffer | |||
 |  |  | |||
CGI Time Out The specified CGI application exceeded the allowed time for processing. The server has deleted the process.
Whenever we tried to run some large script like data extraction or trying to get thousand number of records from remote database, most of us will face the following CGI Issue
“The specified CGI application exceeded the allowed time for processing. The server has deleted the…”
In order to run your script without any such kind of issue, please follow the steps provided below. Earlier I too faced such a issue but after research in my PC I finally fixed it.
Note: the following steps is only suitable only for the Windows XP and with the IIS version 5.1:
Go to your Internet Information Services (IIS) page (Go Start -> Settings -> Control Panel -> Administrative tools -> Internet Information services)
Unfold Websites->Default Web site
Now right click on your website name (on which you are executing your script)
Select Properties
Select the tab Virtual Directory
In that page, select the option High (Isolated) under Application Protection, this option will remove the default timeout settings.
Now click on the button Configuration
Then select Process Options tab
Change the CGI Script Timeout value max value is 999999.
That’s it. You may now run your script without any issue.
Mysql_connect Vs Mysql_pconnect
There are two different connections available, if you are connecting to a MySQL database in your PHP application, mysql_connect – which set up a new connection “each time” and mysql_pconnect which uses persistent connections.
Mysql_connect opens a new connection each time a PHP page is called, and closes the connection down again at the end of the request. It is perfect for pages that do not have a heavy usage.
Mysql_pconnect will also open a new connection when a PHP page is called, but it will NOT close the connection at the end of the request – instead, it will put aside it in a connection pool so that a succeeding request can persist to use the same connection. It’s intended for pages that have a heavy usage – where the resources burn up by opening and closing connections every time might reduce performance.
But mysql_pconnect need some tuning of the servers and you may require limiting the numbers of connections / children and configuring timeouts and how to deal with idle children.
By using this you have some drawbacks as follows.
It does NOT give you sessions.
It does NOT give you a per-site-visitor login.
It does NOT give you any added functionality.
Redirecting PHP pages
Redirecting a visitor or the browser is necessary in different situations. If a page is temporarily down at that time we can use HTTP 302 redirect. Same way the permanent redirection is HTTP 301 redirection. Each the 3xx are different types of redirection and out of them 301 and 302 are common. The HTTP 301 permanent redirection is accepted by search engines also.
We will be use the Location Header function to redirect a page. This script works when we have not send to any php or html command to out put any thing in the browser. Trouble is to be taken not to send any other to the browser after the header redirection using location command. Here is the code.
header (“Location: http://www.websitename.com”);
/* Redirect browser to websitename.com web site */
exit; // Closes further script execution .
You can see this code above will redirect the page to a new URL.
How to use cookies in PHP
Cookies in PHP is done by using the statement setcookie() , this statement is available from the time when version 3 of PHP.
int setcookie (string Name [, string Value [, int Expire [, string Path [, string Domain [, int Secure]]]]]);
setcookie() defines a cookie that is sent the information from the header. Cookies are sent before any html tag; therefore, we call one of these statements before any tag <html> or <head>. This is a restriction of cookies, not for PHP.
All messages, except the name are optional.
- Name . Name of the cookie. If we create a cookie only with its name, the cookie name is existing in the Client under said name will be deleted. We can also replace to any argument with an empty string(“”).
- Value . Value to be stored by the cookie in the Client.
- Expire . The argument expire is an integer argument that indicates the time of the cookie will be deleted in the time format returned by the UNIX statements time() and mktime(). Time() + N seconds of duration is commonly used to specify the duration of the cookie.
- Path . Subdirectory where the cookie has a value.
- Domain . Domain where the cookie has a value. If we establish www.yourdomain.com as domain, the cookie is not set for domain.com. Meanwhile, if we establish yourdomain.com as domain, the cookie is set as for yourdomain.com as for www. yourdomain.com.
- Secure . The secure indicates that the cookie will only be set by a secure HTTPS connection.
Example
setcookie(“Ron”, “Victor”, time()+3600,”/”,”yahoo.com”);
In this example, we set a user name cookie that has the value Victor , lasts 1 hour (3600 seconds) valid for the whole domain yahoo.com


