

1. Create a new text layer.
Create a new file in Photoshop with image size as 150 x 50.
Select the Horizontal Type Tool ,choose font values Myriad Pro, Bold, 48,Strong, 7731ec.A new layer 'Style' will be created.


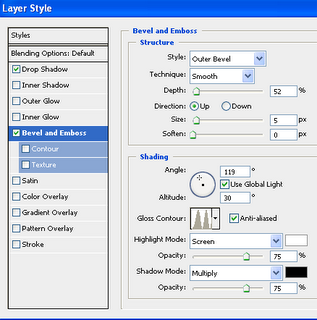
3. Apply the 'Bevel and Emboss' effect
Choose the Style 'Bevel and Emboss'.Apply the following values
for Structure and Shading to get the output as shown. Ensure that the 'Gloss Contour'
and 'Anti-Aliased' options are selected in Shading .


Create a new file in Photoshop with image size as 150 x 50.
Select the Horizontal Type Tool ,choose font values Myriad Pro, Bold, 48,Strong, 7731ec.A new layer 'Style' will be created.
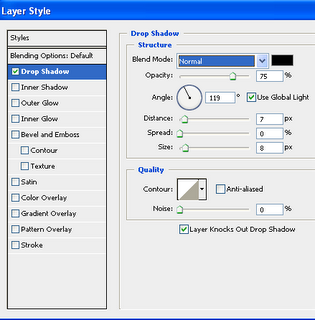
2. Apply the 'Drop Shadow' effect
Select the layer 'Style'. Double Click on this layer. Choose the style
'Drop Shadow'. Apply the following values to get the output as shown.
Select the layer 'Style'. Double Click on this layer. Choose the style
'Drop Shadow'. Apply the following values to get the output as shown.
Choose the Style 'Bevel and Emboss'.Apply the following values
for Structure and Shading to get the output as shown. Ensure that the 'Gloss Contour'
and 'Anti-Aliased' options are selected in Shading .
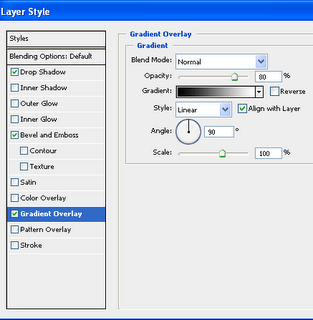
4. Apply the 'Gradient' Effect
Choose the Style 'Gradient Overlay'.Apply the following values
to get the output as shown.
Choose the Style 'Gradient Overlay'.Apply the following values
to get the output as shown.
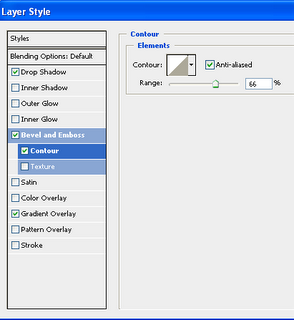
5. Apply the 'Contour' to 'Bevel and Emboss'
Select the following values to get the output as shown.
Select the following values to get the output as shown.
6. Change Colour of Text
Now since the text is still Vector Text with styles applied to it,we can change the
colour of text.Select Horizontal Type Tool and select the top swatch and select
white color. We get a perfect steel effect.
Now since the text is still Vector Text with styles applied to it,we can change the
colour of text.Select Horizontal Type Tool and select the top swatch and select
white color. We get a perfect steel effect.
Labels: Photoshop
posted by Treesa @ 4:36 AM permanent link | |


Post a Comment