

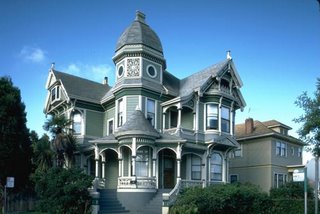
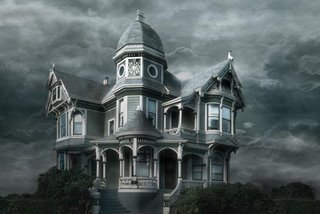
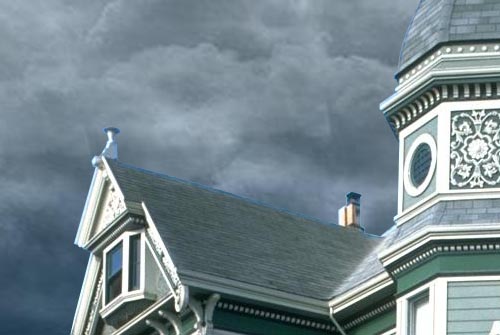
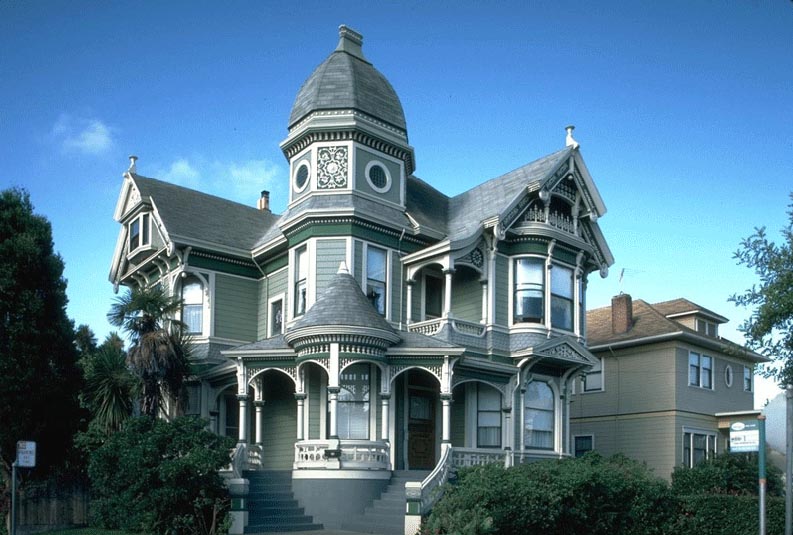
First of all, find a good res picture. I chose to use a picture of a house I found on the web. You can find very nice pics for free, just look around !
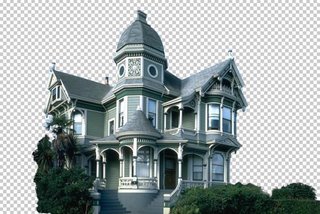
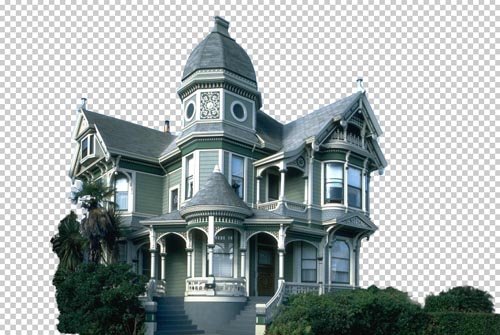
The first step is to isolate the house by putting it on a separate layer and by erasing the rest.
In this example I used the polygonal lasso tool for the house, and a soft eraser for the bushes.
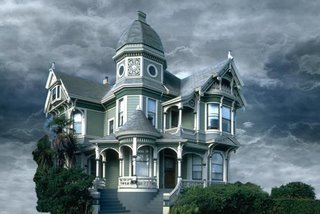
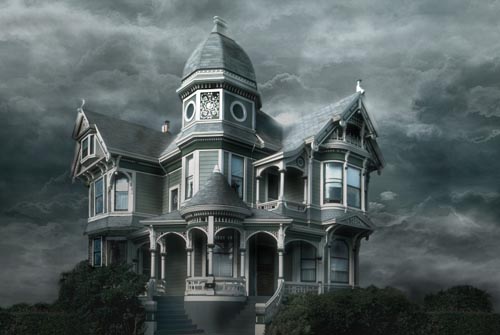
Now you need a new background. You can either find a good pic, either paint one yourself.
I chose the former because it is less time consuming, and the result is far better than what I would have gotten had I painted a background myself. I found this image on the web, unfortunately I do not remember the site I got it from.

Put the sky behind the house (by putting the sky layer under the house layer), and apply a little perspective effect to give more depth to the sky, make it less flat.
Here the house picture was taken from a low angle, which makes our work easier.
Now look at the edges of the house. They still are the color of the original sky. We'll fix that.

Using the magic wand tool, select the empty zone of the house layer. Then, Select > Modify > Expand, to make your selection wider. Pick a value that includes the zone we need to color correct.
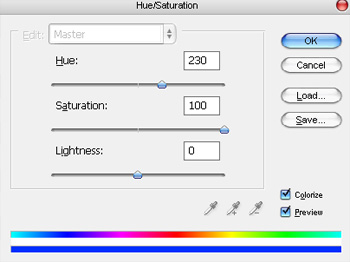
In the menu : Image > Adjust > Hue / Saturation and color correct the edges by matching them with the color of the roof.

Still using Hue / Saturation and also Color Balance, adjust the colors of the house and sky layers so that they perfectly blend together.
Now we want to get rid of that palm tree that hides a part of the house. That tree has nothing to do there since we want to create a morbid mood.
This is probably the most delicate step because we have to hand paint the missing part of the house. For that I mostly used the clone stamp tool, tool that allows you to paint something using another part of the picture for reference.
For instance, the tiles located between the lower and middle windows were painted using similar tiles of the house, using the clone stamp tool.
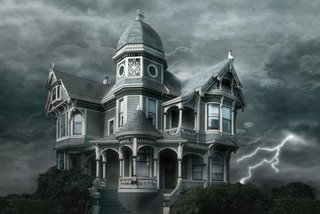
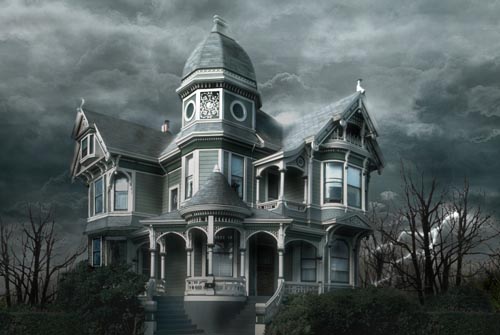
Why not add a lightning bolt to make the scene a little more disturbing ?
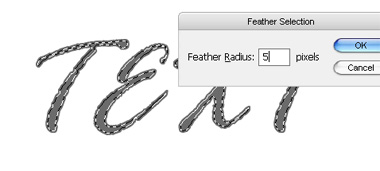
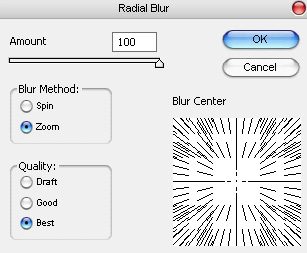
Using the simple non feathered brush, this is simple. Draw your lightning, duplicate the layer, and blur the copies to make the lightning glow.
Then, use the Dodge tool to brighten the clouds from where the lightning is originating.
Paint dead trees behind the house, or use existing ones from pictures. Of course, make the colors and luminosity match.

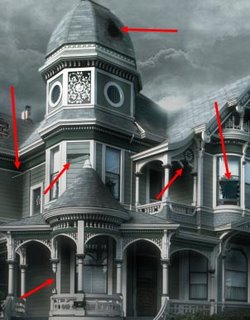
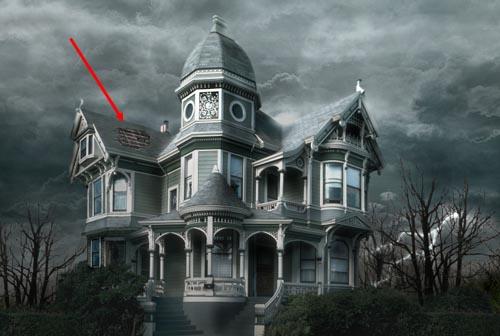
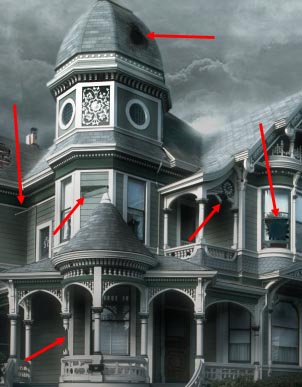
The fun part, now ! Let's break down the house. Well, not all of it.
To make it look older, I added a hole in the rood, painted with brushes.

Don't be afraid to add broken parts ! The house is supposed to still be standing, so don't go too far.
You can see that I broke a wooden beam, a pipe, a board, another part of the roof, and a window. When you break something, use the clone stamp tool to fill in the empty space you created.
Make it look dirty. First of all, the windows. I used a non regular brush and painted the windows with a matte color. Then, change the transfer mode of the dirt layer to make sure that dirt and windows blend nicely together. For this example I chose the Luminosity mode.
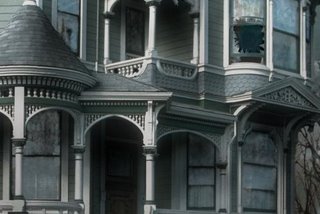
Repeat that step, only do it on the entire house. Paint with a dirtier color and set your layer to Multiply.
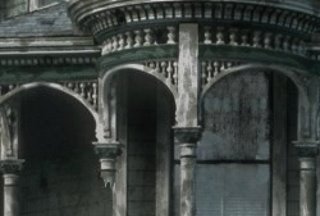
Make sure you make joints and edges look filthy too, because that's where dirt appears most.
This is one of the longest steps, but take your time and don't mindlessly add dirt everywhere !

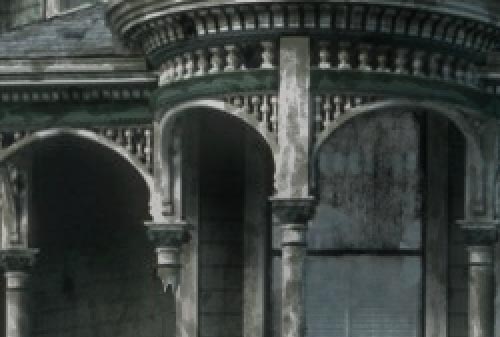
Here, the porch, zoomed in.
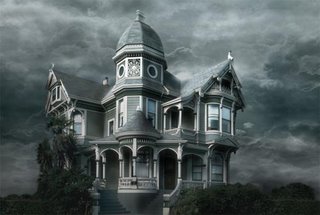
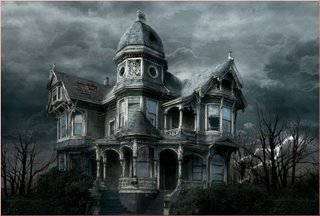
The last step is to create a Levels adjustment layer to get the final contrast of the matte painting.

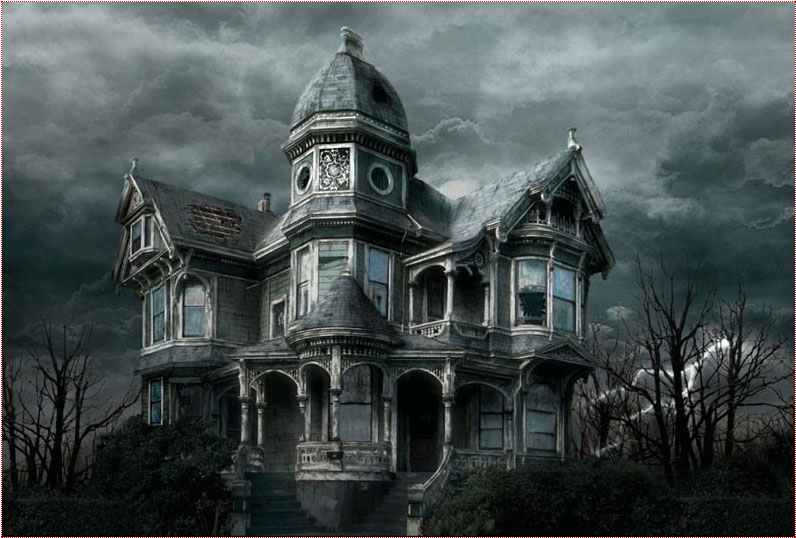
Here it is ! You can compare the original image and the matte painting !
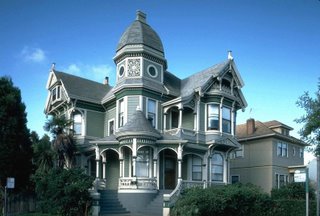

The first step is to isolate the house by putting it on a separate layer and by erasing the rest.
In this example I used the polygonal lasso tool for the house, and a soft eraser for the bushes.
Now you need a new background. You can either find a good pic, either paint one yourself.
I chose the former because it is less time consuming, and the result is far better than what I would have gotten had I painted a background myself. I found this image on the web, unfortunately I do not remember the site I got it from.

Put the sky behind the house (by putting the sky layer under the house layer), and apply a little perspective effect to give more depth to the sky, make it less flat.
Here the house picture was taken from a low angle, which makes our work easier.

Now look at the edges of the house. They still are the color of the original sky. We'll fix that.
In the menu : Image > Adjust > Hue / Saturation and color correct the edges by matching them with the color of the roof.

Still using Hue / Saturation and also Color Balance, adjust the colors of the house and sky layers so that they perfectly blend together.

Now we want to get rid of that palm tree that hides a part of the house. That tree has nothing to do there since we want to create a morbid mood.
This is probably the most delicate step because we have to hand paint the missing part of the house. For that I mostly used the clone stamp tool, tool that allows you to paint something using another part of the picture for reference.
For instance, the tiles located between the lower and middle windows were painted using similar tiles of the house, using the clone stamp tool.
Why not add a lightning bolt to make the scene a little more disturbing ?
Using the simple non feathered brush, this is simple. Draw your lightning, duplicate the layer, and blur the copies to make the lightning glow.
Then, use the Dodge tool to brighten the clouds from where the lightning is originating.

Paint dead trees behind the house, or use existing ones from pictures. Of course, make the colors and luminosity match.
The fun part, now ! Let's break down the house. Well, not all of it.
To make it look older, I added a hole in the rood, painted with brushes.
Don't be afraid to add broken parts ! The house is supposed to still be standing, so don't go too far.
You can see that I broke a wooden beam, a pipe, a board, another part of the roof, and a window. When you break something, use the clone stamp tool to fill in the empty space you created.
Make it look dirty. First of all, the windows. I used a non regular brush and painted the windows with a matte color. Then, change the transfer mode of the dirt layer to make sure that dirt and windows blend nicely together. For this example I chose the Luminosity mode.

Repeat that step, only do it on the entire house. Paint with a dirtier color and set your layer to Multiply.
Make sure you make joints and edges look filthy too, because that's where dirt appears most.
This is one of the longest steps, but take your time and don't mindlessly add dirt everywhere !

Here, the porch, zoomed in.
The last step is to create a Levels adjustment layer to get the final contrast of the matte painting.

Here it is ! You can compare the original image and the matte painting !
Labels: Photoshop tips.
posted by vonteity @ 9:42 PM permanent link | |


Post a Comment