

Creating the new and Blurred Images
I am using Photoshop to edit my images, you can use whatever image editor you choose as long as it has a blur filter. Open Photoshop and start a new document with these dimensions: width 200px, and height 60px and set the background color to white. Now type out some text or use any image you wish to use, I wrote Web Design Blog Now go through File> Export Preview to save your image. I used the GIF foremat and saved the file as Web-design.gif.

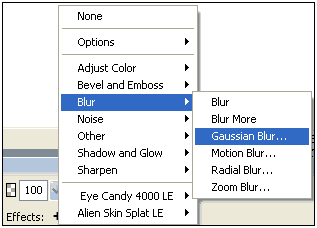
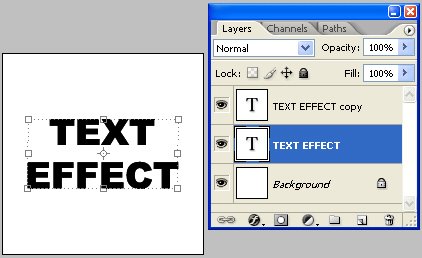
2- Now go back to your Photoshop document and select the text block. In the properties inspector, go to Effects > Blur > Gaussian blur ( as shown in the image below ).
Set Blur radius to 3, and click OK.

Now go to File> Export Preview > there set the settings so that you have a small file size and good quality, and click on Export > Save it as Web-design1.gif.
3- Start a new Flash document with these settings, Width: 300 pixels, and Height: 200 pixels, with a white background. Set the frames per second to 20.
4- Go to File> Import to Library, and import the two images.
5- Now, create a new layer. Go to Insert> Layer. You can name the layers to make life easier, you will surely need this as you learn more complicated stuff in Macromedia Flash. I will change the names of layers. Layer 1 = Original, and Layer 2 = Blurred.
6- Open the Library that you imported the images to. You can do that by pressing (Ctrl+Library), or you can go to Window > Library. Drag and Drop ( Web-design.gif ) to Layer 1 (original). Select the image and press F8 to convert it to a symbol. Select Graphic and name the symbol (original).
7- Now, we have to position the image. Select the Text image. If you can't see the Align control box, then go to Window> Align, Or (Ctrl+K). And click on the highlighted buttons in the image bellow, follow the steps, 1,2,3.

8- Repeat step 6, and drag the second image (Web-design1.gif) to layer 2 (blurred ), and don't forget converting it to a symbol. Repeat step 7 to align the image to the center. The blurred image will cover the original image.
9- Click on frame 40 and drag down to select the layer below, and click F6 to create new key frame for both layers. Do the same thing to frame 20 for both layers.

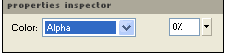
10- In frame 1 of your second layer ( blurred ) Set the Tween to Motion from the properties inspector. Click on the blurred image and then set the Alpha to 0%.
11- In frame 20 of the blurred layer, set the Tween to Motion and set Alpha to 100%. Then Click on frame 40 and set Alpha to 0%. Your timeline should look like the one below.

Now if your try your movie, it should look just fine. But for a smoother effect Go to Frame 1 of the first layer ( original ) with set the Tween to motion and Alpha to 100%, Then go to Frame 20, set Tween to Motion, and set Alpha to 0%. Lastly click on Frame 40 and set Alpha to 100%.
That must do it, you can now text your movie to see the animation in Action.
Labels: flash
posted by power @ 11:09 PM permanent link | |


Post a Comment