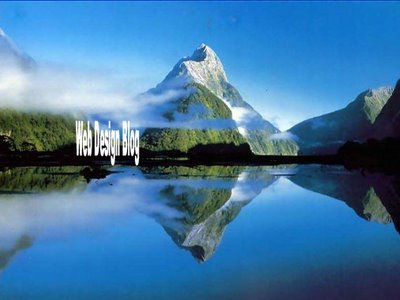
Step 1: Open An Image In Photoshop First, we need the image that we're going to place inside of our text. I'm going to use this rather scenic photo below:

The photo I'll be using to place inside my text.
Step 2: Add Your Text
We have the photo we're going to place into the text. Now all we need is the text!
Since this is such a scenic photo, I'm going to type the word "WEB DESIGN BLOG" over top of
it. First, I'll press "T" on my keyboard to quickly select the Horizontal Type Tool, and I'll choose a font with nice thick lettering to make sure there's enough space inside the letters for the text to appear in. I'll use Arial Black.
With the Horizontal Type Tool and a font with thick letters selected, type your word in front of the photo or image.
Step 3: Resize The Text As Necessary
I've added the word "WEB DESIGN BLOG" in front of my image, but it could definitely be larger. I'm going to press "Ctrl+T" (Win) or "Command+T" (Mac) to bring up theFree Transform box around the type, and I'm going to drag the image larger with my mouse.
I'm not concerned here with keeping the width and height of the text in proportion. All I really want is for the text to cover as much of the photo as possible, so I'm going to simply drag the Free Transform control handles as needed until the text is wide enough and high enough to take up most of the photo.
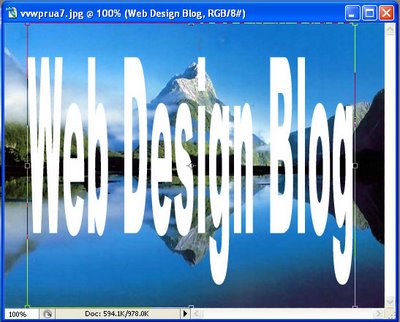
Press Ctrl+T (Win) or Command+T (Mac) to bring up the Free Transform box around the text, and drag the control handles as needed to resize the text so it takes up most of the space in front of the photo.
Press "Enter" (Win) or "Return" (Mac) to accept the resizing of the text and remove the Free Transform box.
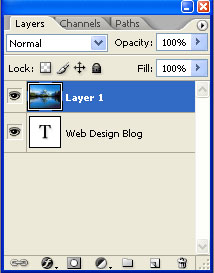
Step 4: Rename The Background Layer
We have our photo, and we have our text. There's only one problem. Currently, our photo is on the Background layer in the Layers palette, and our text is on the layer above it. We need to swap them and have the photo layer above the text.
Photoshop doesn't allow us to move Background layers above other layers, so the first thing we have to do is fix that problem by renaming the layer from "Background" to something else. The easiest way to do that is to simply hold down the "Alt" key (Win) or the "Option" key (Mac) and double-click directly on the name "Background" in the Layers palette. Photoshop will
automatically rename it to "Layer 0", which converts the layer to a regular layer at the same time.

Hold down the "Alt" key (Win) or the "Option" key (Mac) and double-click directly on the name "Background" to quickly rename the Background layer "Layer 0" and convert it from a Background layer to a normal layer.
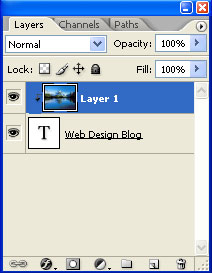
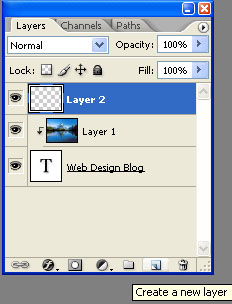
Step 5: Move The Photo Layer Above The Text Layer In The Layers Palette
Now that we've renamed the Background layer and converted it to a normal layer, we can move it above the text layer. The easiest way to do that is to hold down the "Ctrl" key (Win) or the "Command" key (Mac) and press the right bracket key "]" on the keyboard. With "Ctrl" or "Command" held down, the right bracket key "]" moves layers up in the layer stack, and the left bracket key "[" moves them down in the layer stack.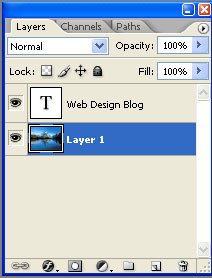
Hold down the "Ctrl" key (Win) or "Command" key (Mac) and press the right bracket key "]" on the keyboard to move the photo layer above thetext layer in the Layers palette.
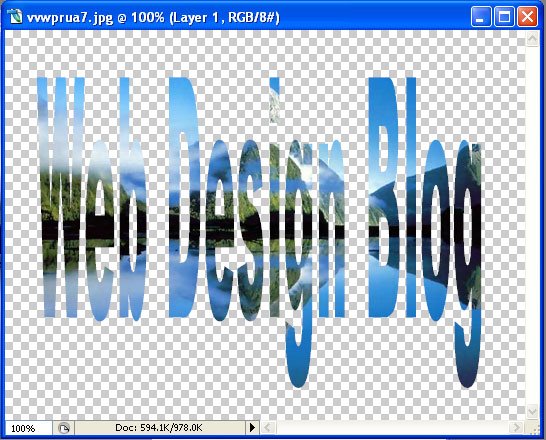
Step 6: Create A Clipping Mask
We now have our photo layer above the text layer. What we want to do now is use the text as a mask and have only the areas of the photo which fall inside the letters appear, and any areas of the photo outside of the letters will be hidden from view. This will give us the illusion of the photo being inside thetext.
We do this by using what's called a "Clipping Mask". Think of it as "clipping away" any parts of the photo that fall outside of the letters.
To create a clipping mask, hold down the "Alt" key (Win) or the "Option" key (Mac) and move your mouse directly in between the photo layer and thetext layer in the Layers palette. You'll see your mouse cursor turn into the Clipping Mask icon. When you see the icon, click with your mouse, and you'll create the clipping mask.
Hold down the "Alt" key (Win) or the "Option" key (Mac) and move your mouse cursor directly between the photo and text layers in the Layers palette. When you see your mouse cursor change into the Clipping Mask icon, click with your mouse to create the clipping mask.
Once you've created the clipping mask, the photo layer will be indented to the right in the Layers palette to show that it is now being "clipped" by the layer below it, which is thetext layer.
Back over in the document window, you'll see that the photo now appears inside of the text!
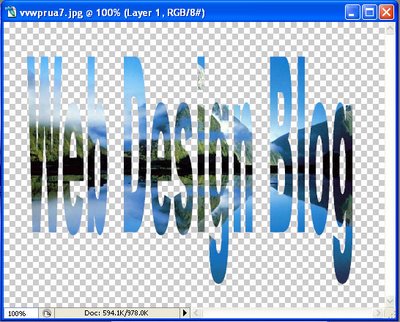
The photo is now being masked by the text thanks to the clipping mask, giving the illusion that the photo is inside the text.
Step 7: Add A New Layer Below The Text Layer And Fill It With White
See that checkerboard pattern surrounding our text? That's what Photoshop uses to signify transparency in an image, and it's not what I want here. I want my text with the image inside of it to appear on a solid white background. To accomplish that, I'm going to add a new layer below my text layer in the Layers palette and fill it with white.
First, I'll make sure my text layer is the layer I have selected in the Layers palette (click on it if it's not selected). Now, normally when you add a new layer, Photoshop places the new layer above whichever layer you had selected, but I want this layer to go below the text layer, not above it.
The trick to doing that is to hold down the "Ctrl" key (Win) or the "Command" key (Mac) and then click on the New Layer icon at the bottom of the Layers palette (the icon directly to the left of the trash bin icon). This little trick tells Photoshop to place the new layer below the currently selected layer, not above it, which is exactly what we want. 
With the text layer selected, hold down the "Ctrl" key (Win) or the "Command" key (Mac) and click the New Layer icon on the bottom of the Layers palette to add a new layer below the text layer.
To fill the new layer with white, first press the letter "d" or "D" on your keyboard, which resets your Foreground and Background colors to their defaults of black and white respectively. Then, with the new layer selected in the Layers palette, press "Ctrl+Backspace" (Win) or "Ctrl+Delete" (Mac) to tell Photoshop to fill the layer with the current background color, which we just set to it's default of white.
This gives us the white background for our text, and we're almost done!

Press "d" or "D" to reset the Foreground color to black and the Background color to white, then press "Ctrl+Backspace" (Win) or "Command+Delete" (Mac) to fill the new layer with the background color, which is now white.
Step 8: Add A Drop Shadow
For a final touch, I'm going to add a default drop shadow to the text.
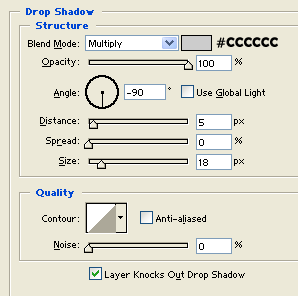
To do that, first click on the text layer in the Layers palette to select it, since we want to add the drop shadow to the text. Then, click on the Layer Styles icon on the bottom of the Layers palette and choose "Drop Shadow" from the list. This will bring up the Drop Shadow dialog box. Click "OK" to accept the default effect.
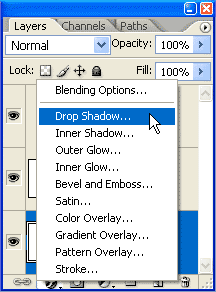
Click on the text layer in the Layers palette to select it, then click on the Layer Styles icon at the bottom of the Layers palette and choose "Drop Shadow". Click OK to accept the default shadow effect.
And we're done! Here's the final result, with the image inside the text and the drop shadow for added effect:

The final result.
Labels: Photoshop


Post a Comment