BALLOON SHOOTING
Play the game and try to shoot as many balloons to collect maximum points.
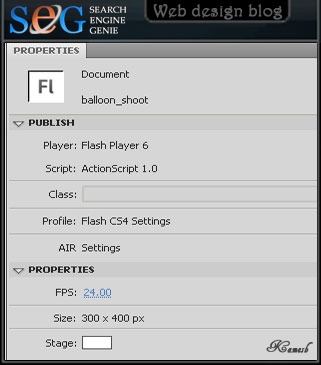
1. Create a new movie with dimensions of 300px. X 400px. and fps = 24 with white color as Background Color.
CREATING CLICK TO PLAY SCENE
1. Select frame 1 on Layer 1
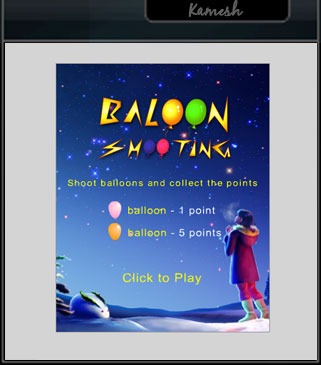
2. Select the “TEXT” tool type BALLOON SHOOTING as a game title as shown in the image
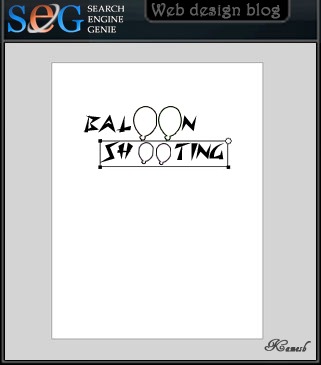
3. Here we have used ‘Arial’ font for the text. You can use any other font of your choice
4. Rename the layer as ‘BALLOON SHOOTING’
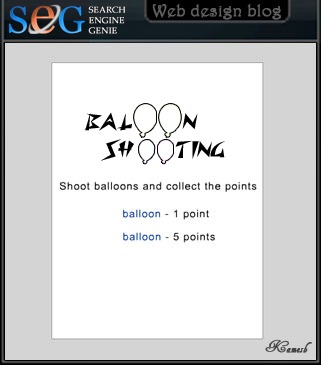
5. Below the game title type the text as shown in the image.
7. Choose Insert > Layer to insert a new layer above the Balloon Shooter layer
8. Rename the layer as ‘Click to Play’
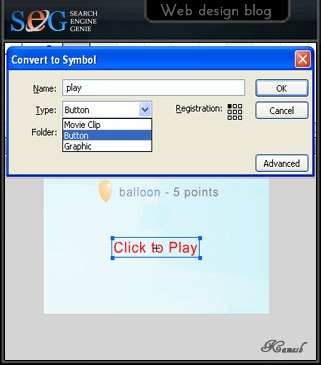
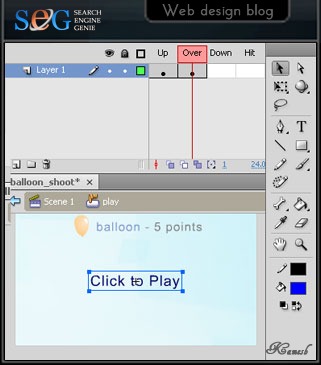
9. With the help of ‘Text’ tool type text as ‘Click to Play’ below the existing text
10. Select the text and choose Insert > Convert to Symbol. Convert it into a Button with the center Registration point selected and name it as ‘play’
11. Double click the play button to go inside it
12. Select frame 2 at Over stage and choose Insert > Keyframe
13. With the help of ‘Fill Color’ option in the ‘Tools’ panel change the text color to ‘Red’
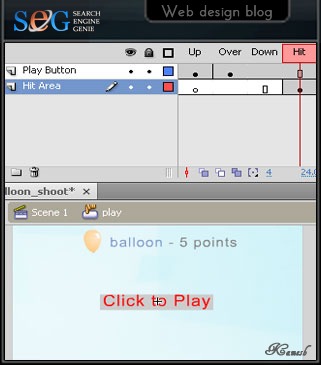
14. Select frame 4 at Hit stage and choose Insert > Frame
15. Rename the layer as ‘Play Button’
16. Insert a new layer above Play Button layer and drag it downward so that it appears below Play Button
17. Select frame at Hit stage and choose Insert > Keyframe
18. Draw a rectangle patch as a ‘hit area’ of the button
19. Come back into Scene 1
20. Select the Play button and choose Window > Actions
21. In the Actions panel type the following action
on (release) {

gotoAndStop(2);

}

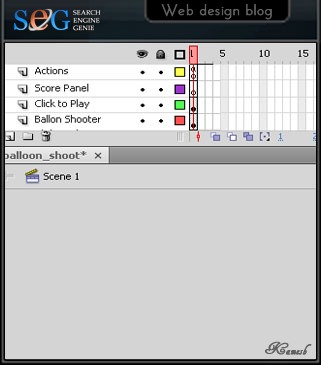
22. Insert a new layer above Click to Play layer and name it as ‘Actions’
23. Select frame 1 on the Actions layer and in the Actions panel type the following action
fscommand("showmenu",false);

stop();
GREATING GAME SCENE
1. Select the Click to Play layer and insert a new layer above it
2. Rename the layer as ‘Score Panel’
3. Select frame 2 on the Score Panel layer and choose Insert > Keyframe
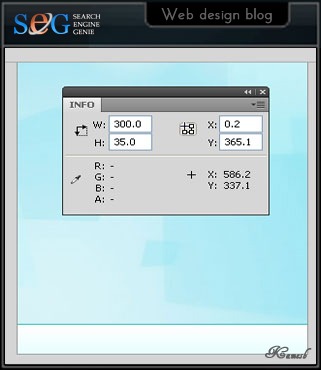
4. Create a gradient panel with dimensions as 300px. X 35px. and place it at the bottom of the stage.
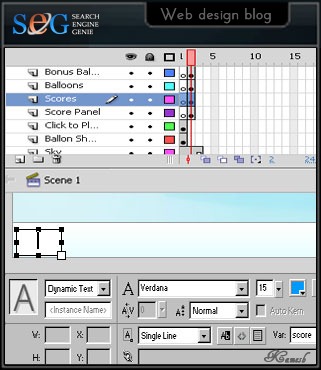
5. Insert a new layer above Score Panel layer and name it as ‘Scores’
6. Select frame 2 on the Scores layer and choose Insert > Keyframe
7. With the help of ‘Text’ tool create a Dynamic text field to display the score. In the Properties panel keep the settings as shown in the image.
In the Variable field type the variable name as ‘score’
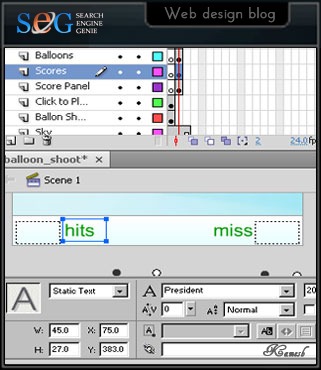
8. Similarly create another text field and place it on the other hand. In the Variable field type the variable name as ‘missed’
9. To understand what these two scores are showing type text ‘hits’ and ‘miss’ as shown in the image
10. Select frame 2 on Actions layer and type the following action.
stop();
CREATING FLYING BALLOONS
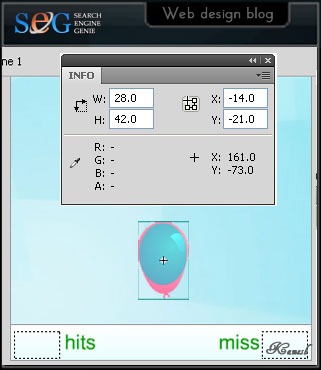
1. Insert a new layer above Scores layer and name it as ‘Balloons’
2. Select frame 2 on the Balloons layer and choose Insert > Keyframe
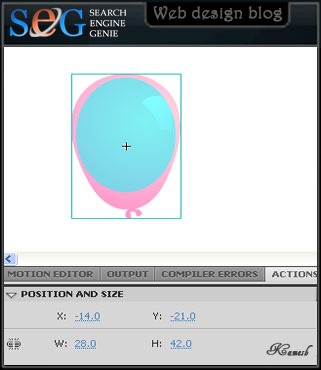
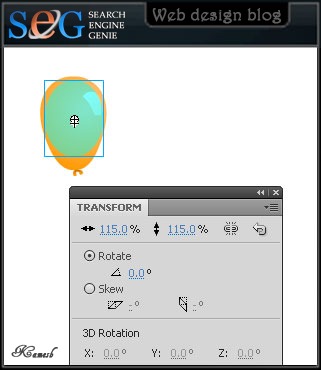
3. Create a balloon graphic of 28px. X 42px.
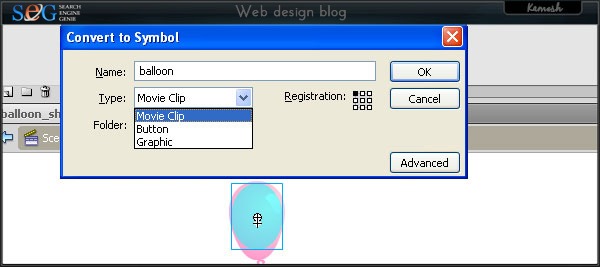
4. Select the balloon on the stage, convert it into a Movie Clip with center registration point selected and name it as ‘balloon’
5. Double click the balloon movie clip to go inside it
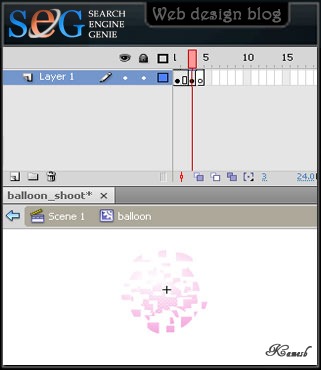
6. Select frame 3 and choose Insert > Blank Keyframe
7. At frame 3 create small gradient patches which looks like a bust balloon
8. Select frame 4 and choose Insert > Blank Keyframe
9. Insert a new layer and name it as ‘Actions’
10. Select frame 1 on Actions layer and type the following action.
stop();
11. Select frame 4 and choose Insert > Keyframe
12. Select the keyframe 4 and in the Actions panel type the following action
_parent.gotoAndPlay(3);
13. Insert a new layer below the Actions layer and name it as ‘Dummy Button’
14. At frame 1 draw a oval shape which can cover the balloon under it
15. Select the oval shape and convert it into a Button with center registration point selected and name it as ‘hit button’
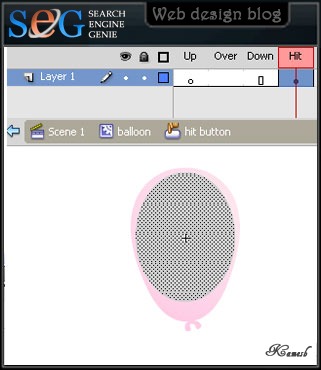
16. Double click the hit button to go inside it
17. Select the shape on the frame 1 at Up stage and drag it on the frame 4 i.e. on Hit stage
18. Come back into balloon movie clip
19. Select the hit button and choose Window > Actions
20. In the Actions panel type the following actions
on (press) {

gotoAndPlay(2);

_root.score++;

}
// _root.score++;
// Everytime this button gets hit, the value of the variable ‘score’ increases by 1
21. Select frame 2 on Dummy Button layer
22. Choose Insert > Blank Keyframe
23. Come back into Scene 1
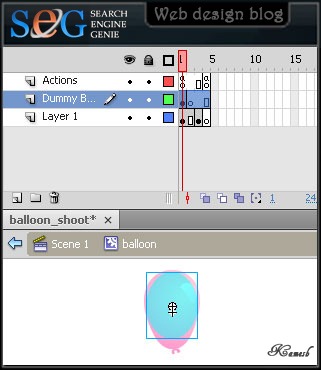
24. Select balloon movie clip on the stage, convert it into another Movie Clip and rename it as ‘balloon move’
25. In the Properties panel type the Instance Name as ‘balloon’
26. Double click the balloon move movie clip to go inside it
27. Select frame 2 and choose Insert > Keyframe
28. Select balloon movie clip at frame 1 and delete it
29. Insert a new layer over the existing layer and name it as ‘Actions’
30. Select frame 1 and in the Actions panel type the following action
stop();
31. Select frame 2 and choose Insert > Keyframe
32. Select frame 2 and in the Actions panel type the following action
stop();
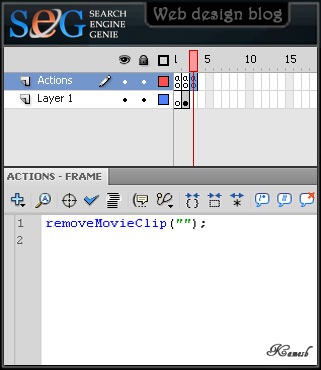
33. Select frame 3 and choose Insert > Keyframe
34. Select frame 3 and in the Actions panel type the following action
removeMovieClip("");
35. Select the balloon movie clip at frame 2 and choose Window > Actions
36. In the Actions panel type the following actions
onClipEvent (load) {

_root.hitz = 0;

this._alpha = 0;

}

onClipEvent (enterFrame) {

this._y -= _root.speedz;

this._rotation += 7;

if (this._y<=-80) {
this._alpha = 100;
}
if (this._y<=-380 && _root.hitz == 0) {
gotoAndPlay(2);
_root.missed += 1;
_root.hitz = 1;
}
if (_root._currentframe == 3) {
_parent.nextFrame();
}
}
// _root.hitz = 0;
// this._alpha = 0;
When movie clip loads, the value of the variable 'hitz' is set to '0' as well as the initial alpha value of the movie clip is set to '0'
// this._y -= _root.speedz;
The Y position of the movie clip goes on decreasing as per the value of variable 'speedz' (Movie clip moves upwards)
// this._rotation += 7;
This action help the movie clip to keep on rotating at the speed of 7
// if (this._y<=-80) {
this._alpha = 100;
}
This action checks whether the Y position of the movie clip is less than or equal to 80. If the condition satisfies then the alpha value of the movie clip is set to 100
// if (this._y<=-380 && _root.hitz == 0) {
gotoAndPlay(2);
_root.missed += 1;
_root.hitz = 1;
}
This action checks whether the Y position of the movie clip is less than or equal to -380 and at the same time the value of variable 'hitz' is 0. If the condition satisfies then movie clip starts playing from frame 2 and the value of the variable 'missed' increments by 1. The value of variable 'hitz' is set to 1
// if (_root._currentframe == 3) {
_parent.nextFrame();
}
}
This action checks whether the currentframe position in the root (i.e. level0) is at frame 3. If the condition satisfies then actionscript will go into the parent movie clip (balloon move movie clip) of the current movie clip and play the actions on the next frame.
37. Now come back into Scene 138. The balloon move movie clip looks like a dot on the stage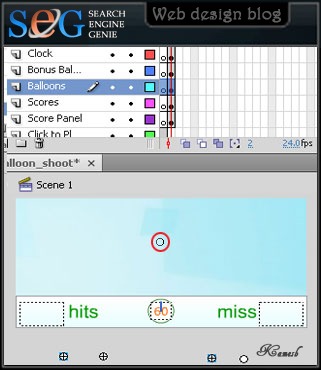
39. Select the balloon move movie clip and drag it downwards so that it appears below the stage area
40. On frame 2 of Balloons layer create a small circle beside the balloon move movie clip
41. Select that small circle and convert it into a Movie Clip and name it as 'trigger'
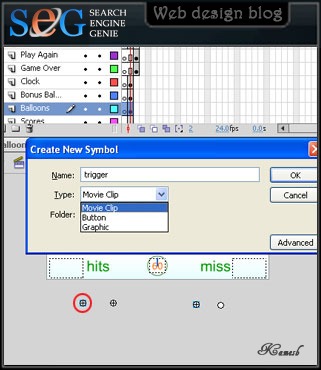
42. Select the trigger movie clip and choose Window > Actions
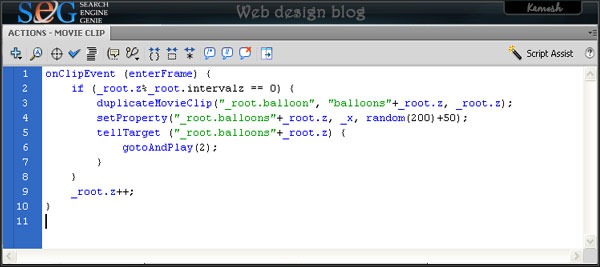
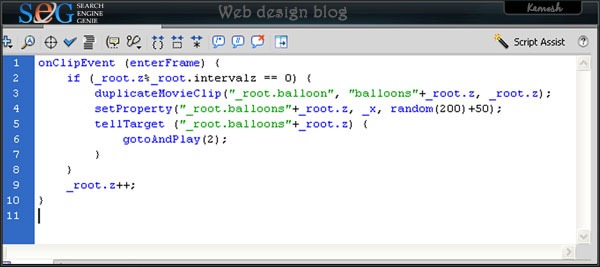
43. In the Actions panel type the following actions
onClipEvent (enterFrame) {

if (_root.z%_root.intervalz == 0) {

duplicateMovieClip("_root.balloon", "balloons"+_root.z, _root.z);

setProperty("_root.balloons"+_root.z, _x, random(200)+50);

tellTarget ("_root.balloons"+_root.z) {

gotoAndPlay(2);

}

}

_root.z++;

}
// if (_root.z%_root.intervalz == 0)
This action checks whether the value of variable 'z' is perfectly divisible by the value of variable 'intervalz'
// duplicateMovieClip("_root.balloon", "balloons"+_root.z, _root.z);
If the first 'if' condition satisfies then this action will create a duplicate movie clip of the balloon movie clip
// setProperty("_root.balloons"+_root.z, _x, random(200)+50);
This action determines the X position of the duplicated movie clip
// tellTarget ("_root.balloons"+_root.z) {
gotoAndPlay(2);
}
This action lets the duplicated movie clip to play its second frame
// _root.z++;
This action keeps on incrementing the value of variable 'z' by 1
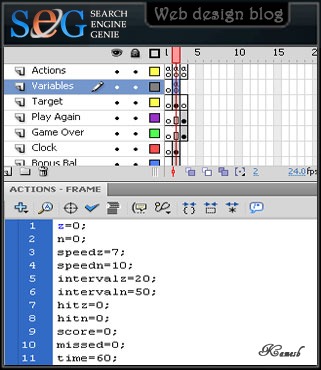
44. Insert a new layer above Balloons layer and rename it as 'Variables'
45. Select frame 2 on Variables layer and choose Insert > Keyframe
46. Select keyframe 2 and in the Actions panel type the following variables (Initialize the variables)
z=0;
// 'z' variable is used for Balloon movie clip
n=0;
// 'n' variable is used for Bonus Balloon movie clip
speedz=7;
speedn=10;
intervalz=20;
intervaln=50;
hitz=0;
hitn=0;
score=0;
missed=0;
time=60;
// time=60 is initialized for one minute timer
47. Choose Control > Test Movie
Now you can see pink balloons flying and at certain point getting busted. If you try to click them with the mouse they will bust and it will increase your score by 1 everytime you hit the balloon. If you miss any of them it will count as a missed balloon.
To add some more interaction to the game we are going to add one more different colored balloon which will give you 5 bonus points if you hit it.
ADDING BONUS BALLOONS
1. Choose Window > Library > balloon movie clip
2. In the Library window click the Options tab to open the menu and choose Duplicate...
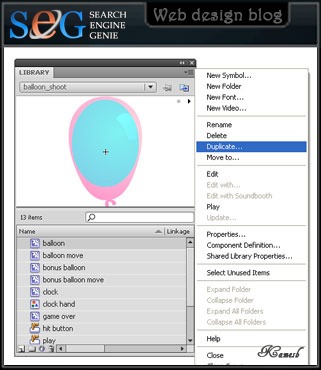
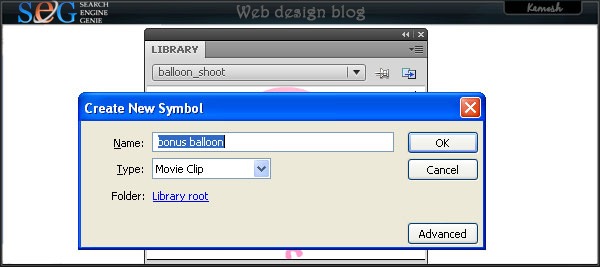
3. In the Duplicate Symbol type 'bonus balloon' and create a copy of balloon movie clip
4. Similarly duplicate the balloon move movie clip and name it as 'bonus balloon move movie clip'
5. In the Library, double click the bonus balloon movie clip to go inside it
6. At Layer 1 in place of existing balloon create a different color balloon with dimensions slightly bigger than the first one. Here we have taken 33px.X50px.
7. Select the hit button at Dummy Button layer and make it little bigger to match the size of the new balloon.
8. Select the hit button and choose Window > Actions
9. In the Actions panel make only one line change. In place of '_root.score++' type '_root.score+=5'
10. Select frame 3 at Layer 1 and change the color of the bust balloon
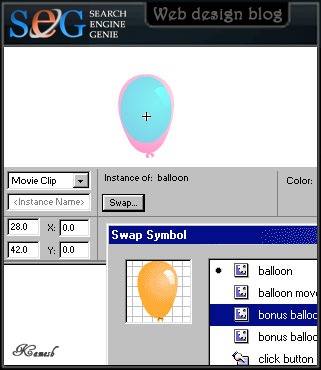
11. In the Library, double click the bonus balloon move movie clip to go inside it
12. Select the balloon movie clip at frame 2
13. In the Properties panel with the help of Swap Symbol button, swap balloon movie clip with bonus balloon movie clip
14. Select bonus balloon movie clip and choose Window > Actions
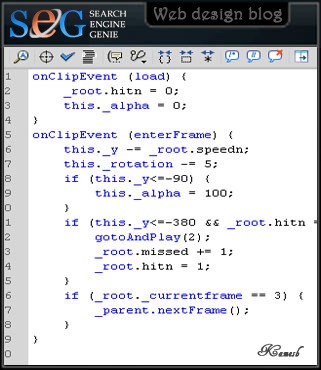
15. In the Actions panel delete the existing actions and type the following actions
onClipEvent (load) {

_root.hitn = 0;

this._alpha = 0;

}

onClipEvent (enterFrame) {

this._y -= _root.speedn;

this._rotation -= 5;

if (this._y<=-90) {
this._alpha = 100;
}
if (this._y<=-380 && _root.hitn == 0) {
gotoAndPlay(2);
_root.missed += 1;
_root.hitn = 1;
}
if (_root._currentframe == 3) {
_parent.nextFrame();
}
}
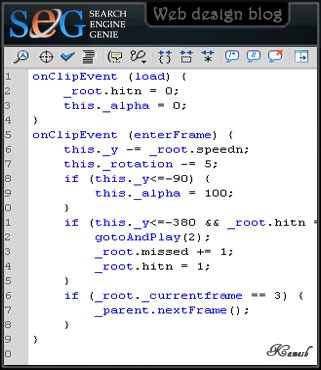
// These actions are same as we have used for balloons movie clip. Only the variables are different.
16. Come back into Scene 1
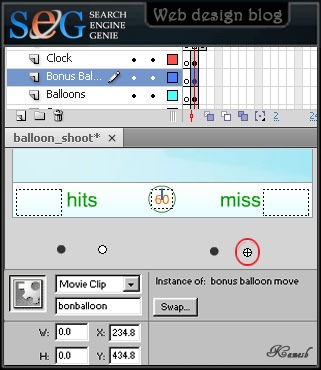
17. Insert a new layer above balloons layer and name it as 'Bonus Balloons'
18. Select frame 2 and choose Insert > Keyframe
19. Choose Window > Library > bonus balloon move movie clip
20. Drag the bonus balloon move movie clip on the stage and place it below the stage bottom where we have placed the balloon move movie clip
21. In the Properties panel type the Instance Name as 'bonballoon'
22. Choose Window > Library > trigger movie clip
23. Drag the trigger movie clip on the stage and place it beside the bonus balloon move movie clip
24. Choose Window > Actions
25. In the Actions panel type the following actions
onClipEvent (enterFrame) {

if (_root.n%_root.intervaln == 0) {

duplicateMovieClip("_root.bonballoon", "bonballoons"+_root.n, _root.n);

setProperty("_root.bonballoons"+_root.n, _x, random(200)+50);

tellTarget ("_root.bonballoons"+_root.n) {

gotoAndPlay(2);

}

}

_root.n++;

}
// These actions are same as we have used for balloons movie clip. Only the variables are different.
26. Choose Control > Test Movie
Now you can see pink balloons flying and as well as orange (bonus) balloons flying after some interval. The orange balloons are bonus balloons so if you hit them you get 5 bonus points for each orange balloon.
If you go on playing the game this game won't get over. So we need to put a timer. After certain time gets over, the game will stop.
CREATING TIMER
1. Choose Insert > New Symbol
2. In Create New Symbol box type 'clock' and create a Movie Clip
3. In the center of the stage, create a small circle of 27px.X 27px. with white color fill and green outline
4. Insert a new layer and name it as 'Timer'
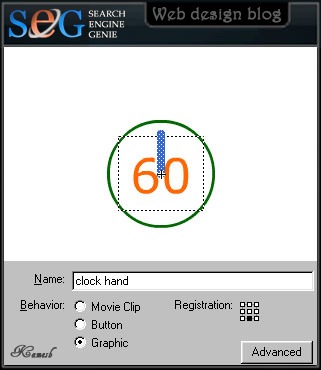
5. Create a Dynamic text field which can contain two digits and place it in the center of the circle
6. In the Properties panel type the variable name as '_root.time'

7. Insert a new layer above timer layer and rename it as 'Clock Tic'
8. Create a small clock hand, convert it into a Graphic with bottom center registration point selected and name it as 'clock hand'
9. Place the clock hand graphic in such way that the registration point of clock hand should match with the movie clips center point.
10. Select frame 24 on Clock Tic layer and choose Insert > Keyframe
11. Select any frame between 1 to 24 and choose Insert > Create Motion Tween
12. In the Properties panel set Rotation options as CW
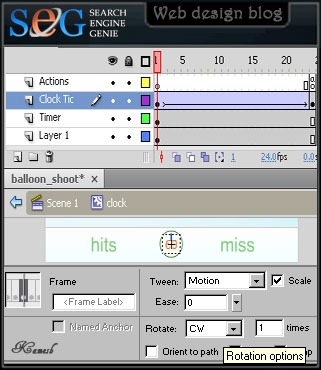
13. Select frame 24 on other two layers and choose Insert > Frame
14. Insert a new layer above Clock Tic layer and name it as 'Actions'
15. Select frame 24 and choose Insert > Keyframe
16. At keyframe 24 assign the following action
_root.time--;
// Everytime when actionscript reaches at frame 24 the value of variable 'time' decrements by 1. So it looks like seconds countdown.
17. Go back into Scene 1
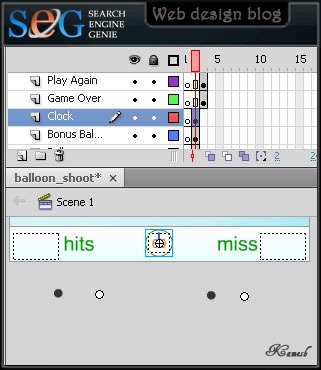
18. Insert a new layer above Bonus Balloons layer and name it as 'Clock'
19. Select frame 2 at Clock layer and choose Insert > Keyframe
20. Choose Window > Library > clock movie clip
21. Drag the clock movie clip on the stage and place it on the score panel
22. Select the clock movie clip and choose Window > Actions
23. In the Actions panel type the following actions
onClipEvent (enterFrame) {

if (_root.time == 30) {

_root.speedz = 9;

_root.intervaln = 30;

}

if (_root.time == 10) {

_root.intervalz = 10;

}

if (_root.time == 0) {

_root.gotoAndStop(3);

}

}
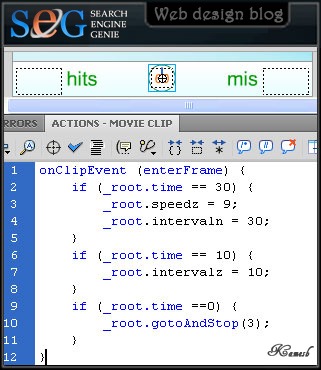
// if (_root.time == 30) {
_root.speedz = 9;
_root.intervaln = 30;
}
This condition checks whether the value of variable 'time' is perfectly equal to 30. If the condition satisfies then the value of variable 'speedz' is set to 9 to increase the speed of the balloons and the value of variable 'intervaln' is set to 30 to reduce the time span between two bonus balloons appearances.
if (_root.time == 10) {
_root.intervalz = 10;
}
This condition checks whether the value of variable 'time' is perfectly equal to 10. If the condition satisfies then the value of variable 'intervalz' is set to 10 to reduce the time span between two balloons appearances.
if (_root.time == 0) {
_root.gotoAndStop(3);
}
This condition checks whether the value of variable 'time' is perfectly equal to 10. If the condition satisfies then actionscript will go and stop at frame 3 in Scene 1.
CREATING GAME OVER SCENE
1. Insert a new layer above Clock layer and name it as 'Game Over'
2. Select frame 3 and choose Insert > Keyframe
3. With the help of 'Text' tool type 'GAME OVER'
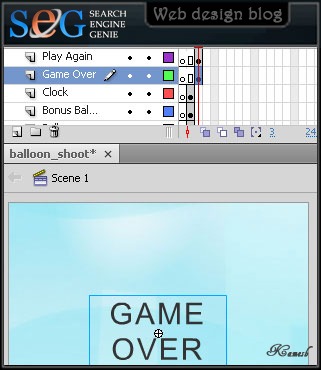
4. Select the text on the stage, convert it into a Movie Clip and name it as 'game over'
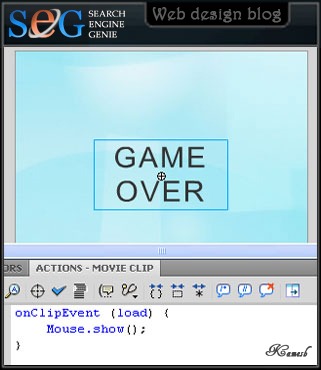
5. Select the game over movie clip and choose Window > Actions
6. In the Actions panel type the following actions
onClipEvent (load) {

Mouse.show();

}
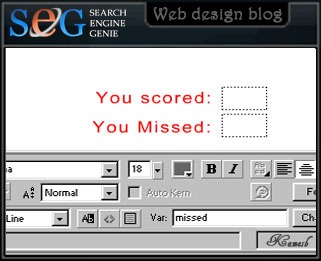
7. Below the game over movie clip type text as 'You Scored:' and 'You Missed:' one below another
8. Create two Dynamic text fields to show the final scores
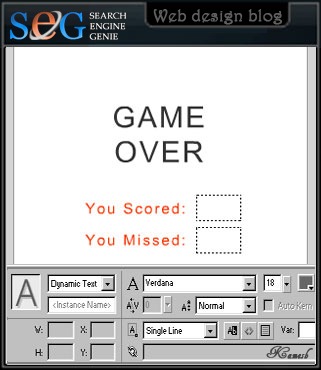
9. Select the Dynamic text field for 'You Scored' and in the Properties panel type variable name as 'score'
10. Similarly, select Dynamic text field for 'You Missed' and in the Properties panel type variable name as 'missed'
When the game is over, there should be an option for user to play it again. So we need to create a 'Play Again' button.
11. Insert a new layer above Game Over layer and name it as 'Play Again'
12. Select frame 3 and choose Insert > Keyframe
13. With the help of 'Text' tool type 'Play Again' below the final scores

14. Select the text, convert it into a Button and name it as 'play again'
15. Double click the play again button to go inside it
16. Select frame 2 at Over stage and choose Insert > Keyframe
17. With the help of 'Fill Color' option in the 'Tools' panel change the text color to 'Red'
18. Select frame 4 at Hit stage and choose Insert > Frame
19. Rename the layer as 'Play Again Button'
20. Insert a new layer above Play Again Button layer and drag it downward so that it appears below Play Again Button
21. Select frame at 'Hit' stage and choose Insert > Keyframe
22. Draw a rectangle patch as a 'hit area' of the button
23. Come back into Scene 1
24. Select the play again button on the stage and choose Window > Actions
25. In the Actions panel type the following action
on (release) {
gotoAndStop(2);
}
26. Select frame 3 on Actions layer and choose Insert > Keyframe
27. Select keyframe 3 and assign the following action to it
stop();
28. Choose Control > Test Movie
Start playing the game. After 1 minute the game will get over. After the game is over you can see the final scores and with the help of 'Play Again' button you can restart the game.
To add more interaction into the game we can create a gun target which will move with the mouse but mouse can not be seen. This can give a feel like you are aiming towards the balloon.
CREATING GUN TARGET
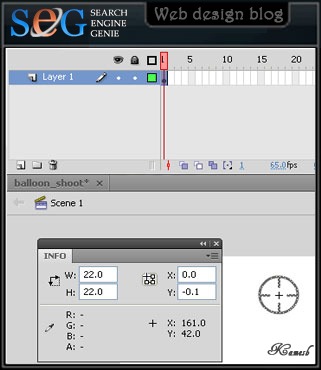
1. Choose Insert > New Symbol, create a Movie Clip and name it as 'target'
2. Create a gun target of 22px. X 22px. as shown in the image
3. Come back into Scene 1
4. Insert a new layer above Play Again layer and name it as 'Target'
5. Select frame 2 and choose Insert > Keyframe
6. Choose Window > Library > target movie clip
7. Drag the target movie clip on the stage and in the Properties panel type Instance Name as 'aim'
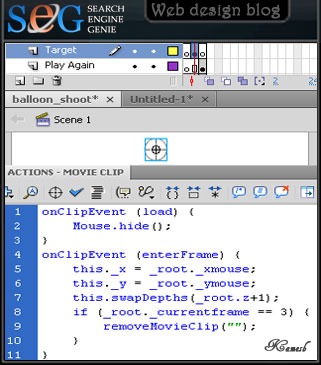
8. Select target movie clip on the stage and choose Window > Actions
9. In the Actions panel type the following actions
onClipEvent (load) {

Mouse.hide();

}

onClipEvent (enterFrame) {

this._x = _root._xmouse;

this._y = _root._ymouse;

this.swapDepths(_root.z+1);

if (_root._currentframe == 3) {

removeMovieClip("");

}

}
// this._x = _root._xmouse;
// this._y = _root._ymouse;
These actions help the movie clip to drag with the mouse.
// this.swapDepths(_root.z+1);
This action determines Depth of the movie clip.
10. Select frame 3 and choose Insert > Blank Keyframe
11. Choose Control > Test Movie and see how you can target the balloons
To make this game more interactive we can add a background to the game.
GAME BACKGROUND
1. Insert a new layer below the Balloon Shooter layer
2. Choose File > Import to import a background image for the game
3. Here we have imported 'sky.jpg' as a background image
4. Rename the layer as 'Sky'
5. Insert a new layer above the Actions layer and create a stage outline
Baloon shooting game is ready.
Leave a Reply