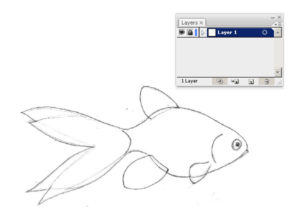
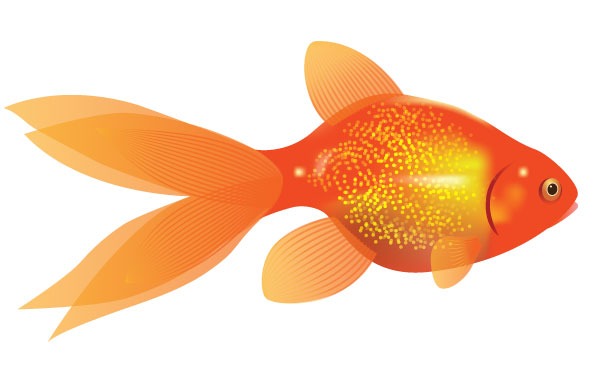
Step 1
Draw the goldfish and scan the drawing. Now open Adobe Illustrator and create a new document (Command + N) at 600 px by 600 px. place in an image in the document by going to File > Place, then bar the layer with the scanned image of the goldfish drawing.
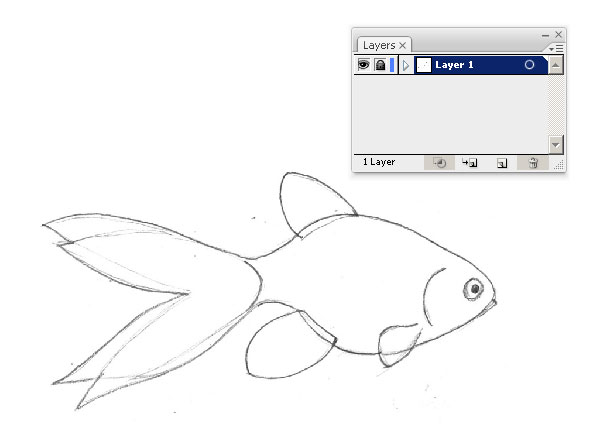
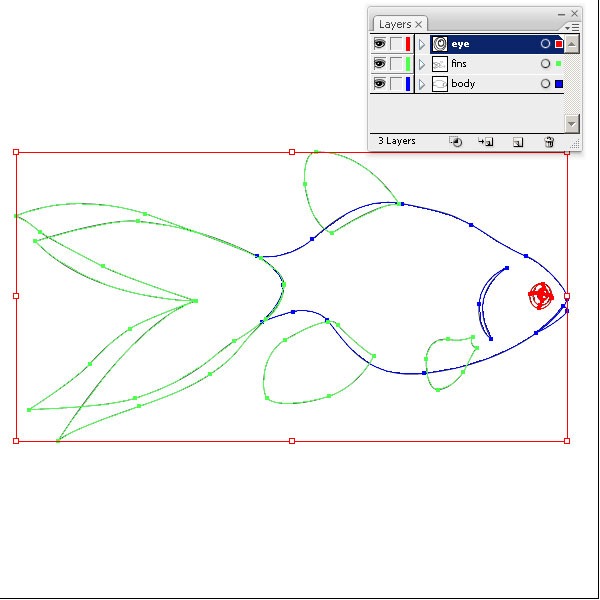
Step 2
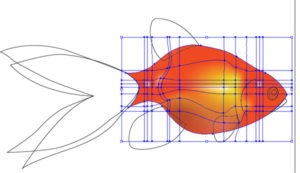
Make a new sheet on top. Start by tracing the outline of the goldfish using the Pen Tool (P). For relieve of work we’ll place different basics in separate layers.

Step 3
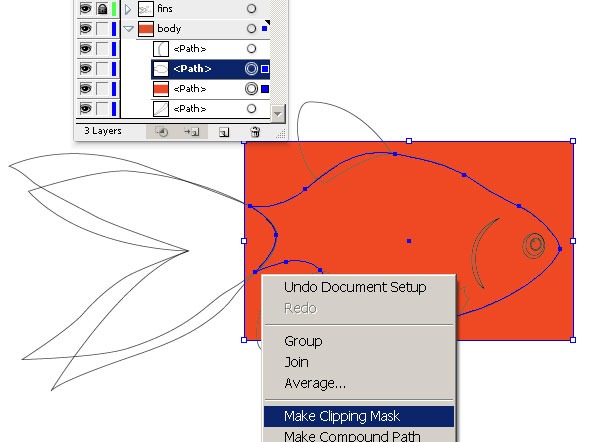
In order that to get a beautiful web under the path of the fish, first create a rectangle (Rectangle Tool (M)) with an orange (C=0; M=87; Y=100; K=0) fill and without stroke. Select the rectangle and path of the fish, and then make Clipping Mask.
Before we move past, I urgently suggest you lock all layers you aren’t currently working with so that nothing gets by mistake moved. In all layers except for a rectangle are noted as locked. We’ll make this rectangle into a Mesh shortly.

Create the specks of light on the body of the fish. Add a point to the mesh by using the Mesh Tool (U) and clicking anywhere in the shape’s area. After converting a shape into a mesh, you can select points with three tools: Mesh Tool, Direct Selection Tool, and the Lasso Tool.
All you have to do now is to add color to the mesh by selecting a color from the swatches palette. I took colors from the Swatch library > Metal. Get creative with color in this stage to get an excellent result.

Step 4
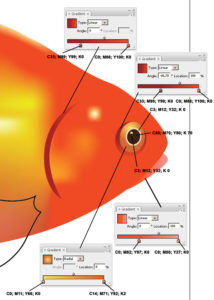
Now we’ll create an eye, gill and lips of the fish. The eye consists of five ellipses located one over another, below the biggest and further in each ellipse decreases in size. The ellipses are filled in by various kinds of gradient and solid colors as shown below. The mouth and gill is filled in by a linear gradient.

Step 5
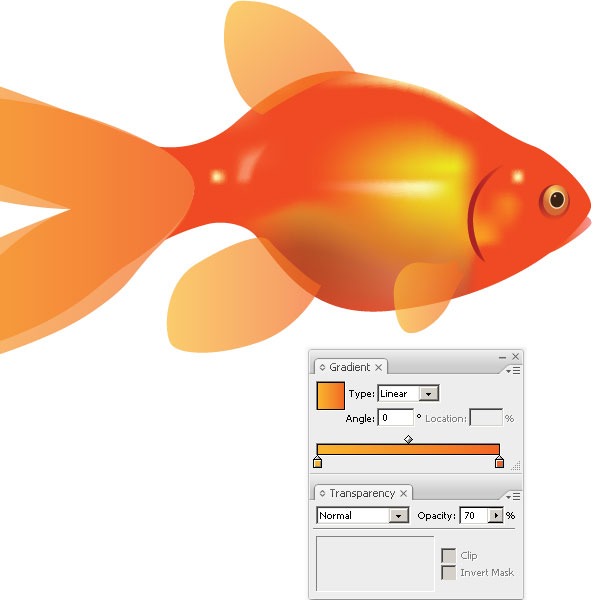
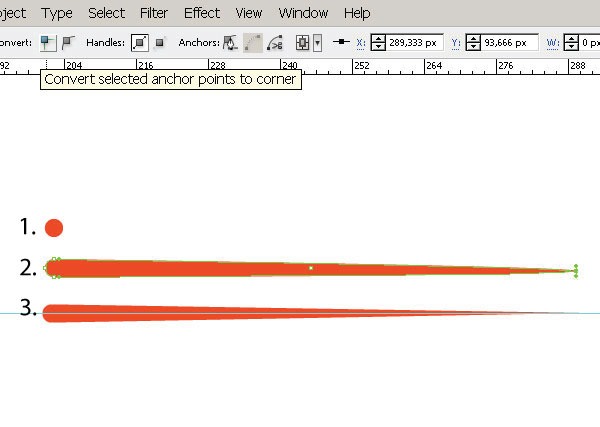
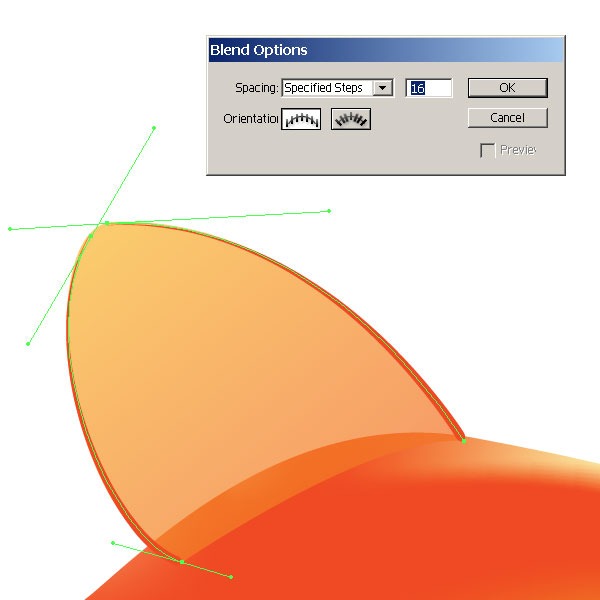
Now we’ll work on the fins. Fill them in with a linear gradient and Opacity of 70% (picture 5a). Let’s place lines in the fins. Create a brush by first using the Ellipse Tool (L) to make a circle 3px by 3px in any color and without stroke. Drag the right fix point to the right by means of the straight Selection Tool (A), while holding Shift to limit. Convert the selected anchor point to a spot (picture 5b). Transfer the created shape to the Brushes palette and select New Art Brush. Along the edges of a fin drawn two curves (Pen Tool (P) and apply to them the just created brush.
Select both curves and make a Blend, by going to Object > Blend > Blend Options Spacing: specified Steps set to 16, then Object > Blend > Make (Alt + Command + B) (picture 5c). Make Object > Blend > Expand and ungroup our curves. Now let’s correct the bottom ends of the fin edges (picture 5d). Correct this using the Direct Selection Tool (A), moving the bottom anchor points.
Now select all the curves and go to Object > increase Appearance, Object > Path > Clean Up. Now fill it in with a linear gradient, Opacity set to 70% (picture 5e). Use a similar workflow to make our other fins.


Step 6
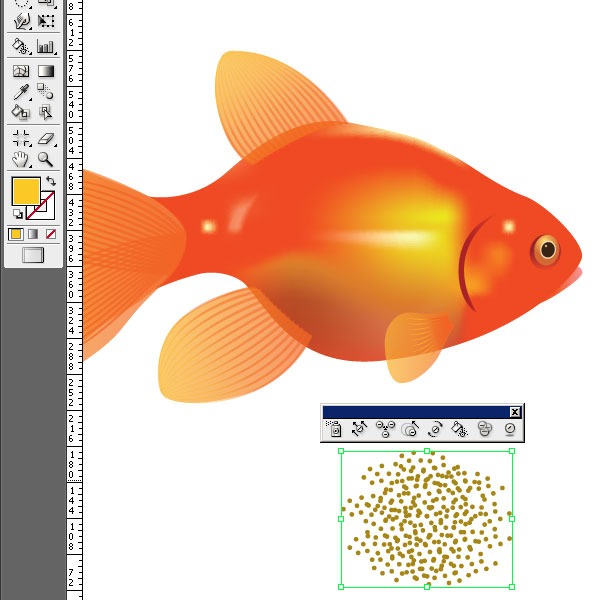
Now let’s make the scales. Make a new layer on top. Open our Symbols palette, in the library search for Artistic Textures and select Stipple large. Grab the Symbol Sprayer Tool (Shift + S), spray a texture (in our case we’ll be 5-6 clicks will be enough).
Take the tool mark Steiner Tool from the Symbol Sprayer Tool submenu, choose a color and paint a texture (picture 6a). Now use the excellent Symbol Screener Tool, select the texture, and very gently in the corners we’ll click with this tool.
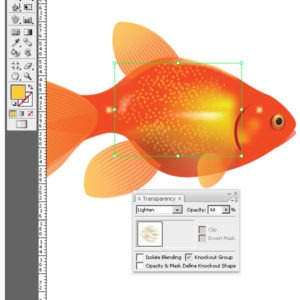
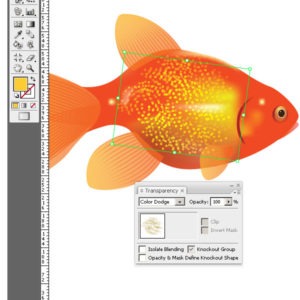
In the center the texture has turned out non-transparent and along the edges it is hardly visible. Now change the merger mode of the texture we just put on the fish to Lighten and Opacity to 60% (picture 6b). Copy the texture, change blending mode to Color Dodge, set the Opacity to 100% and slightly rotate it (picture 6c).


The Goldfish is ready!
Leave a Reply