Archive for April 21st, 2014
Morphing Text With Image In Photoshop CS
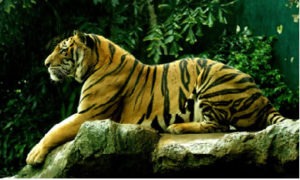
Starting image

Final Result
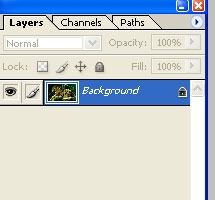
Step 1: Add a new image
Add new image and if you look in your Layers Panel , you’ll see the image sitting on the Background Layer,
And Double click the Background layer and choose the new name ,for example Layer
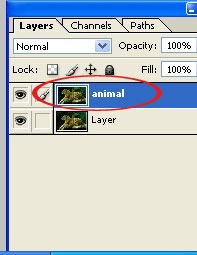
Step 2: Copy the new layer and create a new layer
Next you will select the current layer (layer) and enter the command (Ctrl+J). after copy the new layer is create.
And also chose the name from the image for example(Animal). After create the new white background layer.
First choose the create new fill and select the solid color and choose the white color background .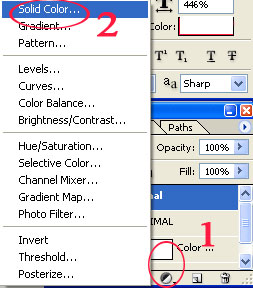
Step 3: Drag the solid color fill layer below animal layer
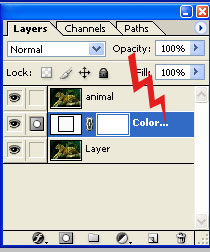
We need to move the Solid Color Fill layer below Animal Layer .
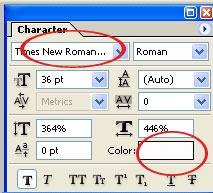
Step 4: Select the Text tool
First you will select the Text tool (or) Ctrl+T and choose the font type for example (Times New Roman) and also choose the font color White.
Step 5: Add your Text
click inside your document and add your text. For example I’ll type the word “Animal”


Step 6: Drag The Type Layer Below Animal Layer
we look in the Layers panel, we see our newly added Type layer sitting above animal Layer and we need to move it below Animal Layer 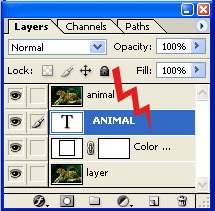
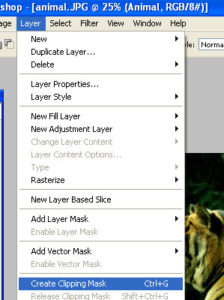
Step 7: Create a Clipping mask
First select the animal layer after go to the layer and select the Create Clipping Mask .

Next you will get the Final image result.


CREATE A GOOGLE PLUS ICON
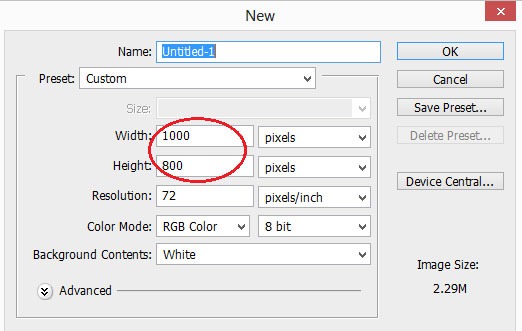
Step 1 : Create a new document
Create a document with preferred size. Set the background to transparent.

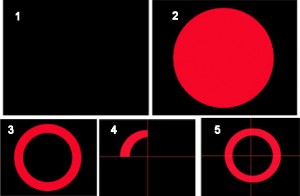
Step 2 : Draw a square
Fill the background with black color and draw a square.
Using rectangular tool and change the option bar to “Subtract From Shape Area”.
Now drag the rectangle to filter the square, finally one quarter will remain copy that shape to form as a square.

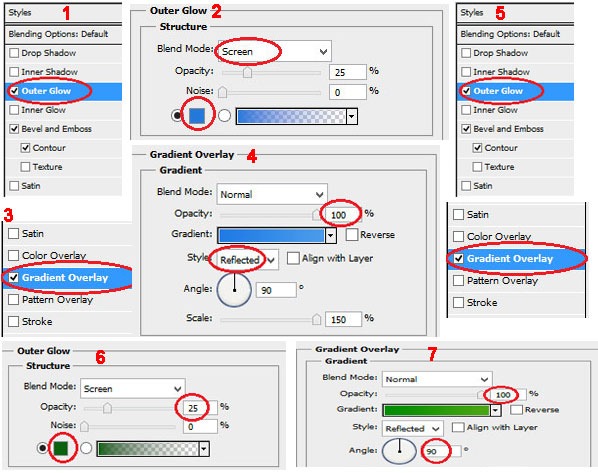
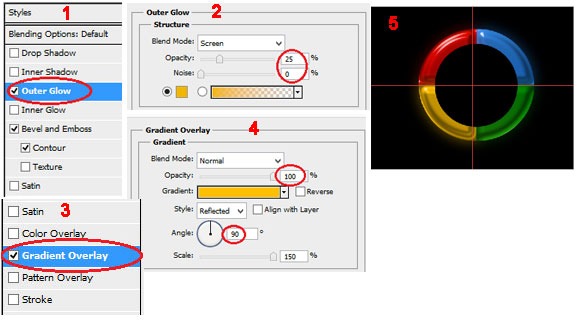
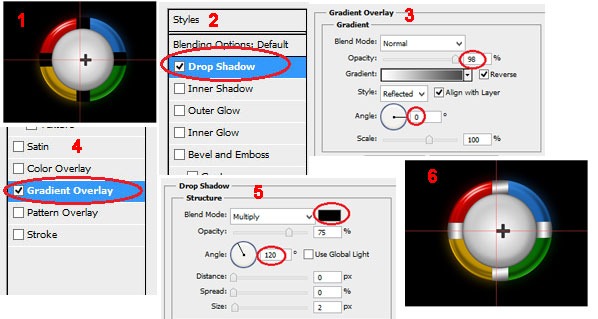
Step 3 : Adding layer style
Apply the following layer style to that square
Bevel and Emboss
Outer Glow
Gradient Overlay
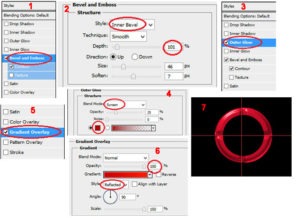
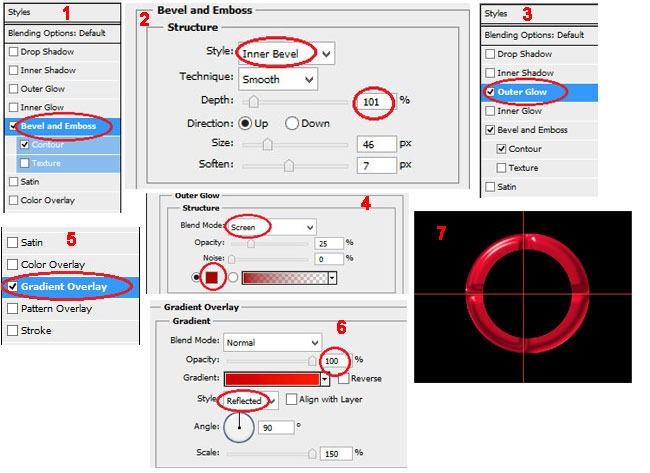
Applying the varies gradient color to get glowing effect


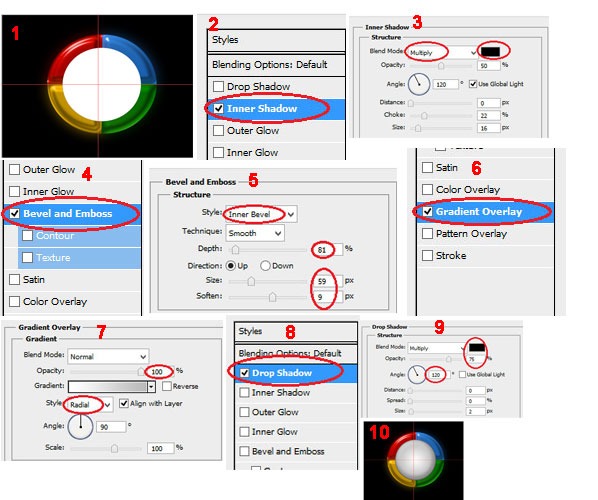
Step 4 : Creating inner Ellipse
Now create ellipse inside the square with whote color.
And give the following layer style
Inner Shadow
Bevel and Emboss
Gradient Overlay
Drop Shadow

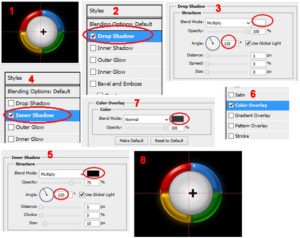
Step 5 : Type plus Symbol
Select type tool and add plus symbol inside of the ellipse.
And give the following layer styles.
Drop Shadow
Inner Shadow
Color Overlay

Step 6 : Creating The Buckle’s
Select rectangle tool and drag out which covers the join between each colors.

Finally the output will be like this.