


Archive for June, 2013
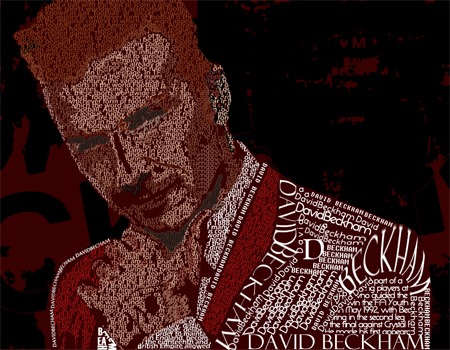
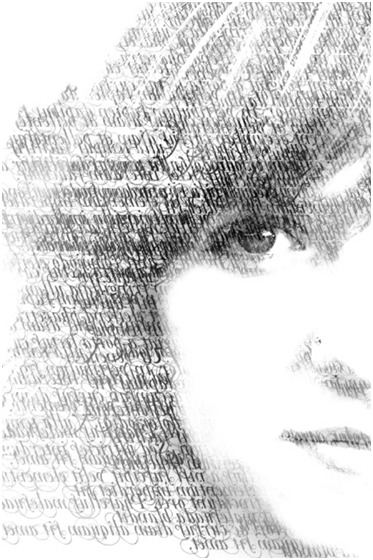
Easy Typographic Portrait In Photoshop for Beginners.
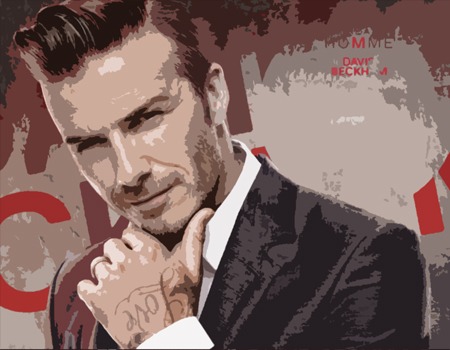
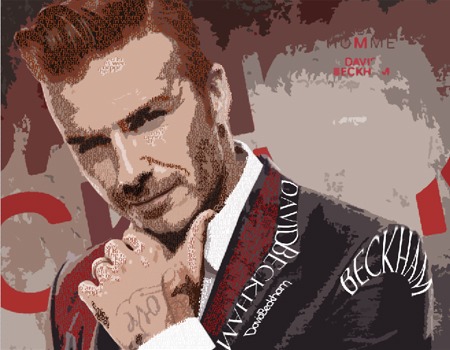
STEP-1: choose a portrait image for your typography design.

STEP-2: Creating Image Effect
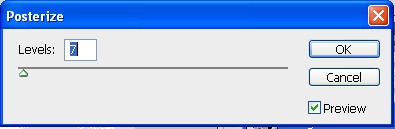
Convert the image into posterize effect by selecting Image > Adjustments > posterize. Set the Levels to 7.
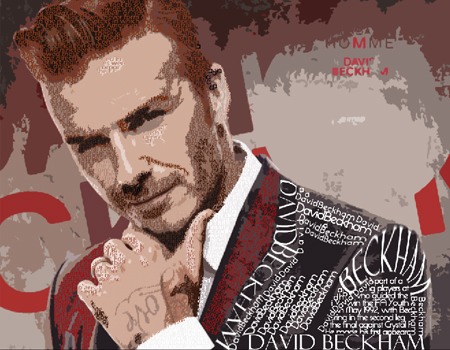
STEP-3: Add Background Text – Important Step
Lower your text opacity to around 20%. Create a new group (Layer – New – Group) and name it Text. Use only the different fonts and sizes. Avoid large spaces between words. Fonts I used:
- Arial
- Cambria
- Die hund
- Impact
- Tahoma
- Times New Roman
- Verdana
- And little bit more default fonts
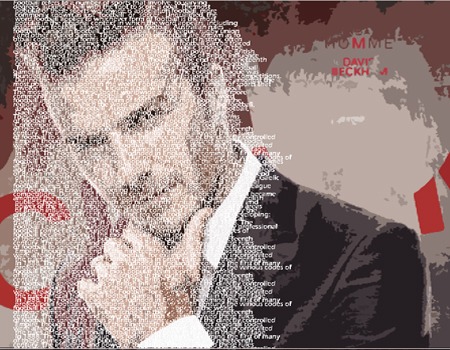
Merge the text into layer and then, crop the layer by selecting the face region.
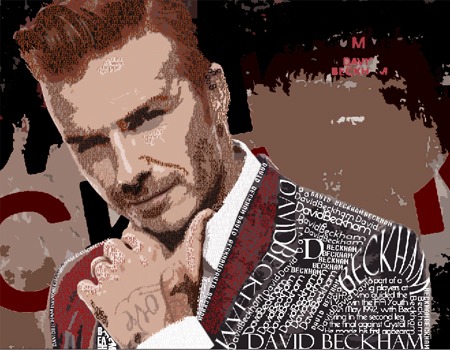
Change the merged layer color by choosing Blending options > Color overlay.
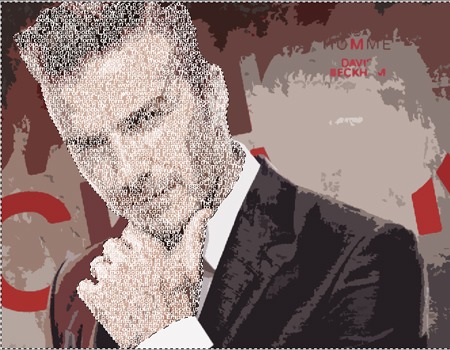
Step-5: Creating effect
When you’re done duplicate your TEXT group (Layer – Duplicate Group) and merge it (Ctrl+E). Make your unmerged TEXT group invisible and select the face region by using Magic Wand Tool.
Step 6 – Create Background Text Effect
Make merged text layer visible again and apply following layer style.
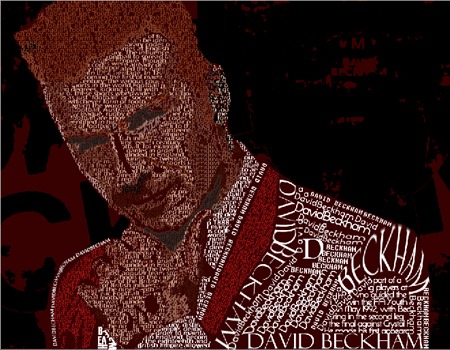
Step 7 – Final touches
Create new layer, go to Image then Apply Image, then go to Filter choose Render, select Lightning Effects and apply following settings. Here is the final result of portrait typography design.
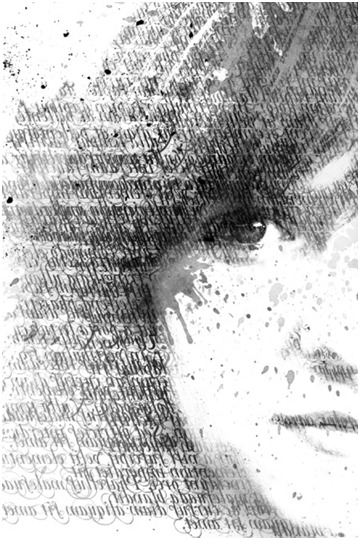
HOW TO DESIGN A WATERCOLOR PORTRAIT
Step 1 – Create the Texture
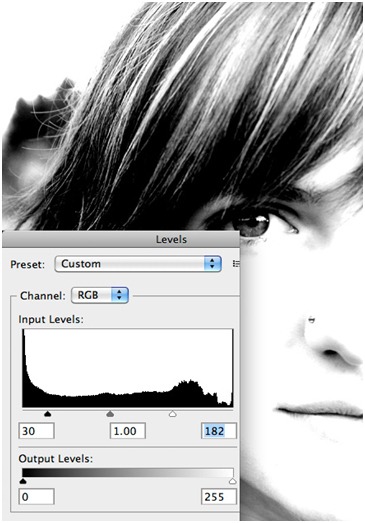
Open the image in Photoshop. From here we need to create a high contrast side of the image. To do that we first need to desaturate the image (Ctrl+Shift+U) or (Image | Adjust | Desaturate). Then we need to punch up the contrast using levels (Image | Adjust | Levels).
==================================
To create the texture, use a custom brush of solid text. You can use any font that you like, but I choose the Mutlu fonts for its eye-catching loops and curls.
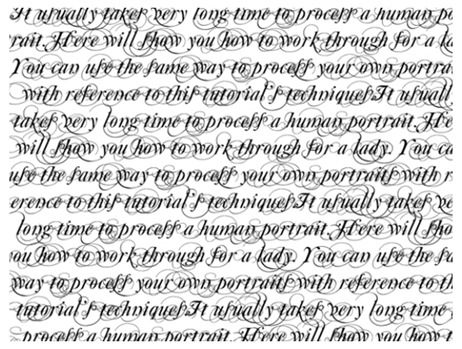
Create new blank document 700×700 pixels and fill the document with a block of black text.
====================================
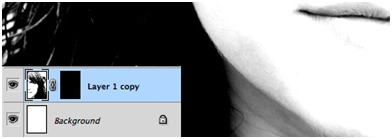
Now click (Edit | Define Brush Preset) to create the custom brush. Go to your portrait image again. create a layer mask for the girl’s layer.
===================================
Fill the layer mask with solid black, which will make the girl image to disappear. Using you’re newly created custom brush, select solid white for your foreground color and begin to click on the mask to reveal portions of the girl’s face. Experiment with the different opacity settings for your brush.
==========================================
Step 2 – Add the Watercolor
Now on a new layer above the portrait, begin adding watercolor with single click, then using a black brush. There’s no any particular method here. Just does what you feel look right. Don’t go extreme; less is more with these splatters. You don’t want them to underrate from the subjects face.
============================================
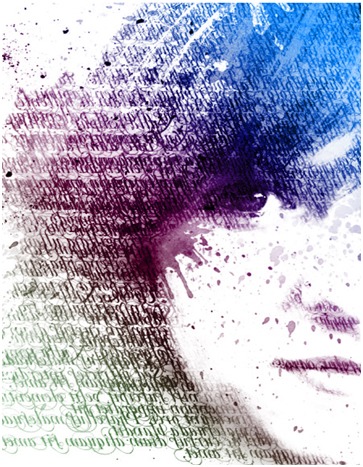
Step 3 – Add a Little Color
To add color, we need to create a Gradient Fill Adjustment Layer, and set its blending mode to Overlay. You can use any sort of color you prefer.
=========================================
As I specified before, this effect seems to work with just about any photo.